The time had finally come to get the body stripped down and start work on repairs. I decided to go down the chemical stripping route and in February last year, sent all the body panels, body tub and chassis to Prostrip Ltd in Nottingham. I had the chassis done since I wasn’t really happy with the paint finish on it from last time. I got everything prepared and removed the last few bits that I didn’t want to go or lose in the process.
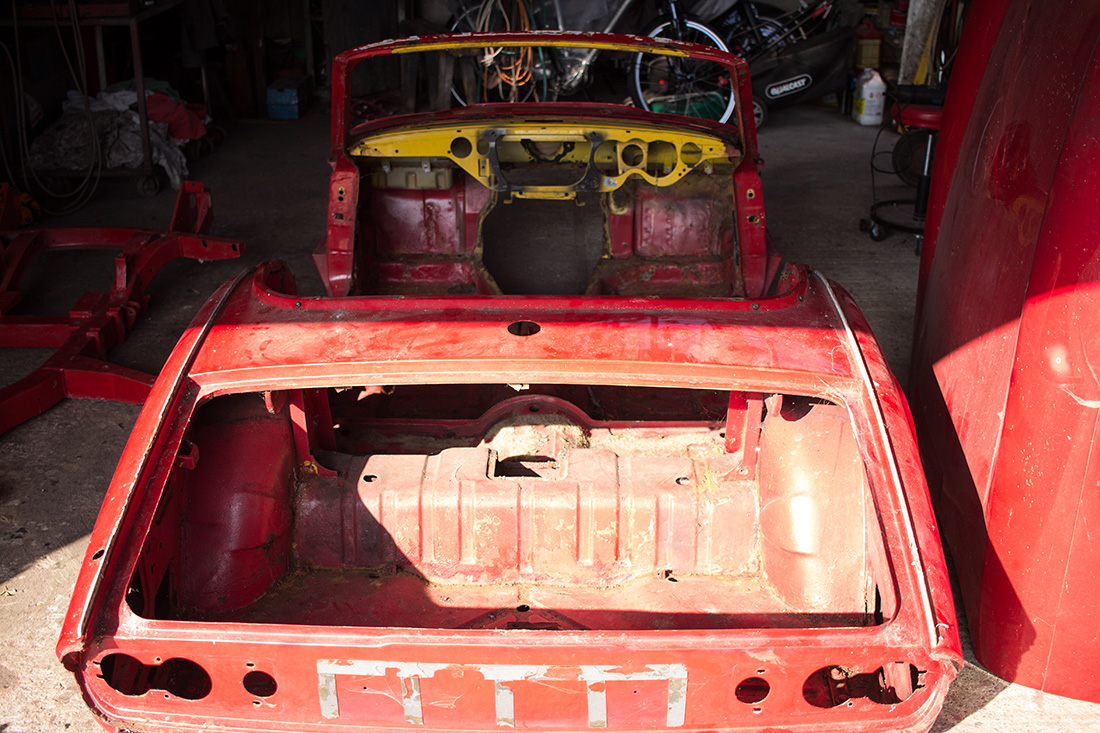
Six weeks later I had a delivery date of mid-April and I was anxious to see what condition everything was in. I didn’t think it would be really bad but you hear stories of half the car disappearing when they get stripped of all the rust and filler. As it rolled off the back of the lorry it didn’t look too bad. Amazing what the stripping process reveals, including repairs that I didn’t know existed and holes that you could easily have missed had you stripped it manually.
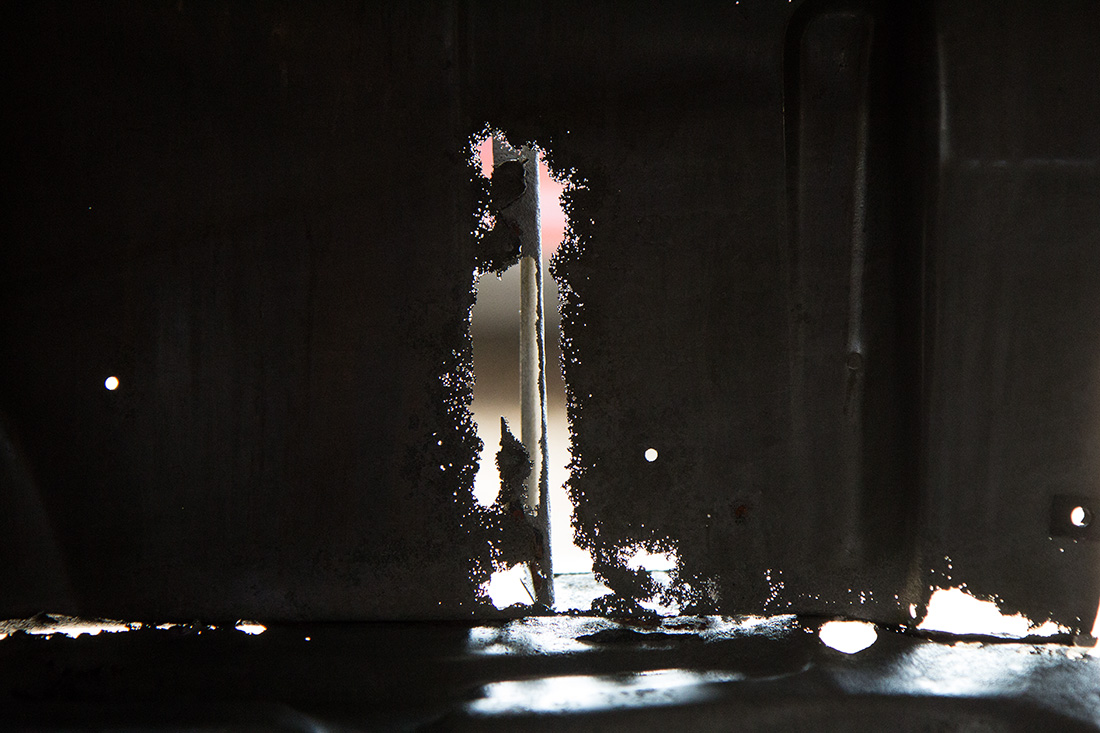
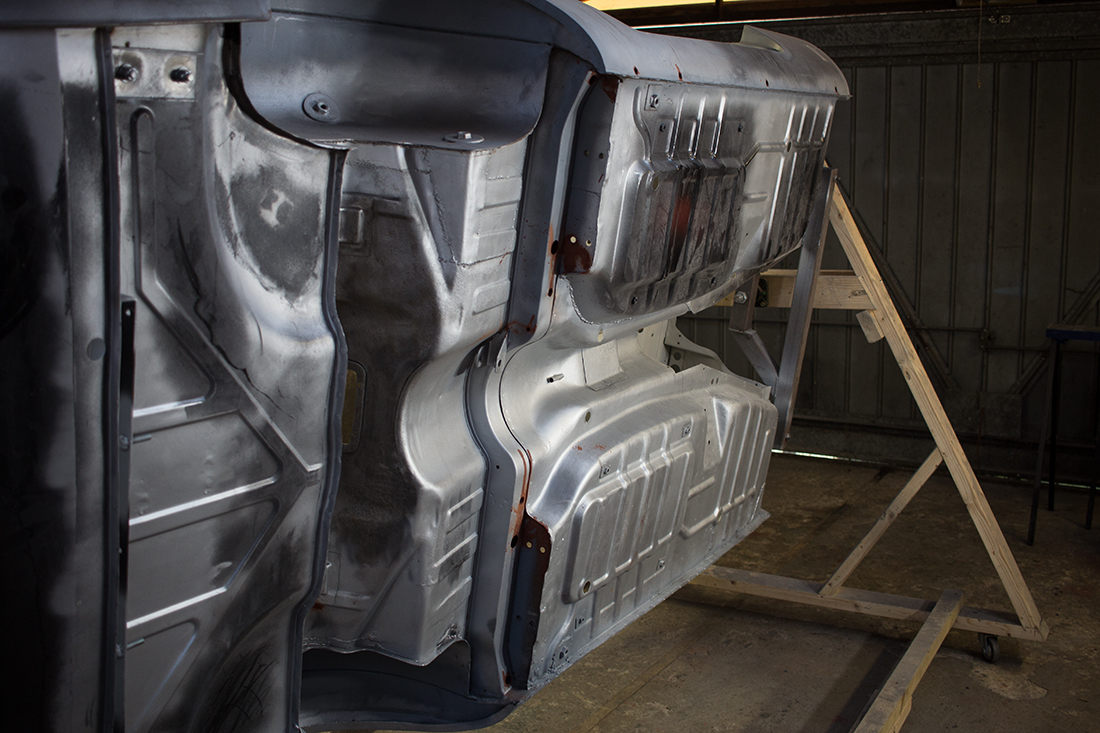
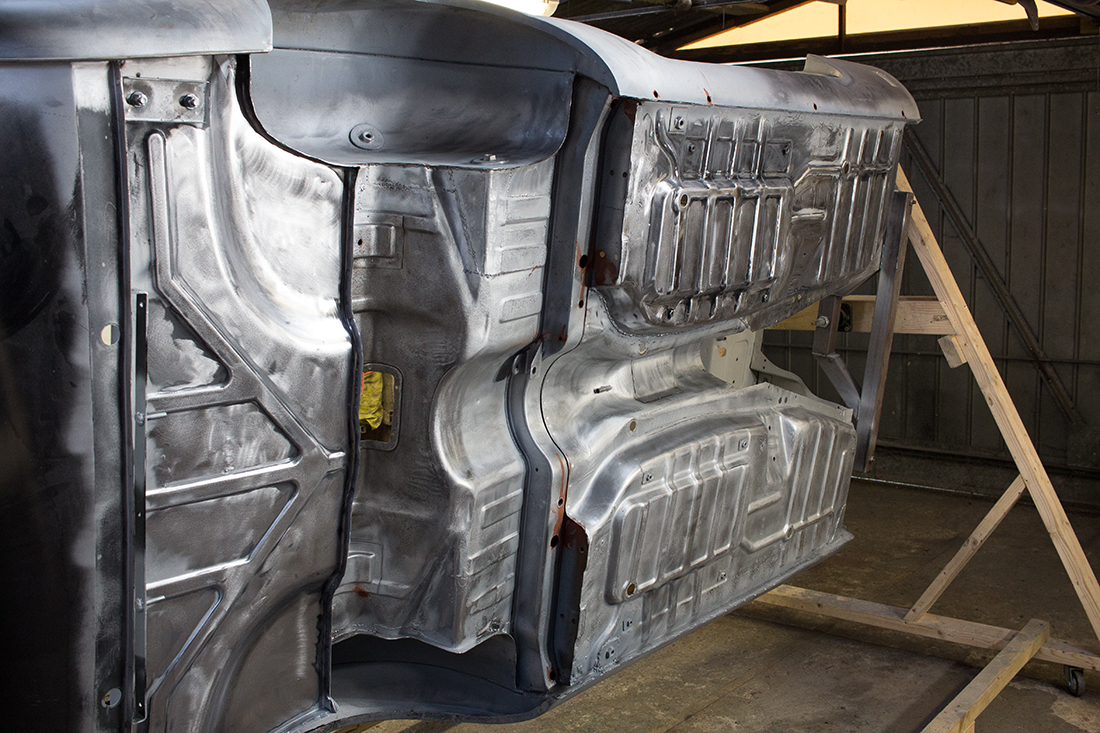
I got the body up on to some trestle stands and had a closer look. There was more work than I thought and plenty of daylight coming through where it shouldn’t. I’d be buying a few panels before I was done…
The bulkhead had plenty of rot on both sides. The offside floor pan would need replacement.
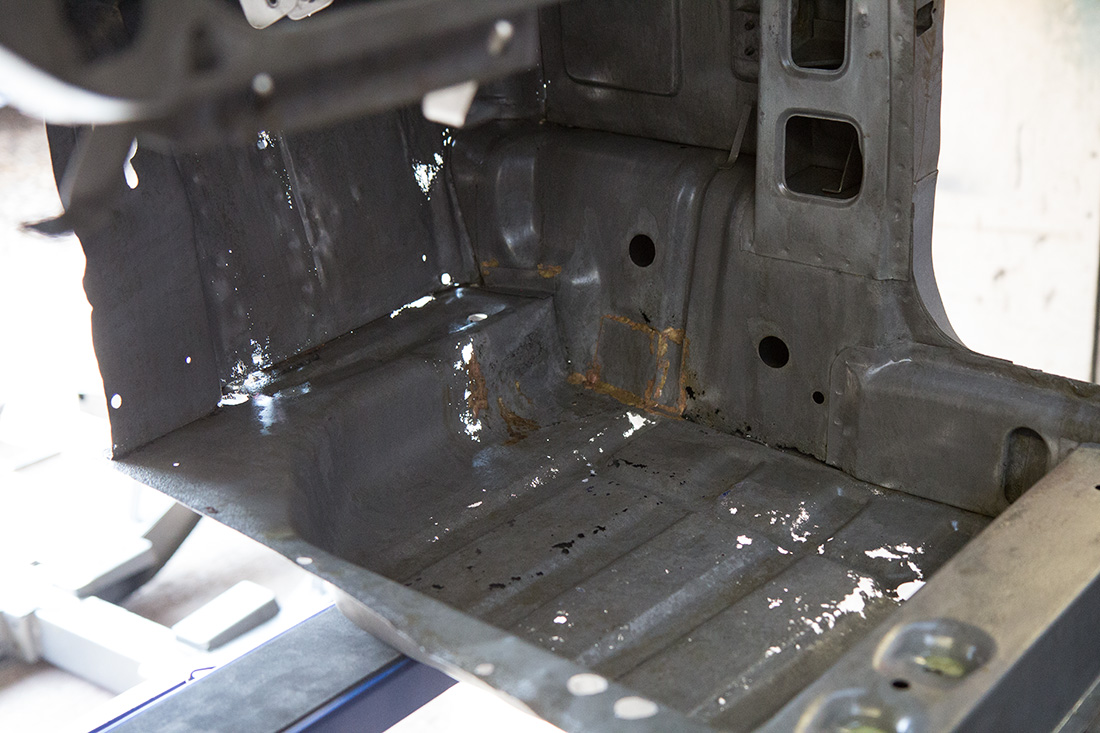
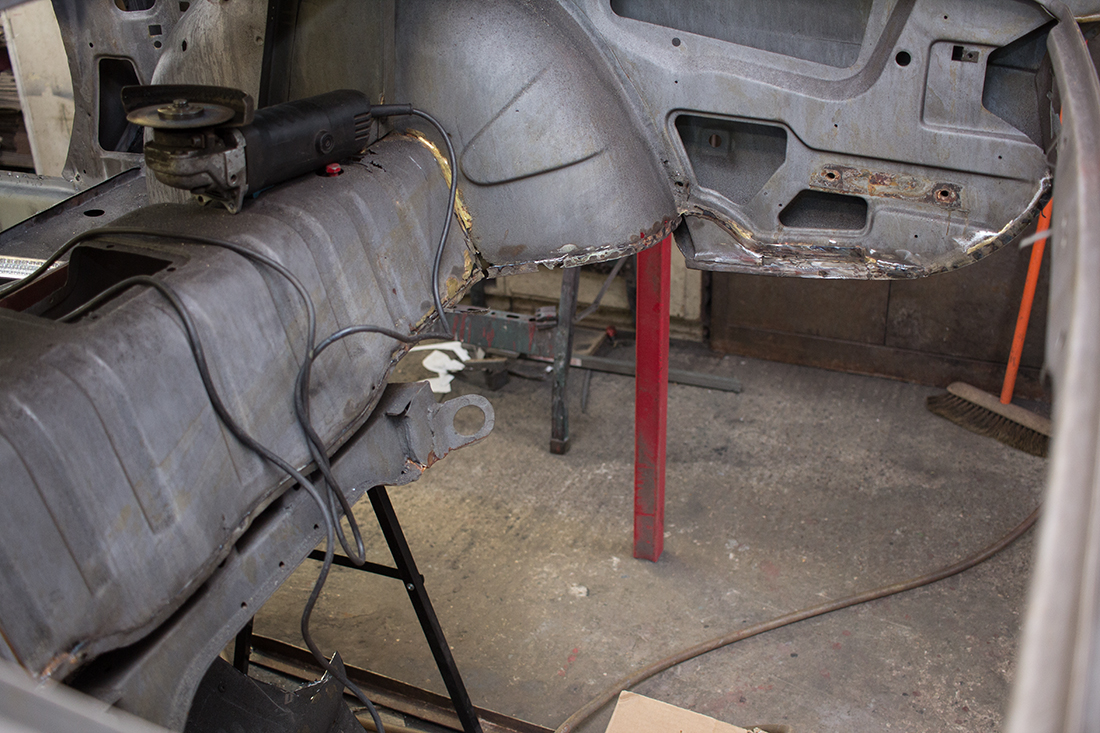
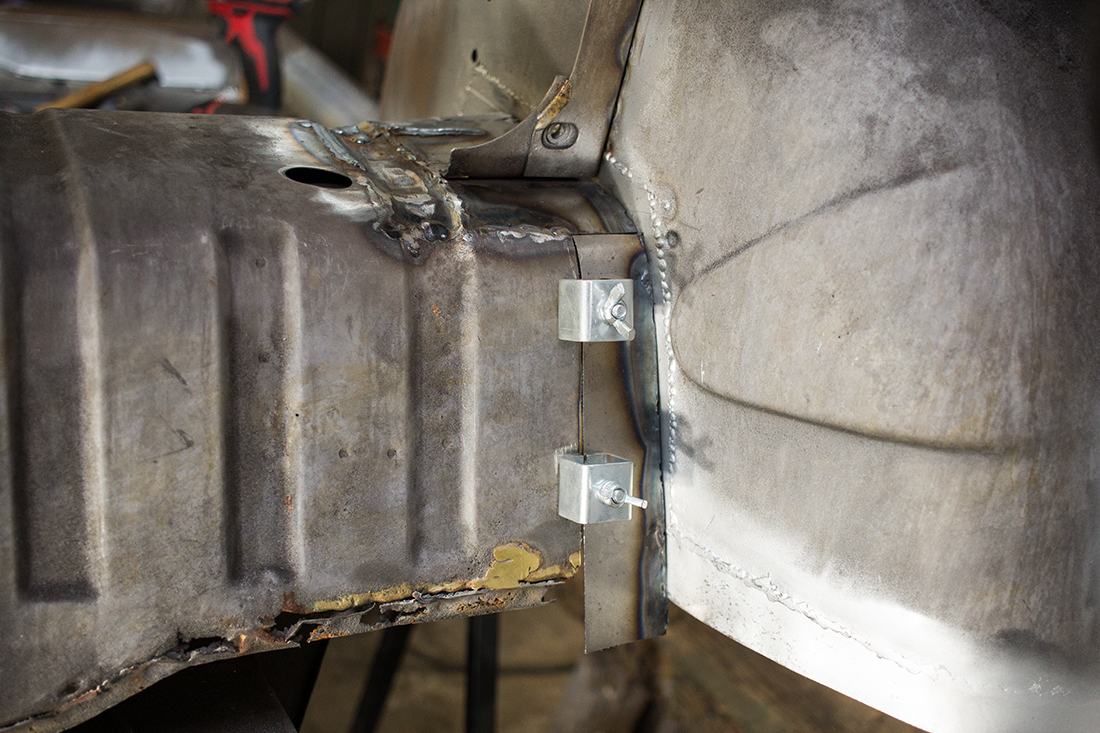
Not much holding the body mounting bracket to the bulkhead on the nearside.
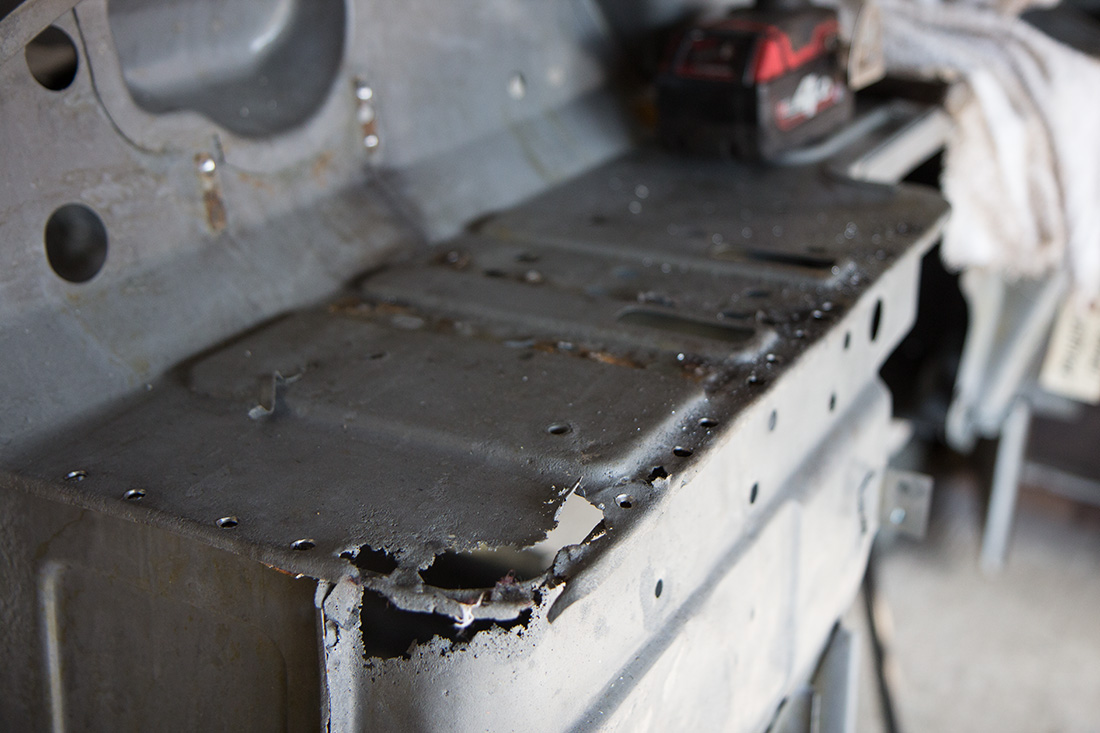
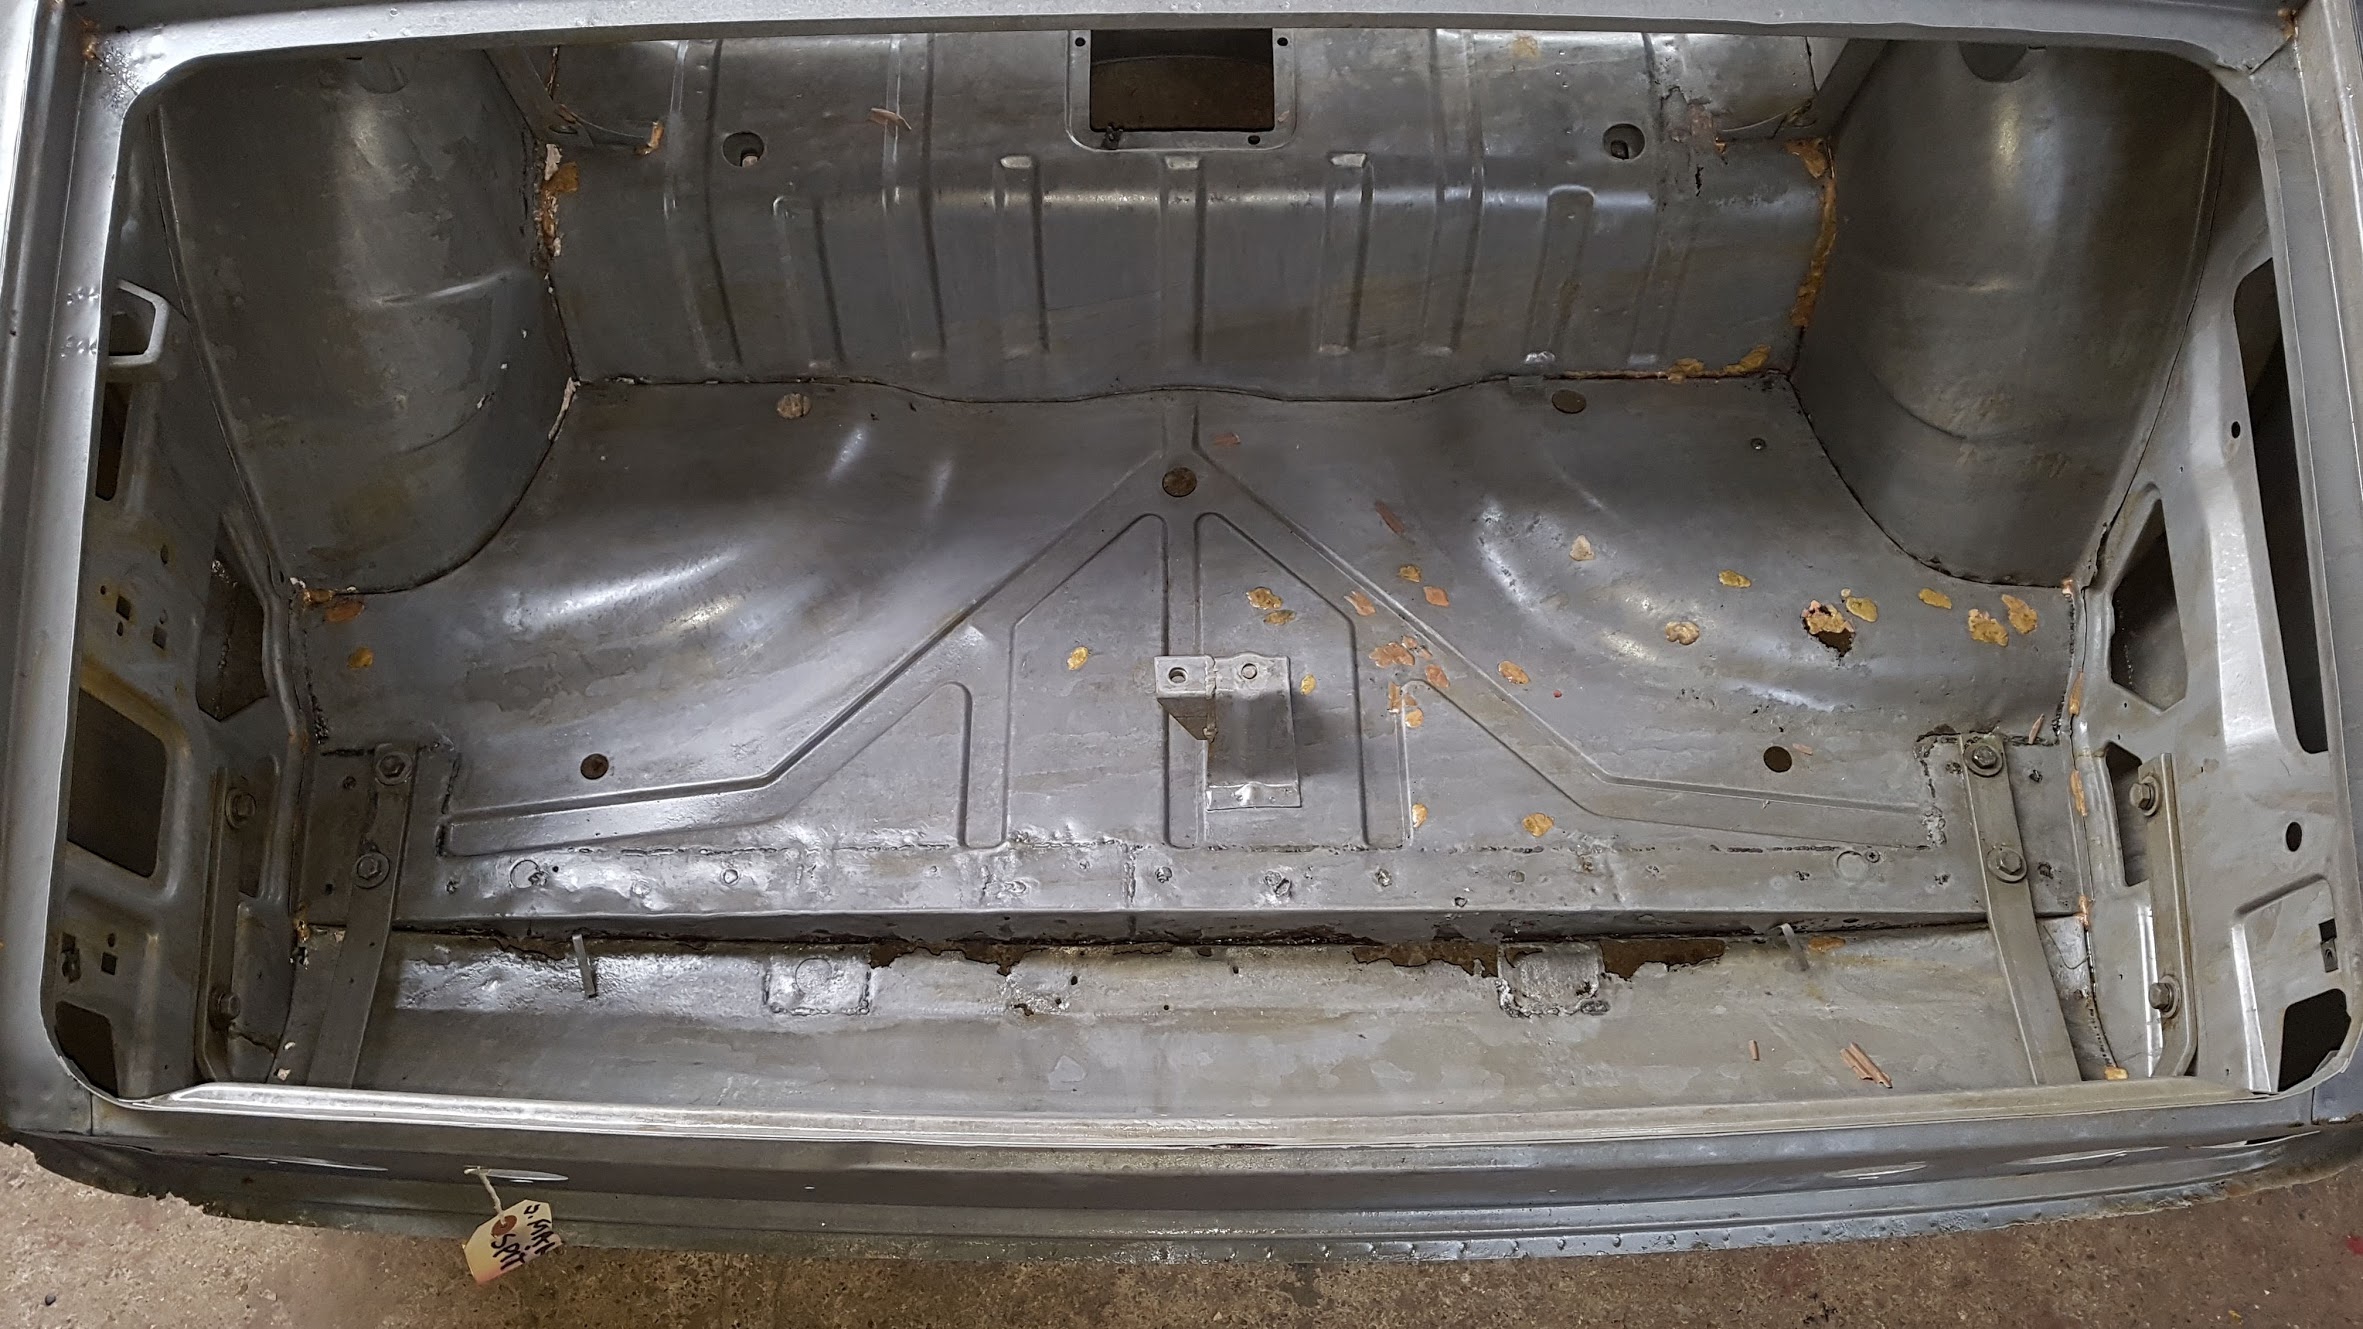
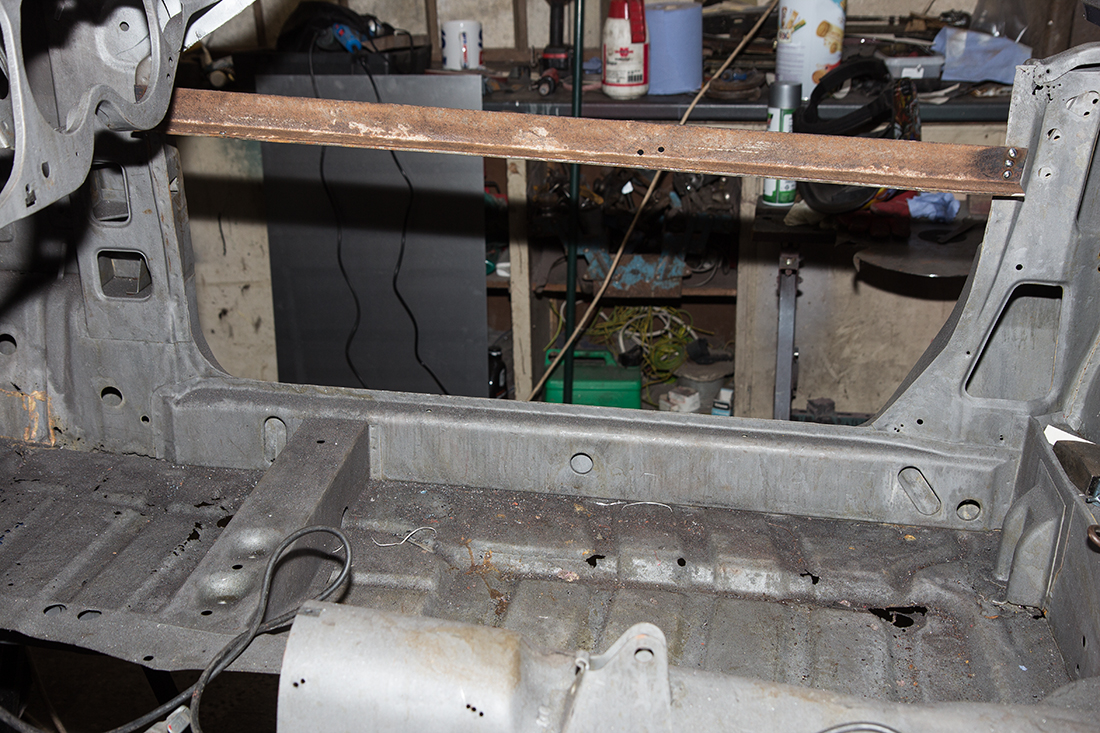
Much of the rear seat pan and boot floor would require a lot of attention and new panels since most of the seams have rotted away.
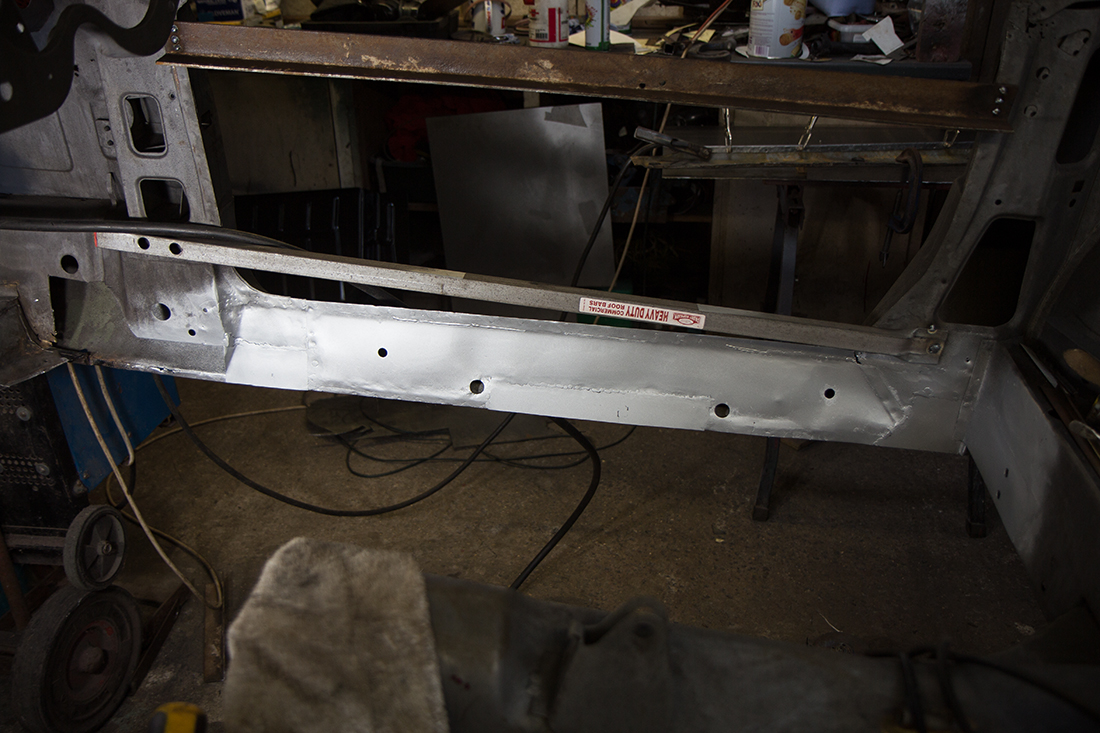
I started work on the bulkhead where the pedal box is and started by removing a section of the top which I had a new panel for. Using a sheet of steel on a piece of wood clamped to the bench I folded the edge over to form the flange for the top panel to be plug welded to. Around the edge I made several cuts so it would bend. I welded these closed and ground them flat afterwards.

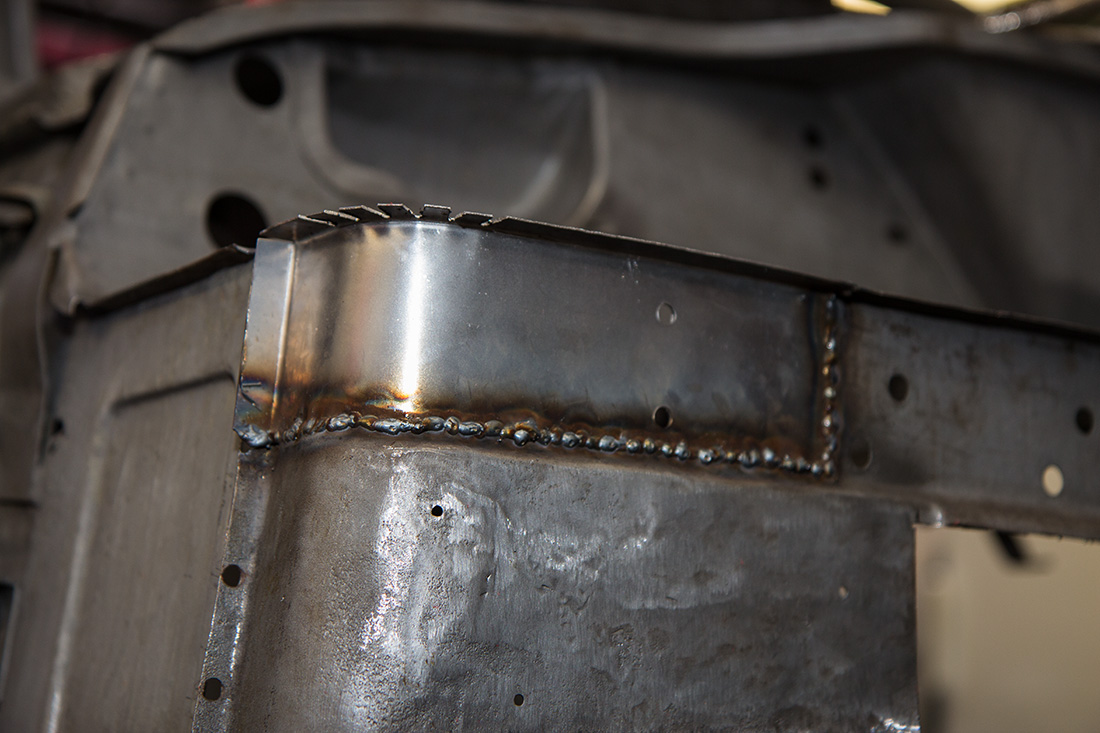
So far, so good. Having done relatively little sheet metal work I was pleased with the result. Looking at the whole car can be daunting at times but breaking it down in to one small task at a time really helps. Always thinking about the end result keeps me going.
I carried on with the bulkhead repairs making up small repair panels as I went along. I would use cardboard to make templates to cut 1.2mm sheet steel. Some panels were easier to buy though…
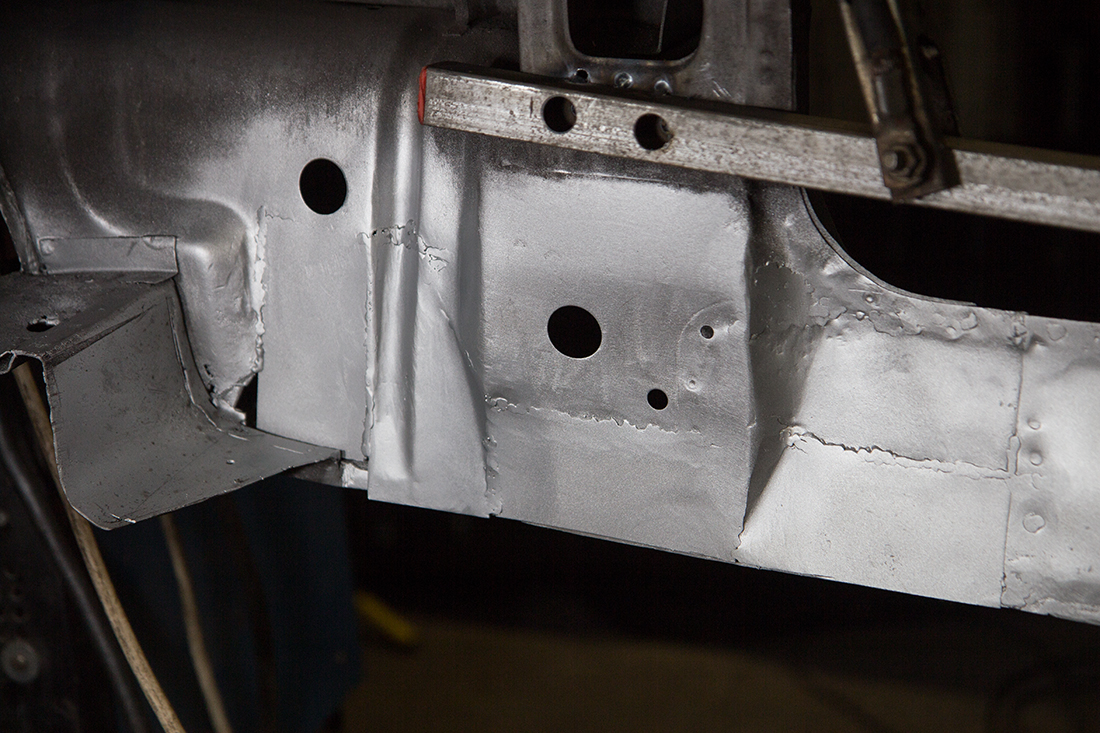
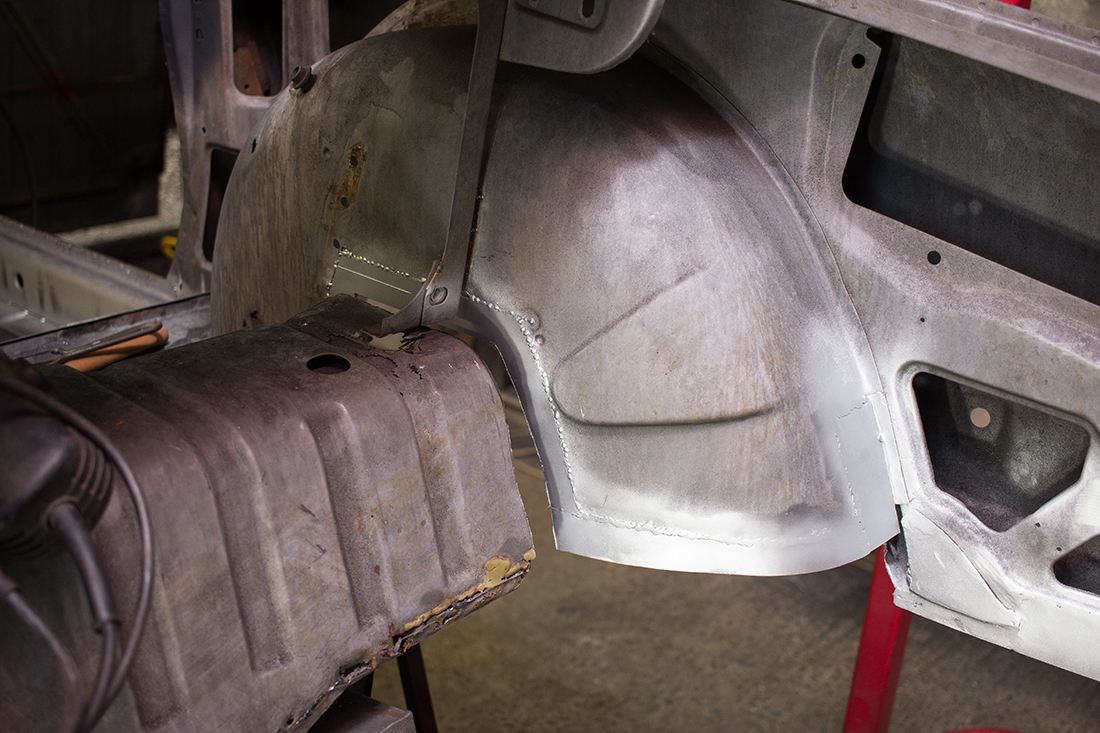
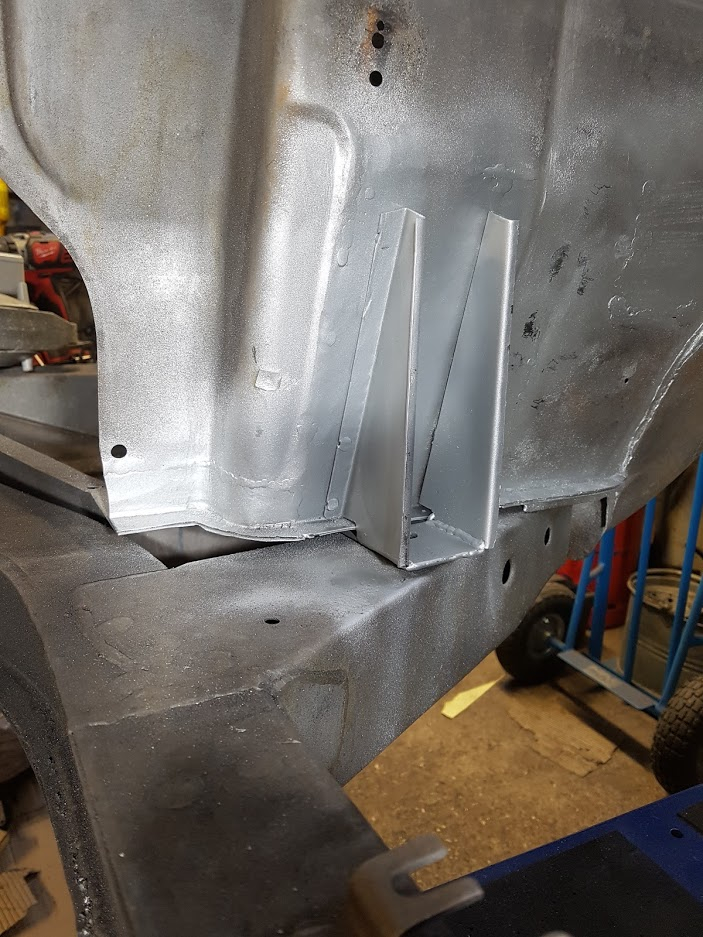
A small repair section to the passenger floor pan near the bulkhead. This is where the body mounts to the chassis under which there is a structural bracket.
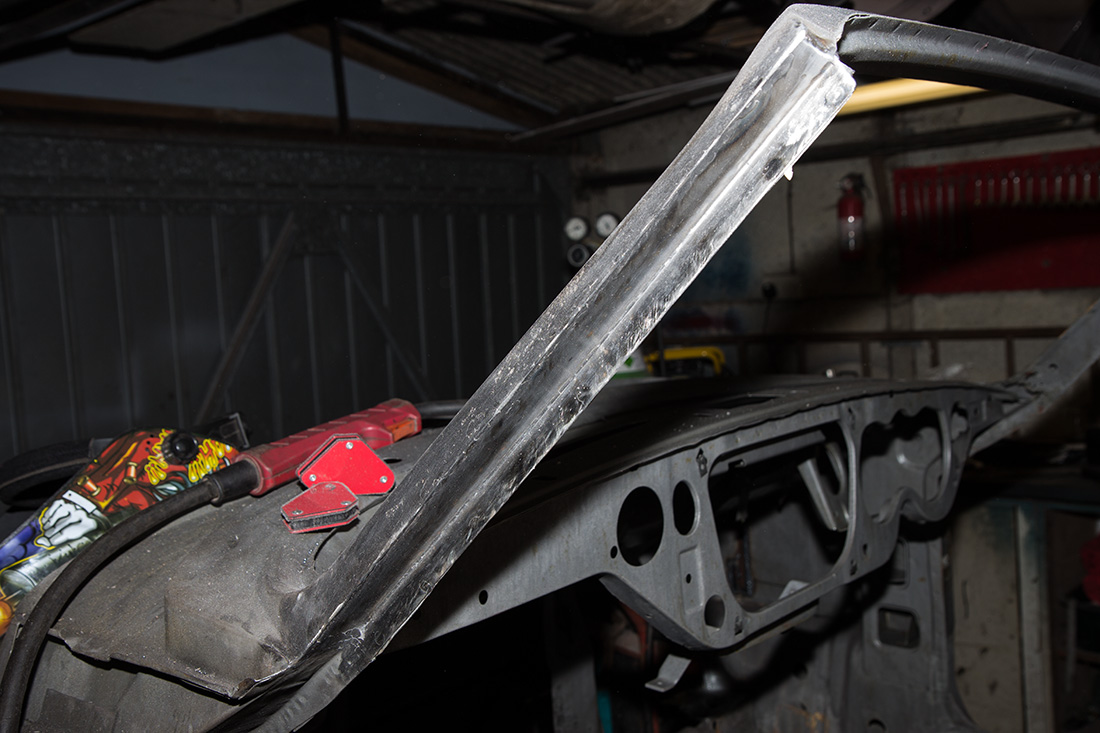
Moving on to the windscreen I needed to replace both gutters and the part of the frame they mount to as well as a fairly badly rotted piece of the screen in one of the corners. The back of the frame was fairly easy since it’s basically a flat rectangular shape and I had new panels for the gutters themselves.
These are prime areas for rot since the gutter is just spot welded to the frame it leaves a gap for water ingress. Once the body has had a coat of epoxy primer I will go round with seam sealer. This is one area that will definitely benefit from it. I’ve also been using a lot of high zinc weld-through primer in the hope that it will give some corrosion resistance to areas that won’t be accessible when painting.
Below is part of the windscreen frame removed and the back of the spot welds that I drilled out filled back up with weld prior to grinding flush.
New section welded in and plug welds ground flush ready for the new gutter to be plug welded in.
I started using a hole punch for my plugs welds. I moved back to drilling holes with a spot drill after this because the hole punch only produces 5mm holes. They aren’t big enough to get a decent pool of metal into the back surface before bridging the hole over. 8mm seems to be plenty big enough.
The corner of the windscreen would be the trickiest part I had attempted so far and quite a crucial part in terms of retaining the shape since the windscreen seal will need to fit nicely. I replaced the internal part of the frame first which would give me something to build on. After that, cut the rotten section out. I would make four repair sections to weld in since there are four flat surfaces in this area including the flange that holds the rubber seal in.
This would also mean plenty of grinding back to clean the welds up and shape it but I could use the other side as a guide. Many of the areas I’ve welded will need tidying up and sealing so I’ve opted for lead loading. It should retain some flexibility and overall be a more permanent repair.
I continued working my way around the car, cutting a piece of rot out and replacing it with either a fabricated part or a new panel. I did as much as I could with the body upon the trestle stands in order to get the body strong enough to support its own weight on a rollover jig. That would mean replacing both sills, offside floor pan, much of the inner arches and the rear seat pan and the entire boot floor.
I certainly found that the more you cut away, the more rot is exposed and the deeper you go. Replacing parts that I didn’t have any intention of replacing to start with. I knew this was my only opportunity to get it right though. In the end, I felt confident that there wasn’t any rot lurking because I’d replaced it all.
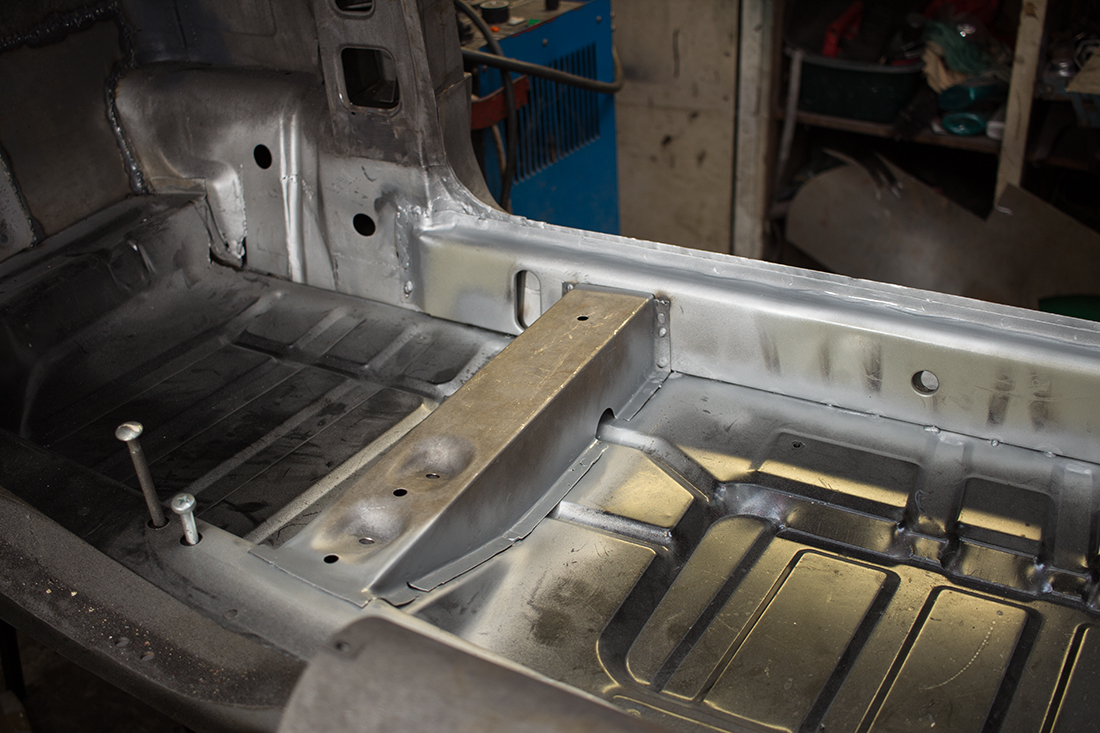
This is partway through replacing the floor pan. I’d cut the old floor, cross member and heel board bracket out as well as the inner sill behind which was a fairly non-existent sill strengthener. I replaced much of that and the lower A-post.
Getting the new floor pan lined up is not an easy task. Many recommend that you do this with the body flipped upside down but I didn’t have the facility to do that at this stage. Even when you have got it lined up, getting the seams nice and flush for plug welding is tricky but patience and plenty of mole grips are your friends. Quite a large and satisfying panel to replace.
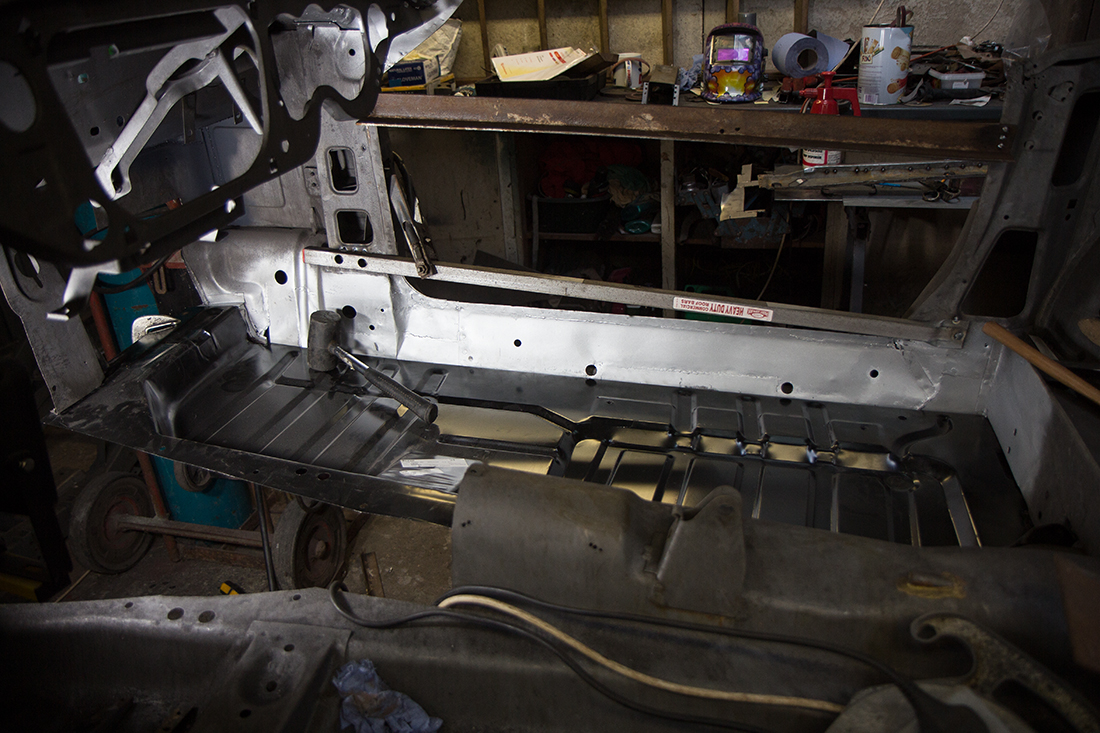
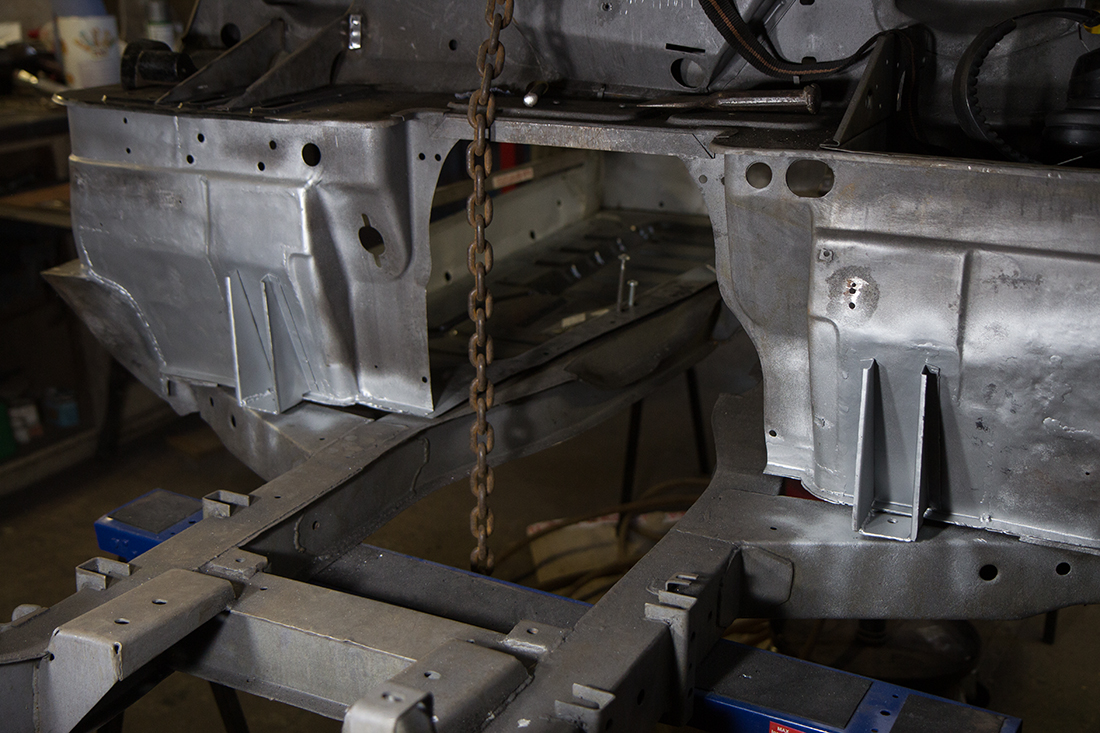
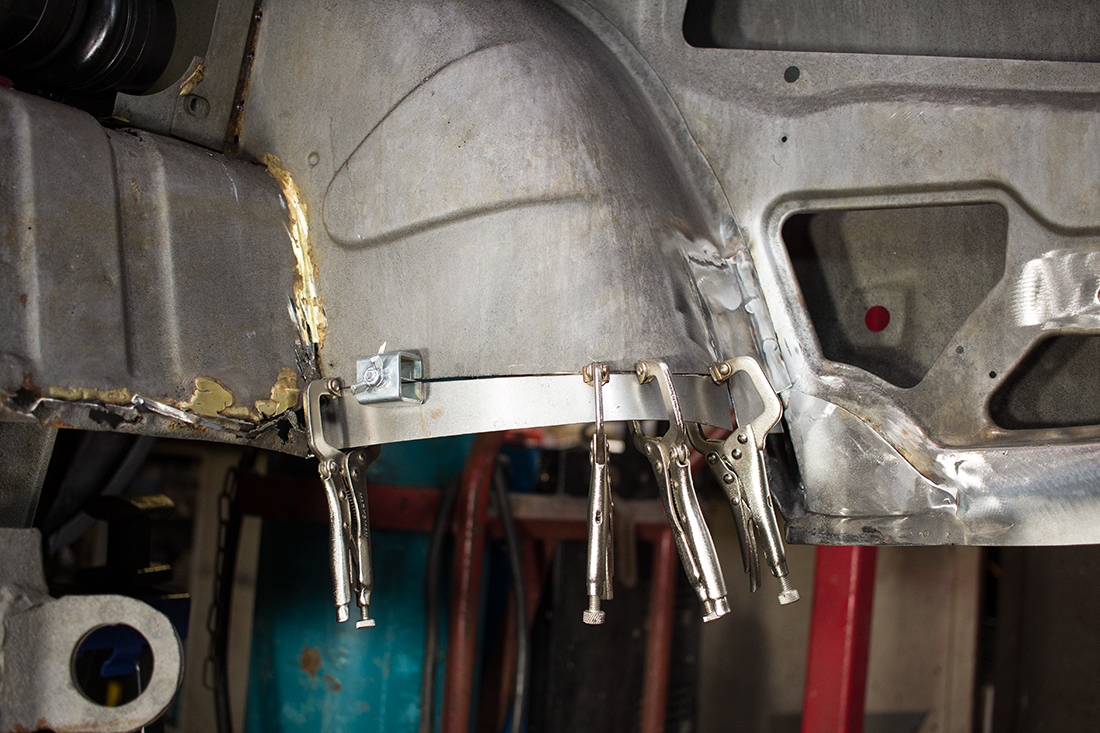
Once the floor pan was done I could finish the bulkhead since that is supported by it. I put the body back on the chassis to make sure everything lined up before continuing. I’d just have a few panels and some brackets to fabricate for the bulkhead. The little clamps for holding butt jointed panels together are invaluable.
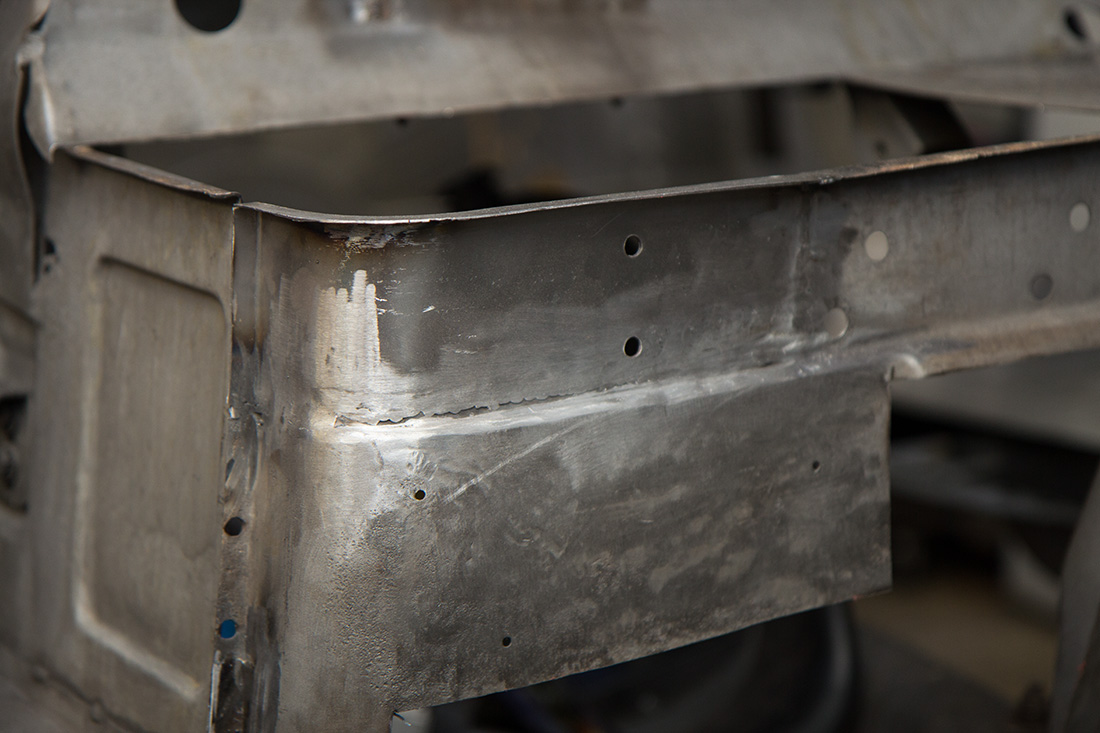
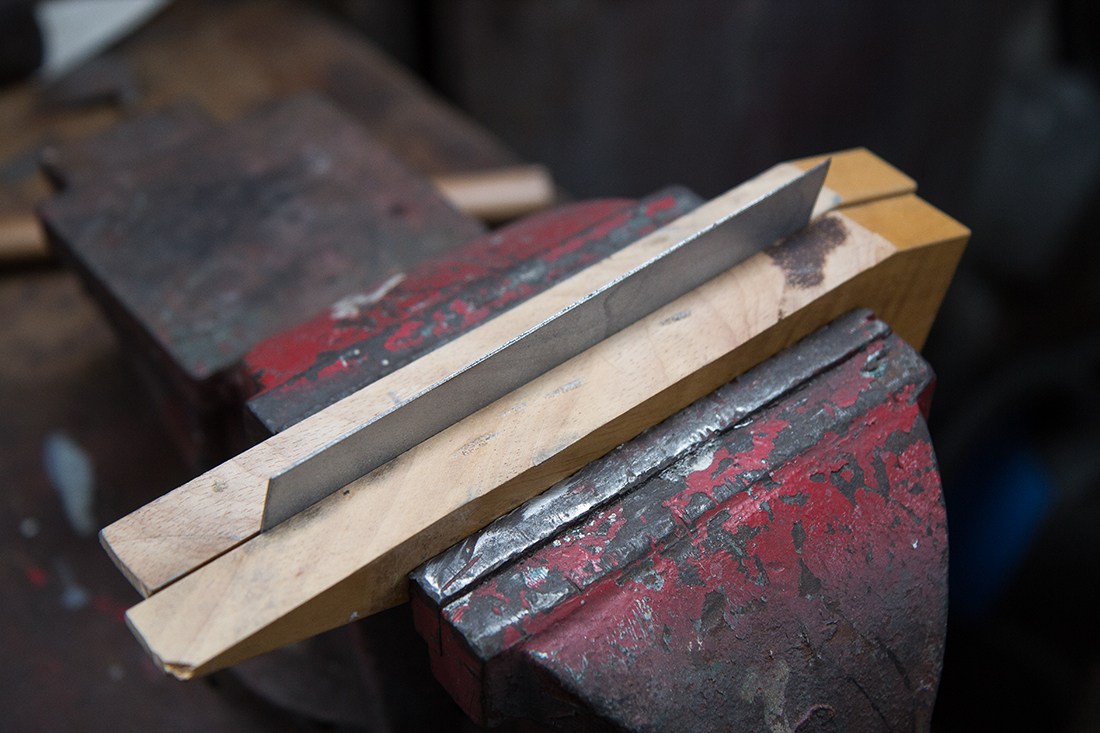
Below is the bulkhead after fabricating some new body mount brackets. To make the brackets I just cut a couple of pieces of hardwood to match the angle of the originals, clamped a sheet of steel between them and folded the edges over. I was quite pleased with the result.

Now the bulkhead was finished I carried on with the floor pan. I put the cross-member and heel board bracket back in and a new inner sill.

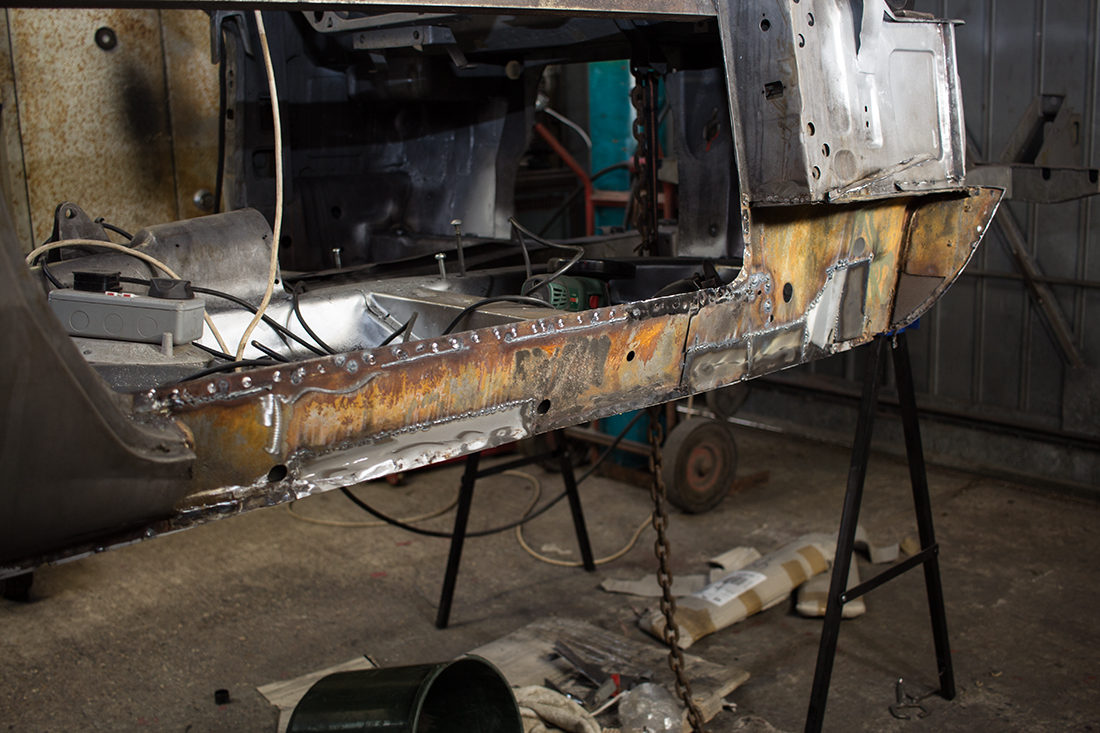
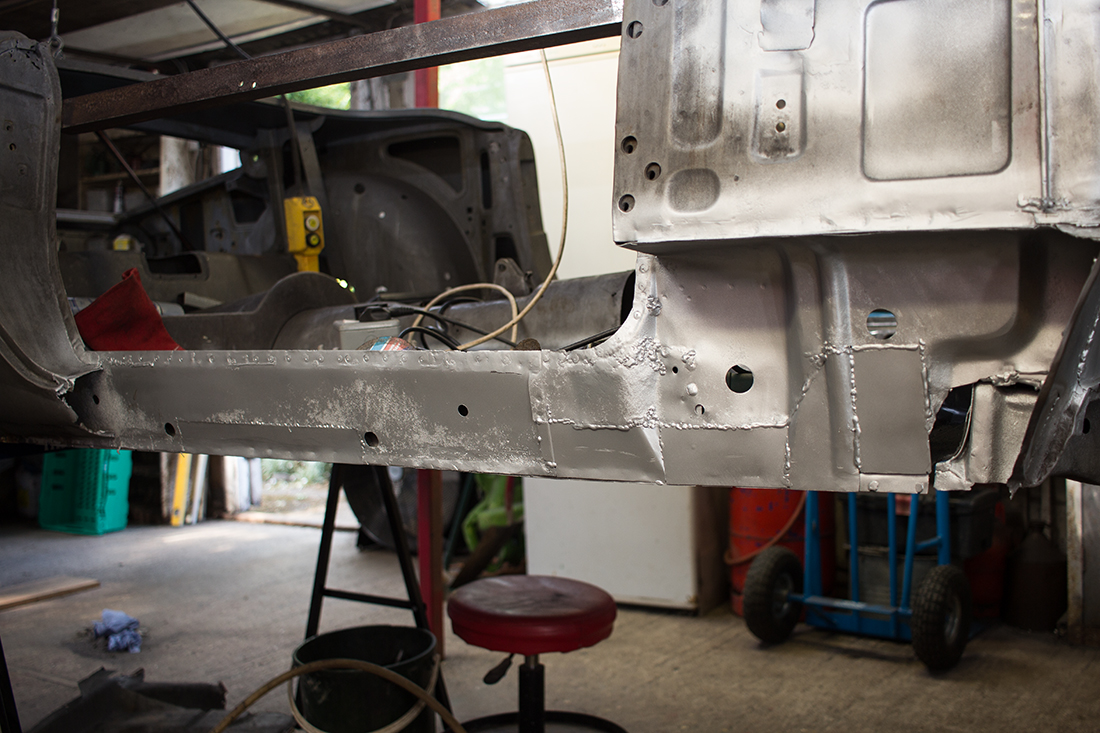
Next up was the offside sill. I thought there would be more repairs behind this as well and I wasn’t wrong. You can see a few patches that I’d done from the inside already but there was more to go. Mostly cleaning up surface rust…
Just a bit more to replace in the bottom right of this photo…
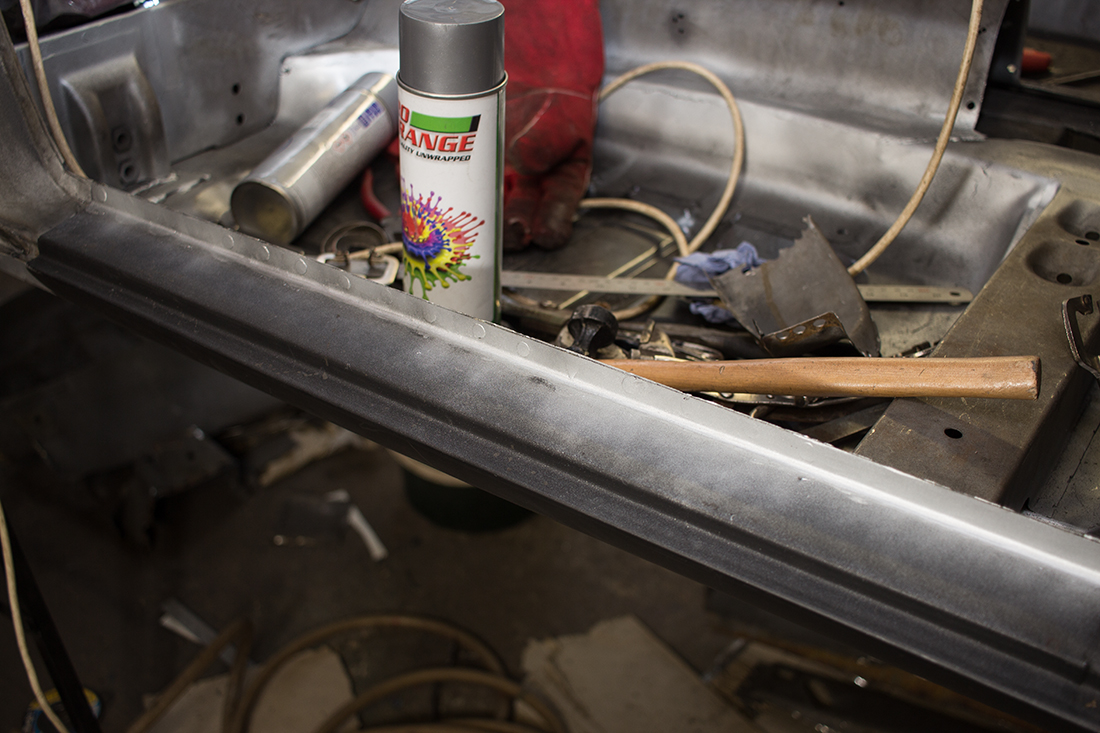
…and a new sill prepared and ready to fit…

The sill was, again, a tricky part to get aligned. I offered the door up at this stage to make sure the gaps were going to look reasonable before fully welding it.
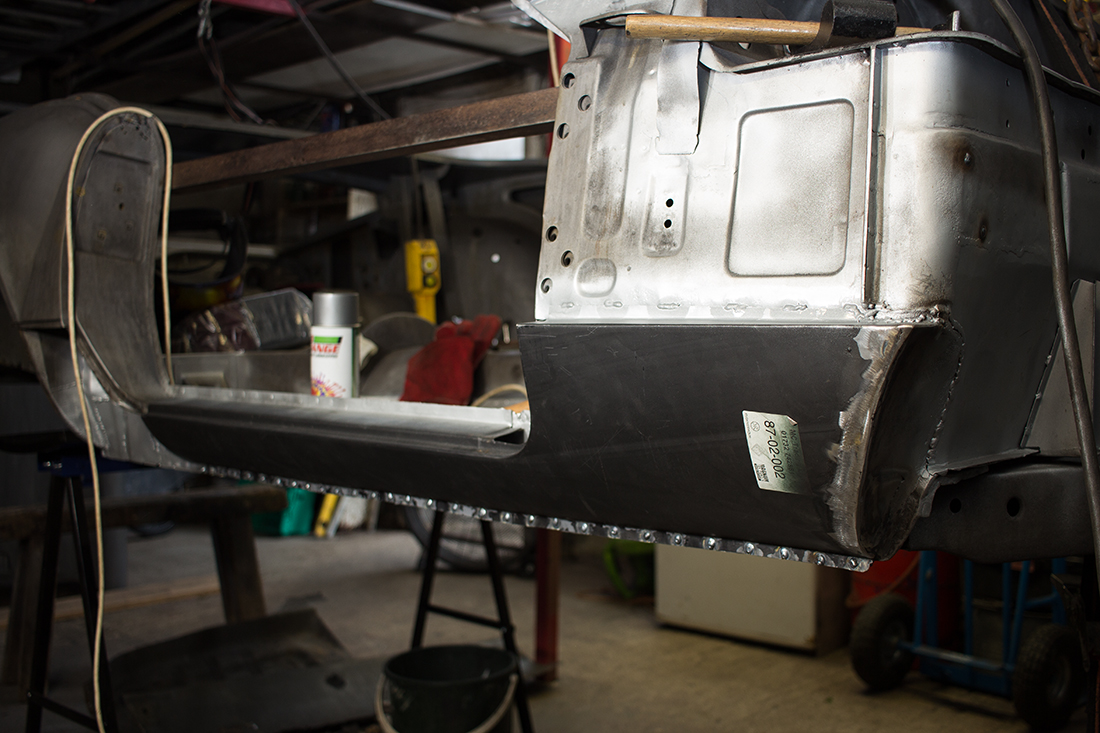
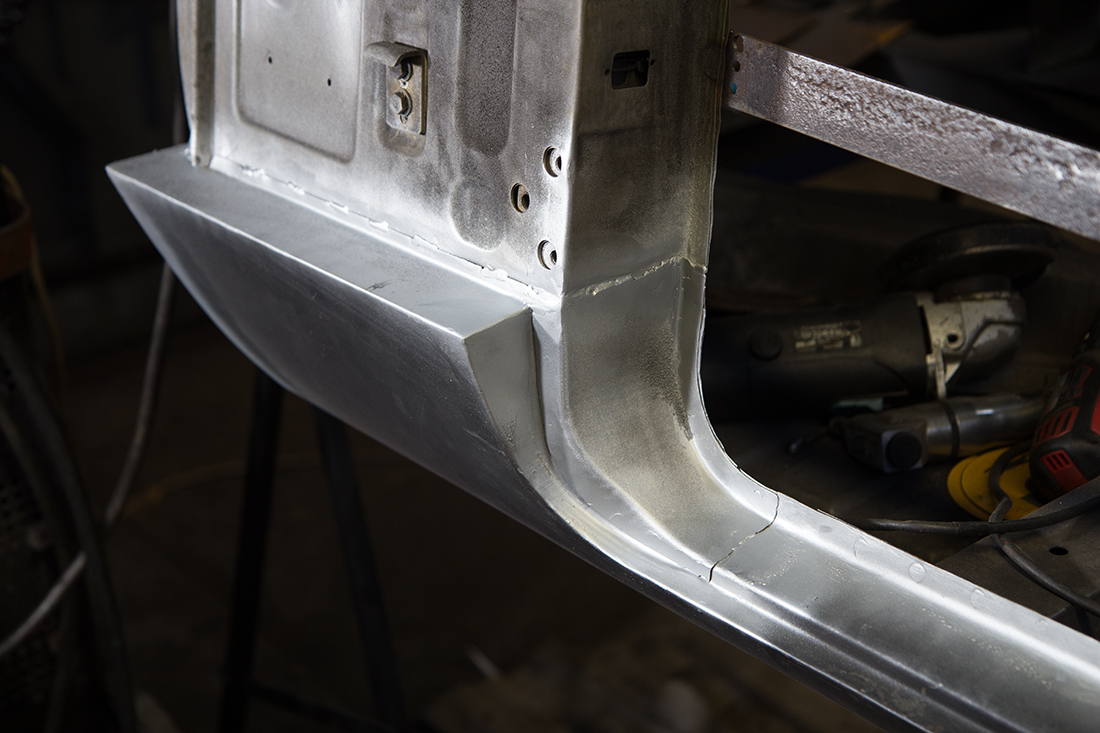
I also replaced the sill extension which forms part of the rear wheel arch.
It was starting to take shape but there was a way to go yet. The inner arches and boot floor were pretty shot. I cut the entire boot floor out so I could properly access the inner arches and the section behind the seats. A lot of the section behind the seats, under the fuel tank and arches, had been brazed. This made cutting it all out somewhat difficult. I certainly wouldn’t choose to braze any seams in future. It just means the surrounding steel rots away and you’re left with a mess of brass and rust to cut out!
Piece by piece I patched the inner arches and section between them. Ideally, it could have done with new panels here but since they aren’t on show and they are expensive, I decided to patch them instead.
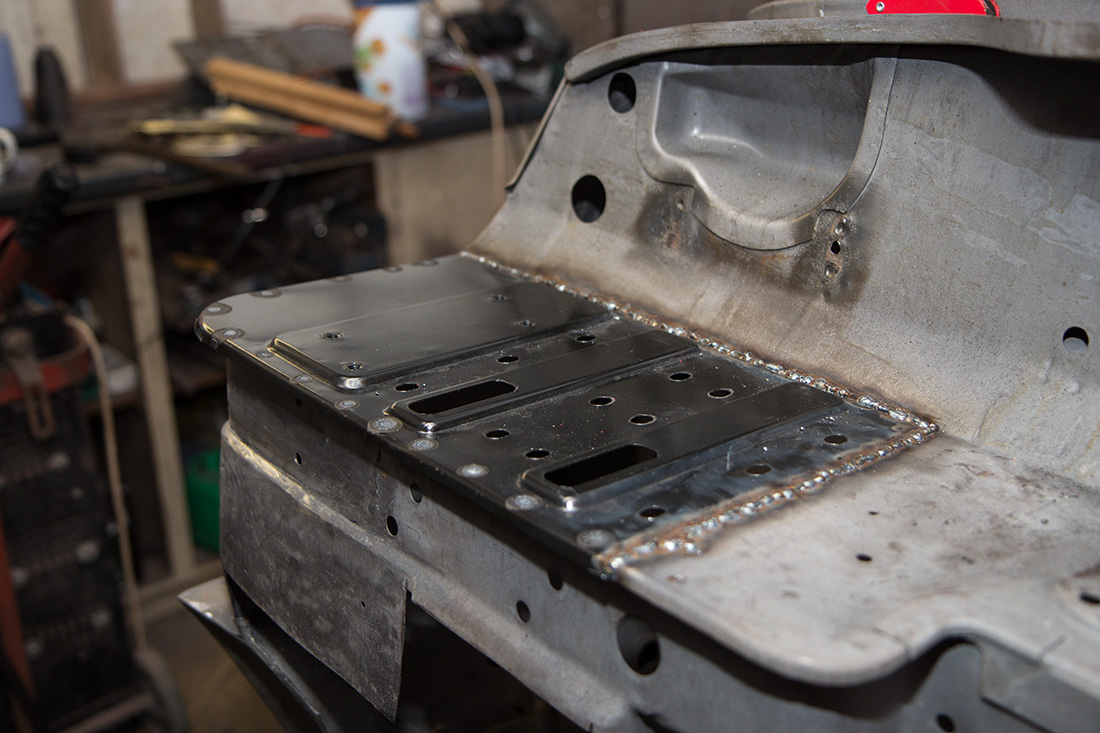
I had a couple of week-long stints at it around this time using some of my annual leave from work to get stuck in and make some progress. I’d been counting hours and racked up about 200 by this stage. I pushed on with the arches and the section that covers the driveshafts and differential. Next up was the boot floor which is another large panel. I was really pleased at this stage because you could really see the hard work paying off and the body returning to the beautiful shape that it once was.


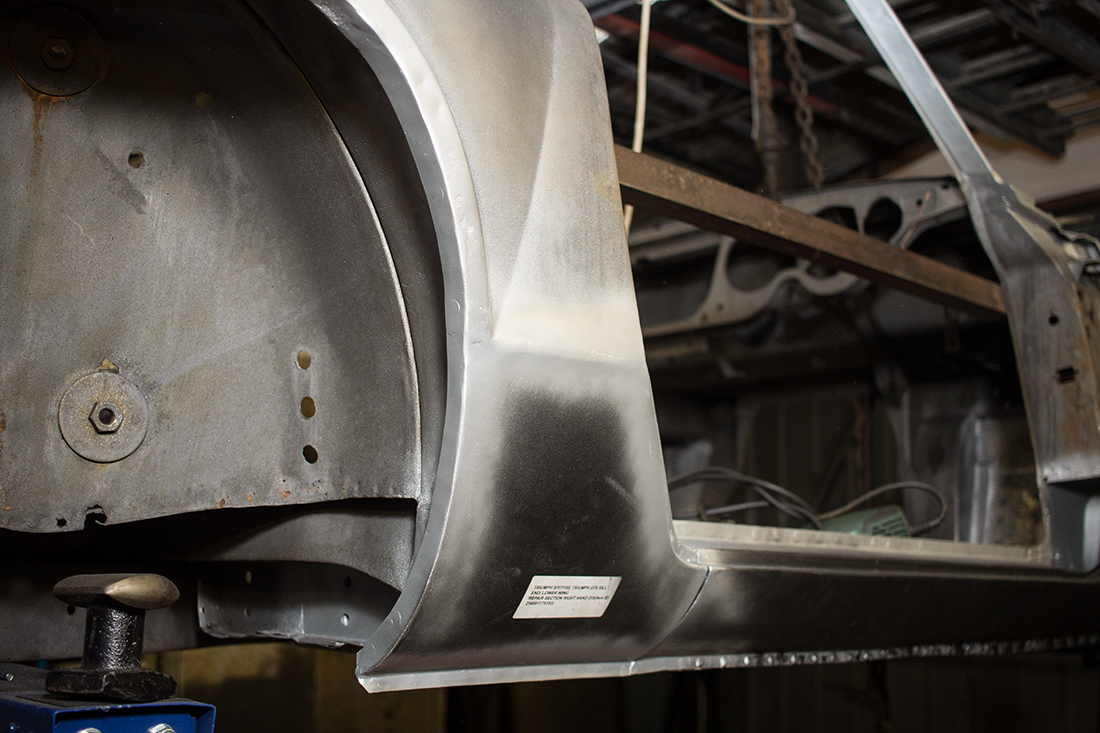
These big panels just don’t want to sit nicely to begin with but with plenty of clamps and grips, you can get it there with some careful welding along the way. It took some jostling but the boot floor and rear valance went together like a glove in the end. I also replaced both rear lower parts of the rear wings with some NOS repair panels I’d found.
I now focussed my attention to the nearside sill which was a rinse and repeat of the offside sill.
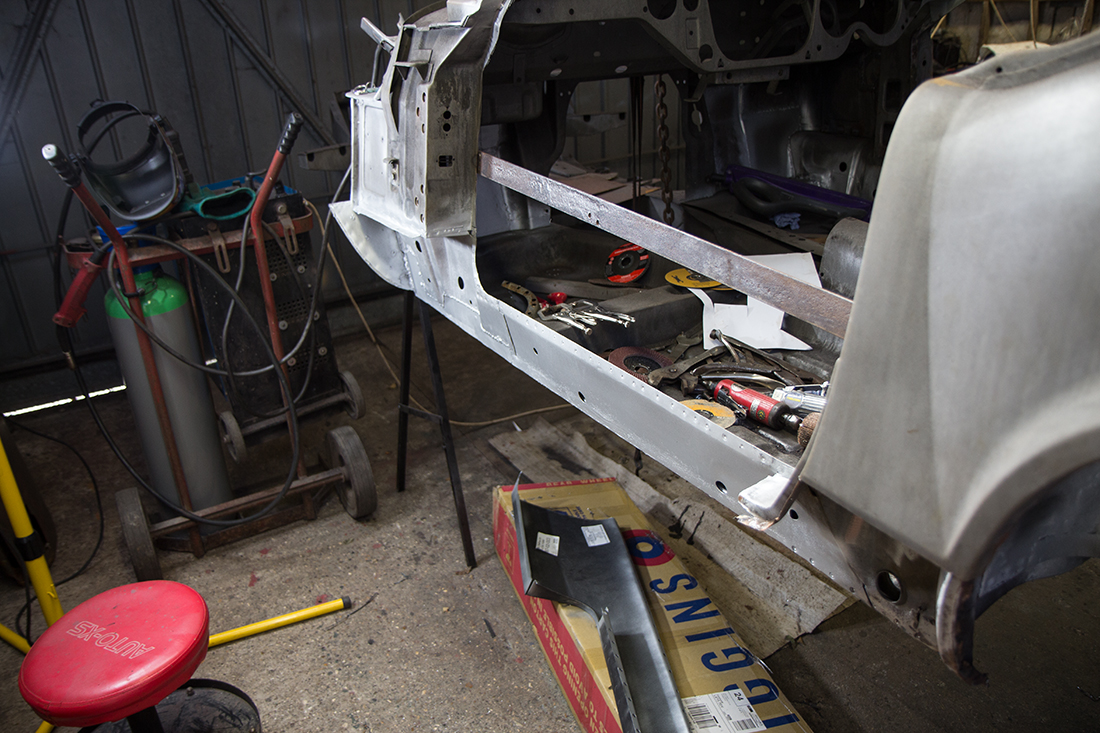
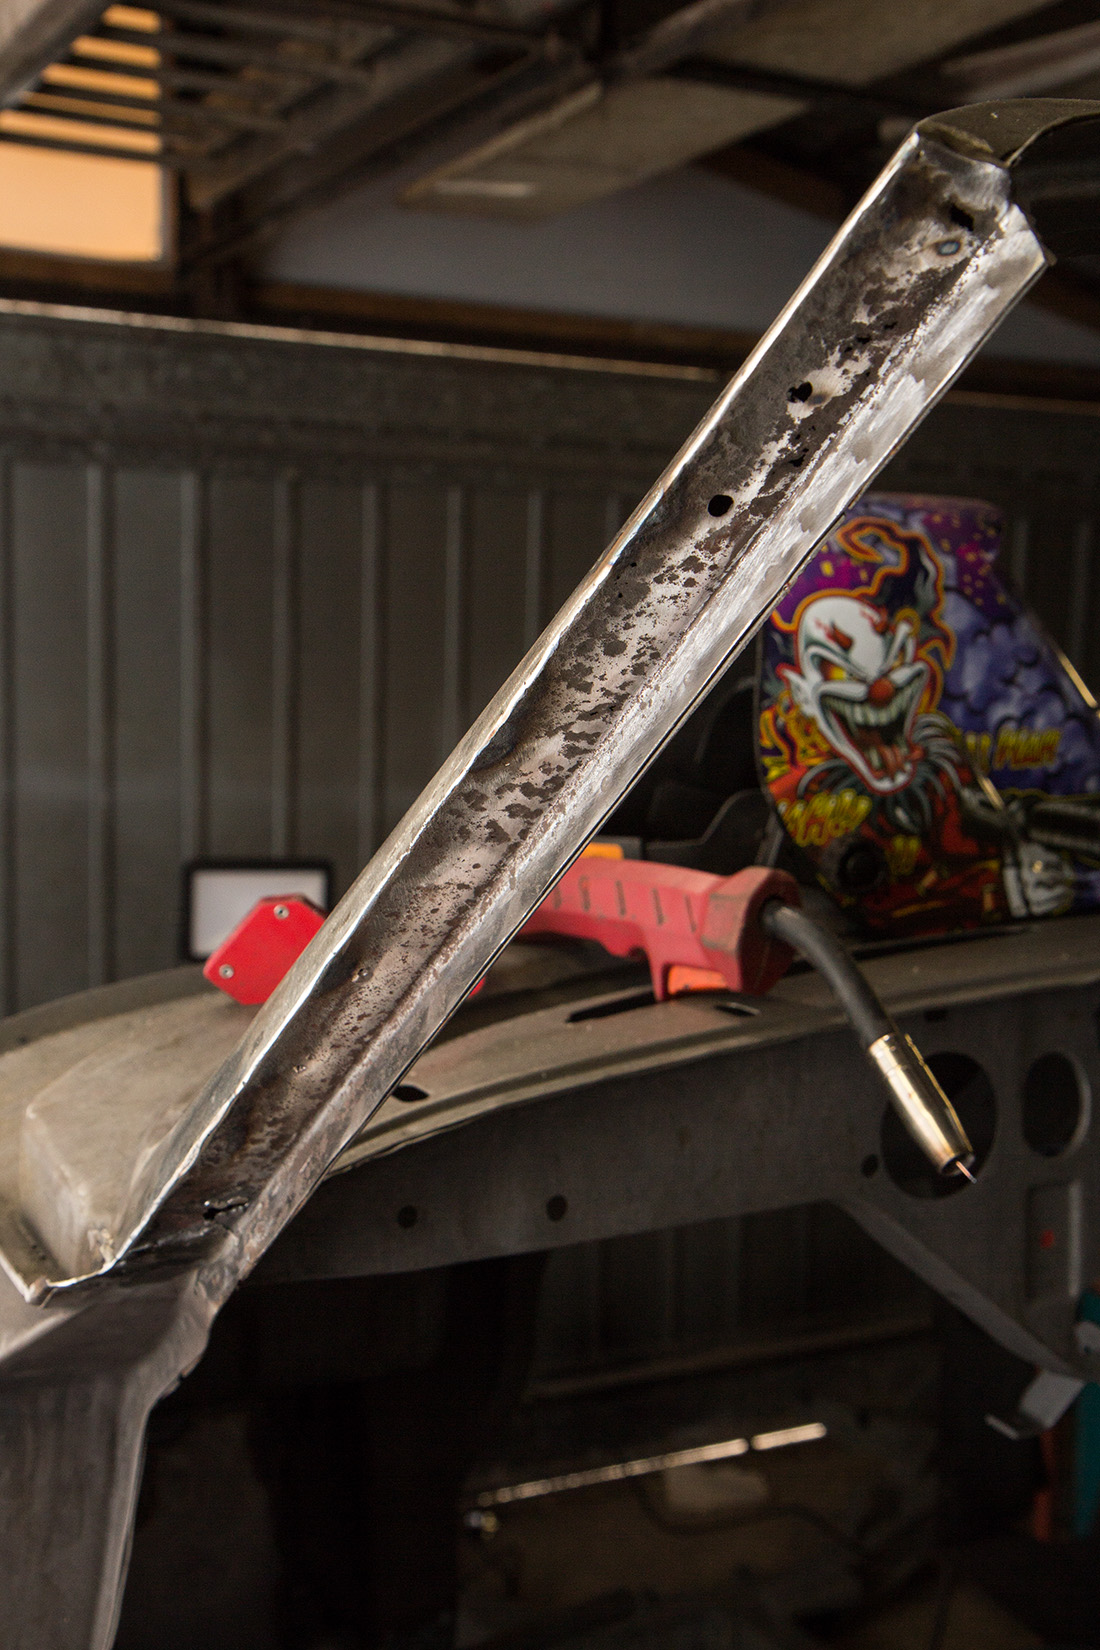
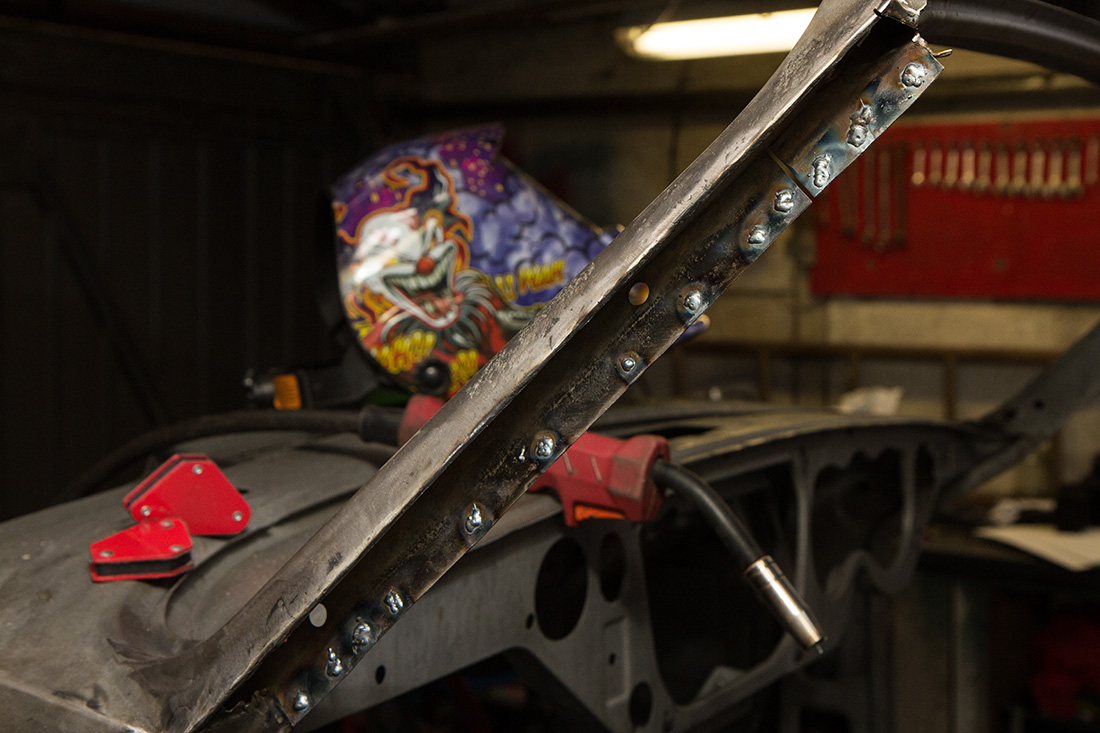
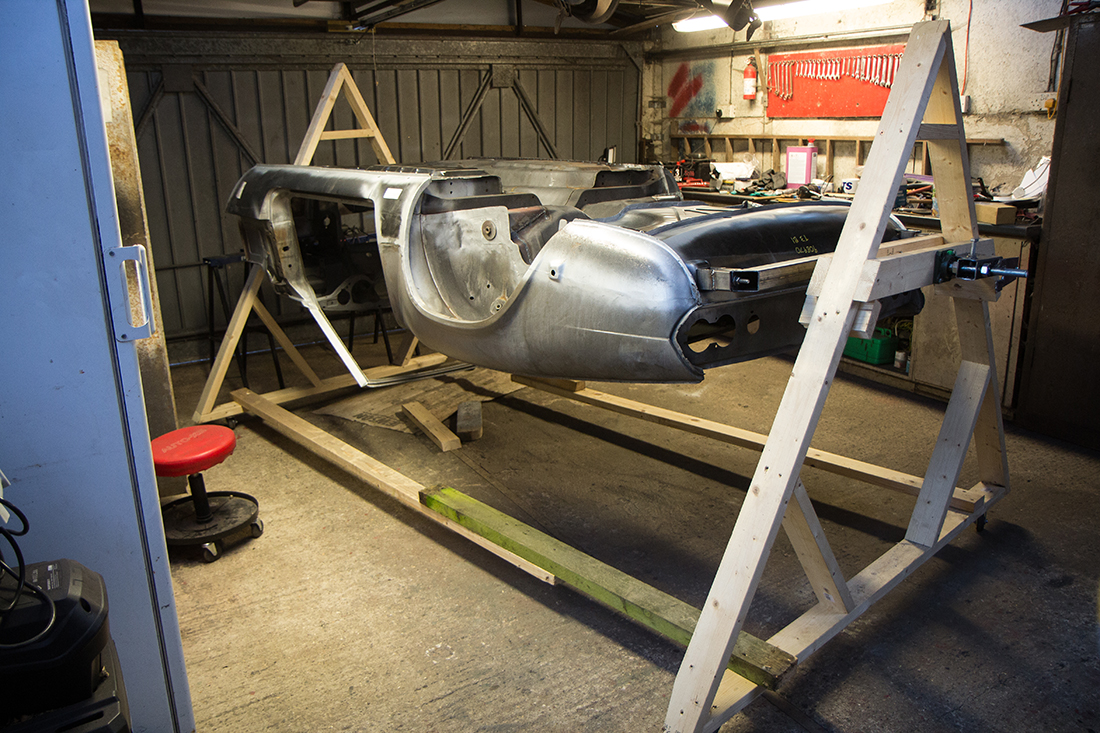
Now the body had plenty of strength back in it so I could get it mounted in the rollover jig. I’d made the jig while the body was away for stripping and I went with a simple A-frame style design made mostly from 2 x 4 timber. In the ends were some flanged bearings and I used 50mm box section for the mounting brackets. At the front, I picked up on the chassis mounts from the bulkhead, offset to allow the floor of the car to remain level. At the rear, I used the rear bumper mounts (with the supporting brackets inside).
Things were really progressing nicely now. I just had a handful of areas to weld and then I would be ready to move on to some lead loading.
Lead loading isn’t too difficult really. You just have to get familiar with getting the lead in the right consistency which is kind of like a paste. Adding heat little and often is the way. Just keep going at it with the paddle until it’s just right. Slightly too much heat and it will run off the panel. Not enough and you can’t manipulate it. Getting the area to be tinned 100% clean is important too but you’ll know if you haven’t got it clean enough because it just won’t tin properly. I like lead loading. You can’t really go wrong because it won’t tolerate it and what you end up with is a really solid bond to the steel beneath. It’s also excellent for penetrating welds and really sealing them up.
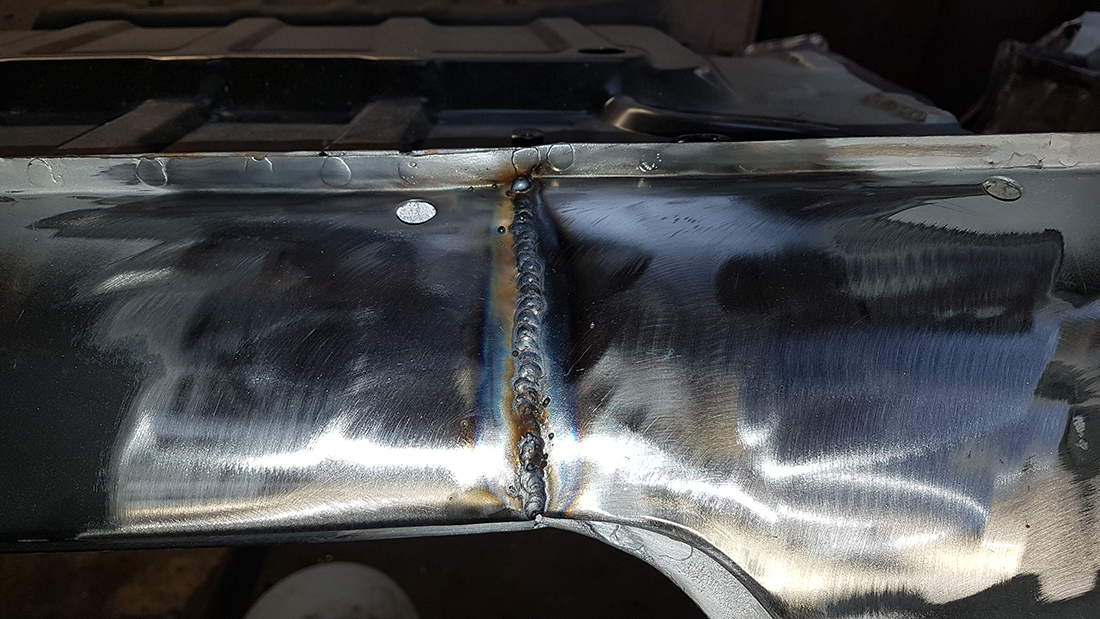
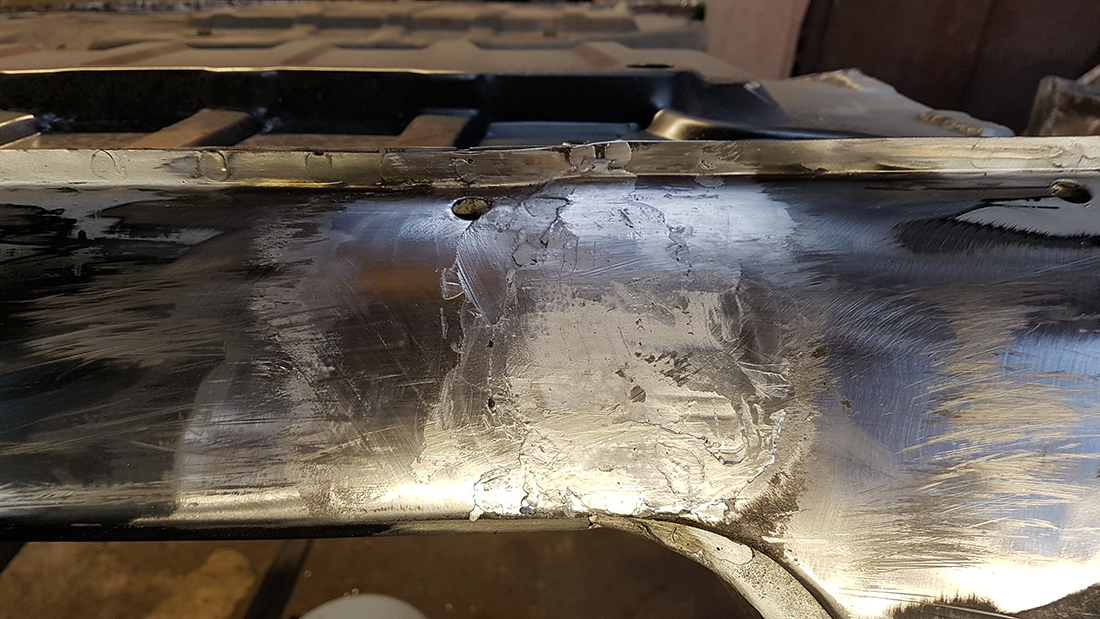
I fully welded the sills at the join where they meet the rear sill extension. I’m sure the purists would be horrified but there’s no good reason to leave the gap there since it’s just another area for water and dirt to accumulate. After I welded it I lead loaded it and skimmed over it with some Upol Fibral which is short strand fibreglass filler to get it reasonably level. Annoyingly I didn’t take any decent photos with my SLR of this bit but these from my phone give you an idea…
Once all the lead loading and initial filling were finished, I was ready to start prepping for the epoxy primer. I chose epoxy because it’s supposed to fully seal the surface and it also adheres really well. First I completely cleaned the shell by using a paraffin gun filled with panel wipe to remove the oily corrosion inhibitor they used from the chemical stripping place and I vacuumed all the loose material out as far as I could. Next, I applied Buzzweld cavity paint in any area that I wouldn’t be able to access with a spray gun—inside sills, windscreen frame, rear wings, cross members etc. I went through 6 cans of the stuff so I think the internal parts are well covered.
Now it was time to strip all the paintable surfaces down. I like to use a strip-disc, they’re quick and leave a good surface for paint. I use a wire wheel attachment on the drill for getting in to hard to reach areas.
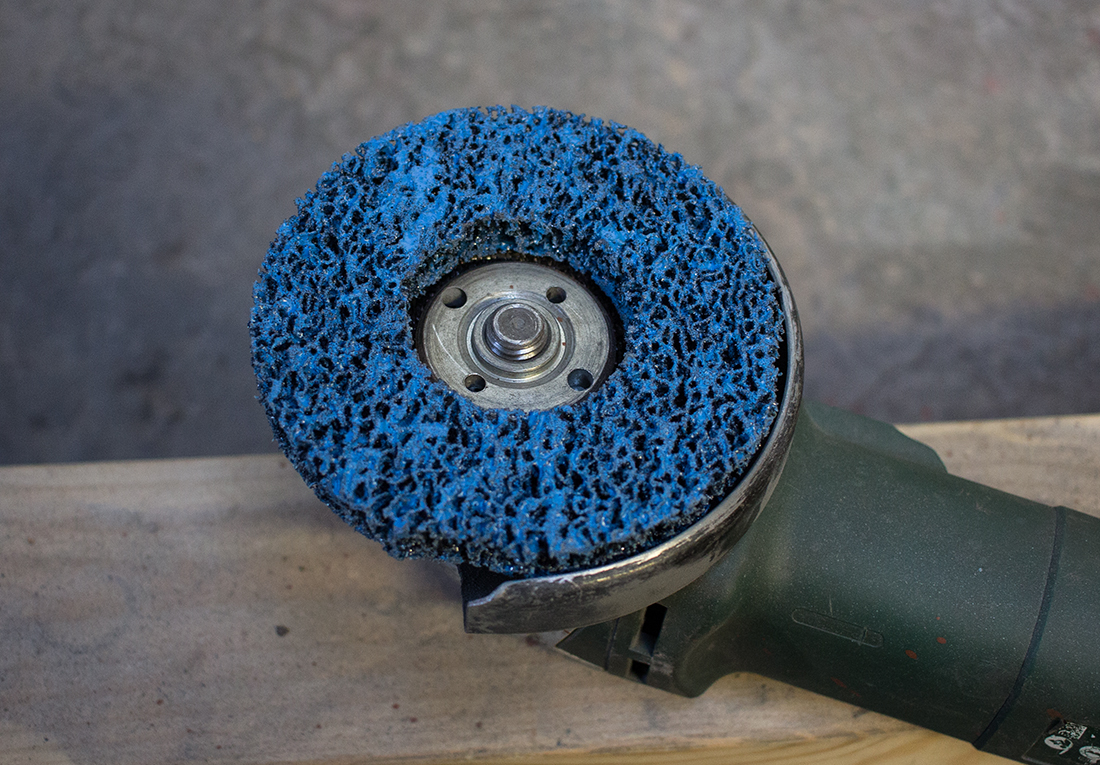
These cheap ones are ok but they don’t last too long because the glue they use to hold the disc to the backing lets go and you lose half a disc somewhere across the garage. I went for some Norton Blaze discs in the end. They just last longer and take more abuse.
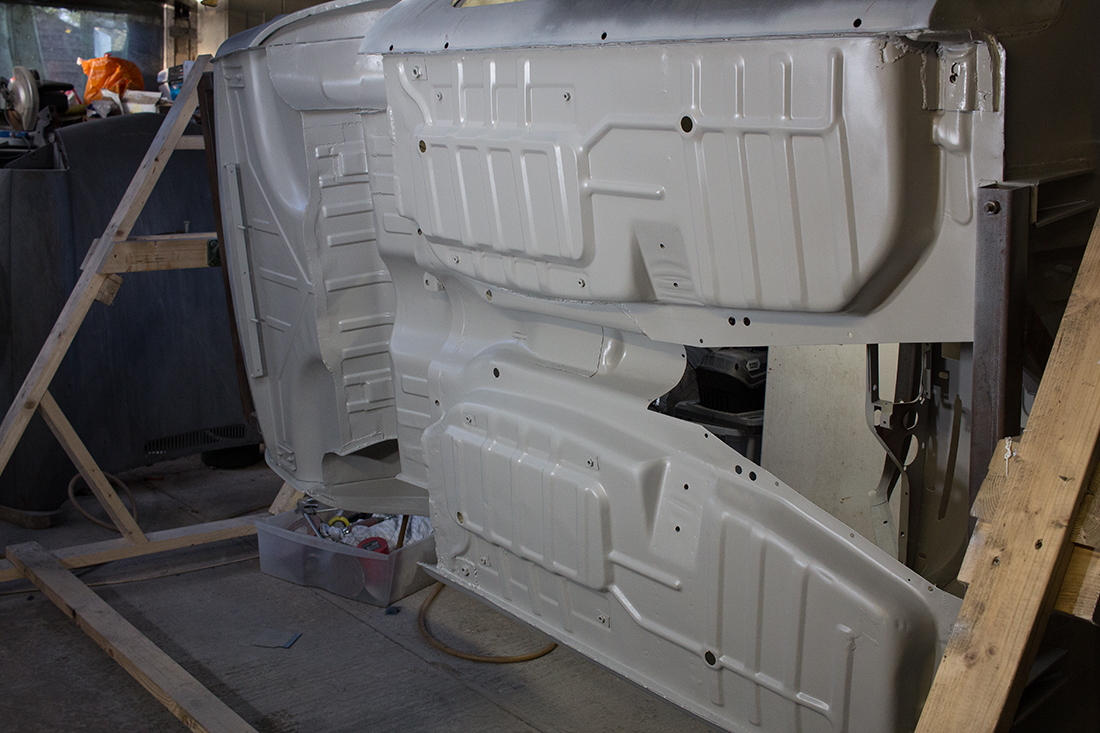
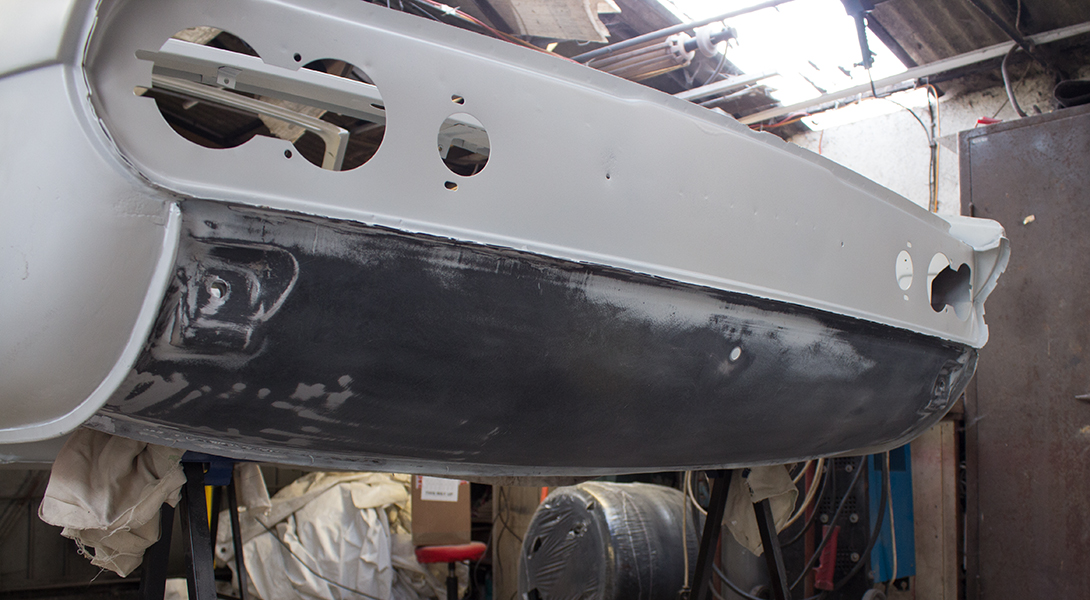
Underside prior to stripping…
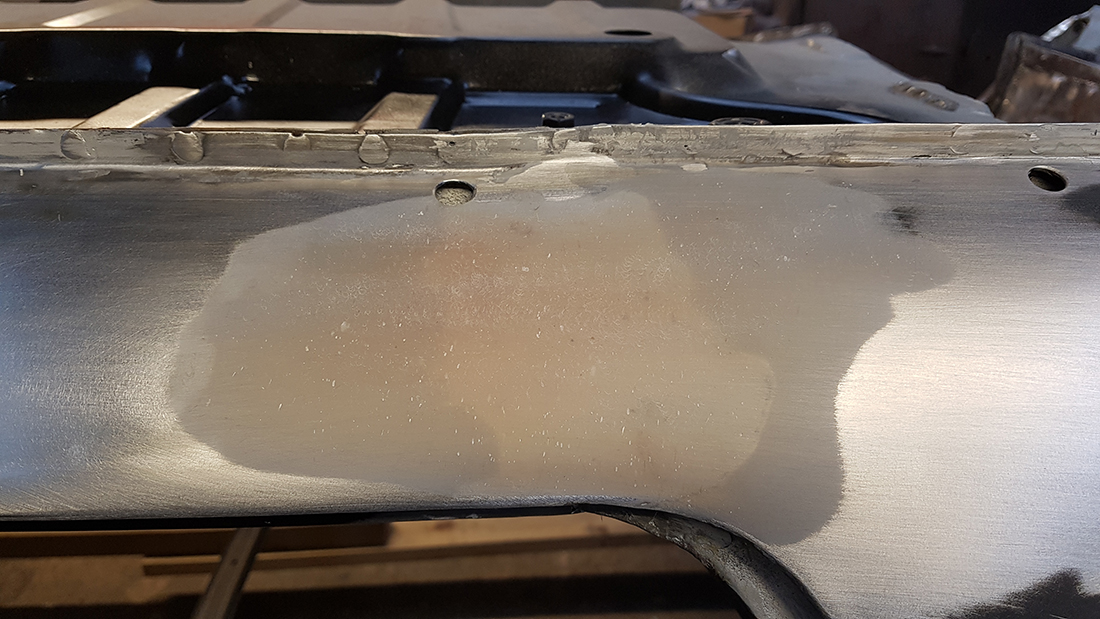
Almost there…
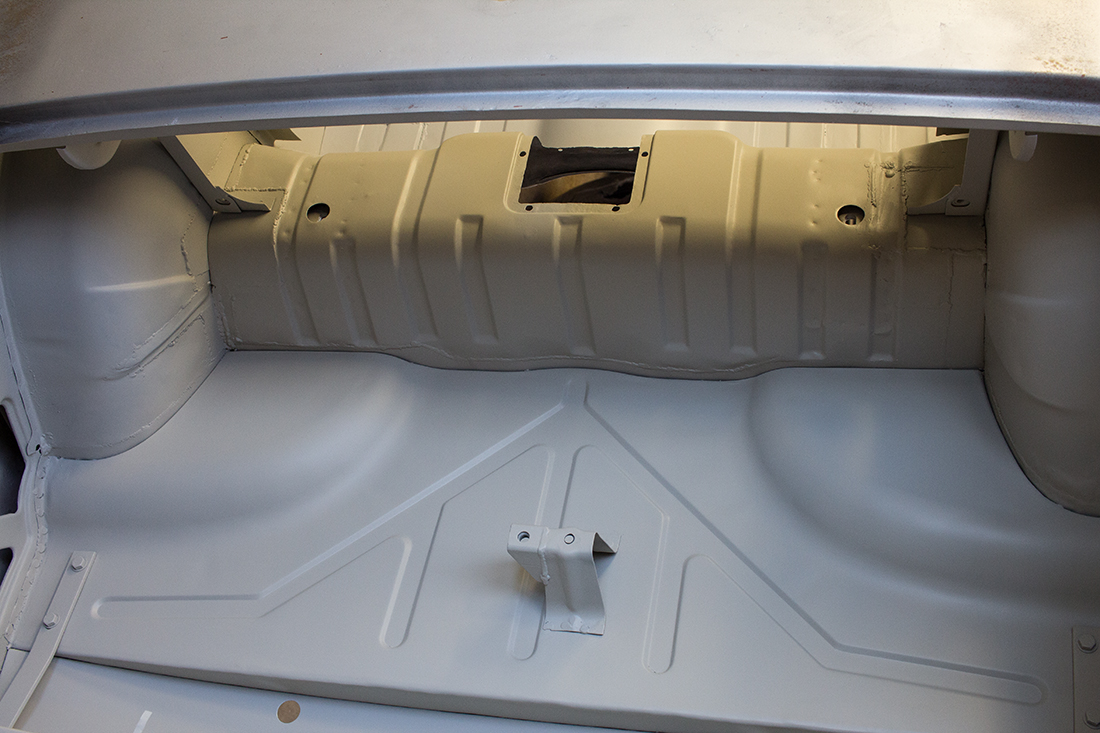
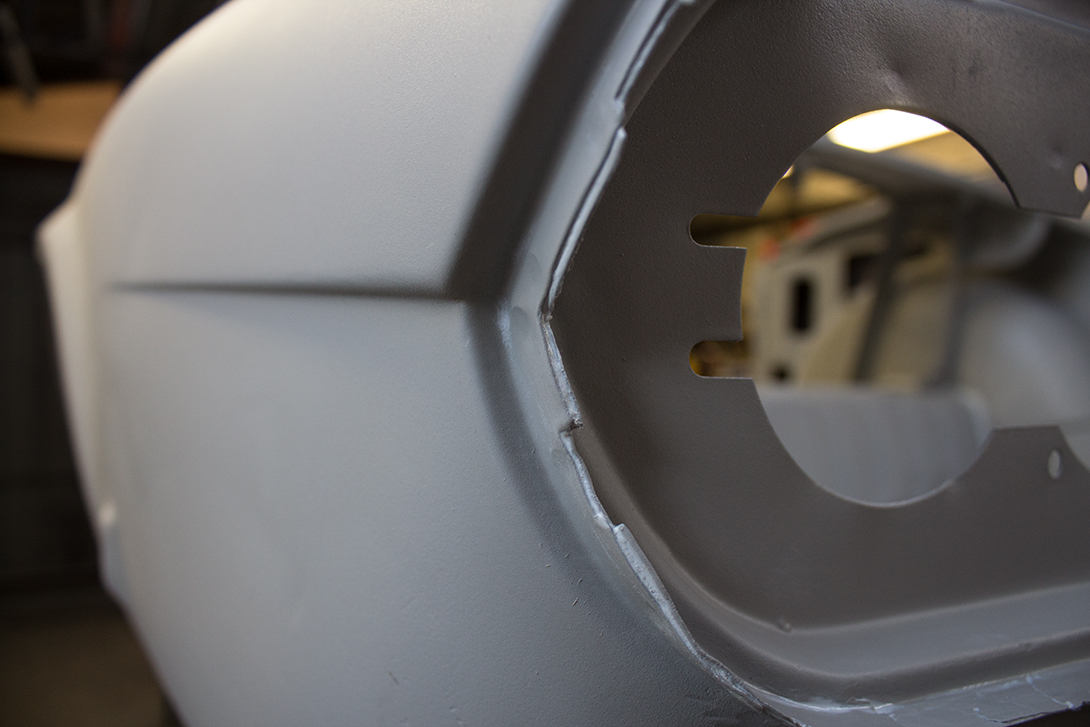
Once I stripped an area I did one last thorough clean with panel wipe in the paraffin gun and blow-dried it. HB Body 989 epoxy is what I used to prime it. I love the stuff, it goes on really easily and will stick to anything. Seeing the uniform colour of primer going on felt like a really big step (and a satisfying end to all that welding!).
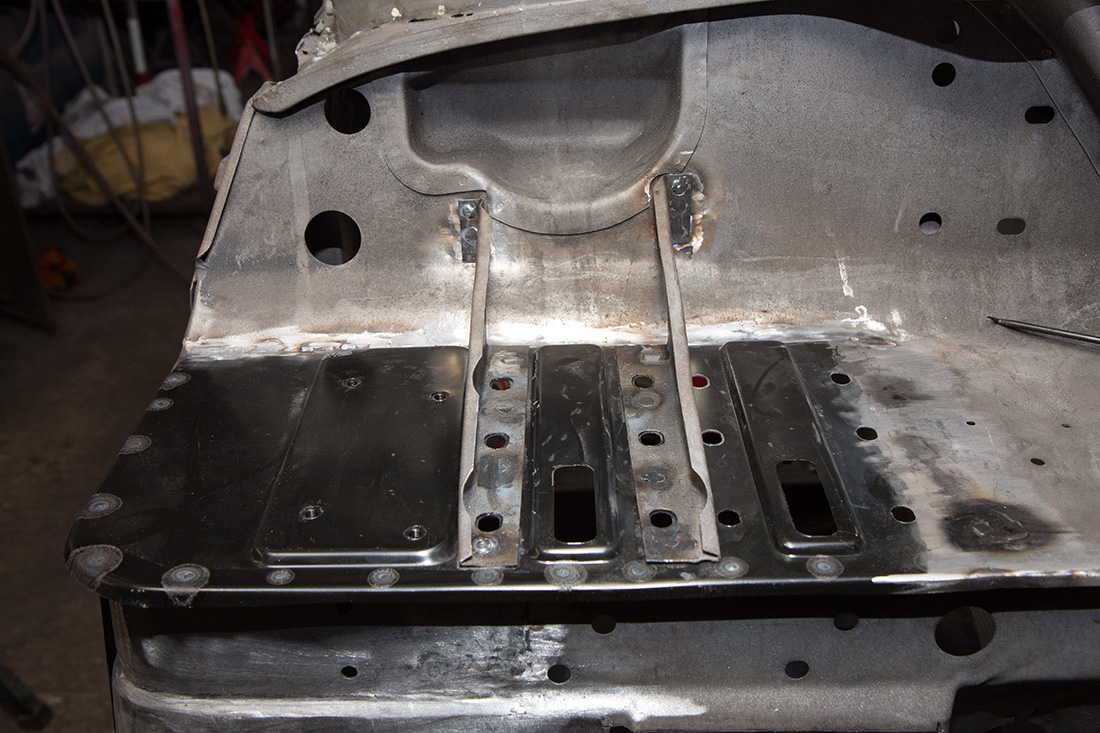
I carried on working my way around the car and seam sealing the areas I’d done the previous weekend. I used Upol Tiger Seal as a seam sealer since it can be used in a caulking gun. Just a bead down the seam followed by running over it with your finger and it looks pretty neat in most places. I found a rag with some panel wipe on it really helps to smooth it over and take off the excess from the surrounding area as well which leaves a nice neat job.
I pretty much seam-sealed anything I thought may see the slightest hint of water including seat belt mounting plates and chassis mounting plates. These areas clearly suffered before because water was able to get trapped between the spot-welded panels and ate the shell from the inside out so I took no chances and seam-sealed everything.
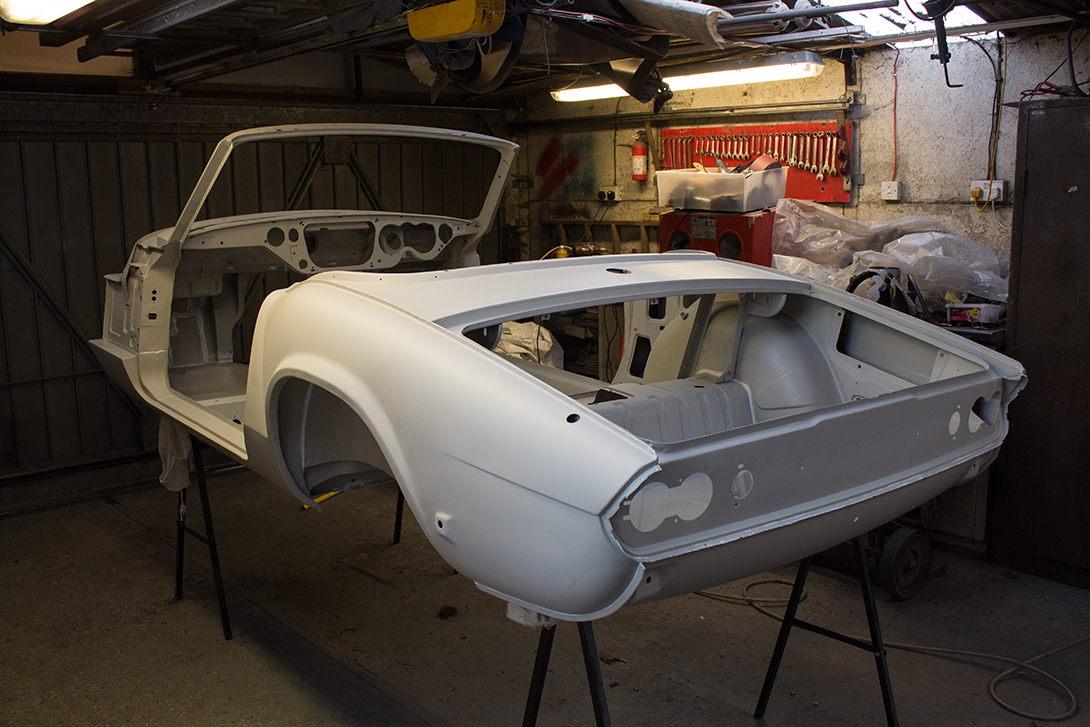
I hoisted the shell out of the rollover jig and primed the final parts that were concealed by it. Finally, I’d finished priming and seam sealing. My plans for the next stage will be tinted Upol Raptor on the underside. Inside the shell just some prep, maybe another coat of epoxy before top coat. The rest will get high build primer, filler and flatting before top coat.
I stopped keeping track of the hours I spent on it after a while but I estimate it took me around 400 hours and almost a year to get the shell to this stage. I’m a bit behind where I thought I’d be but I’m really pleased with the result. On to the chassis and running gear in a couple of weeks.
8 thoughts on “Spitfire Body Tub Repairs”
Absolutely outstanding I would be lost without your clear concise methods of fabrication.
Thank you for sharing your knowledge experiences.
Appreciated.
Graeme
Glad you found it useful, Graeme. Thanks!
Wow, you are definitely passionate about what you do, dedicated? Very impressive. Couldn’t help asking myself why you chose a body in such bad condition to start a restoration with. . nice work.
Thanks, Greg. The body just happened to be the one I bought with the car, 17 years ago 😉
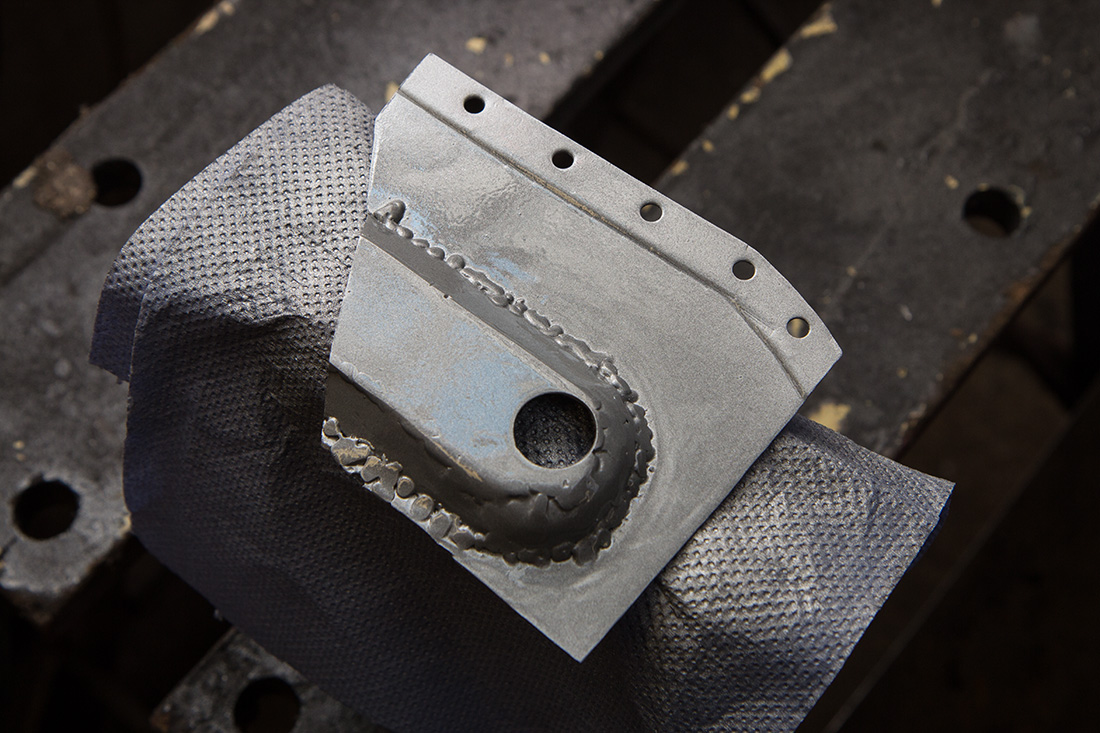
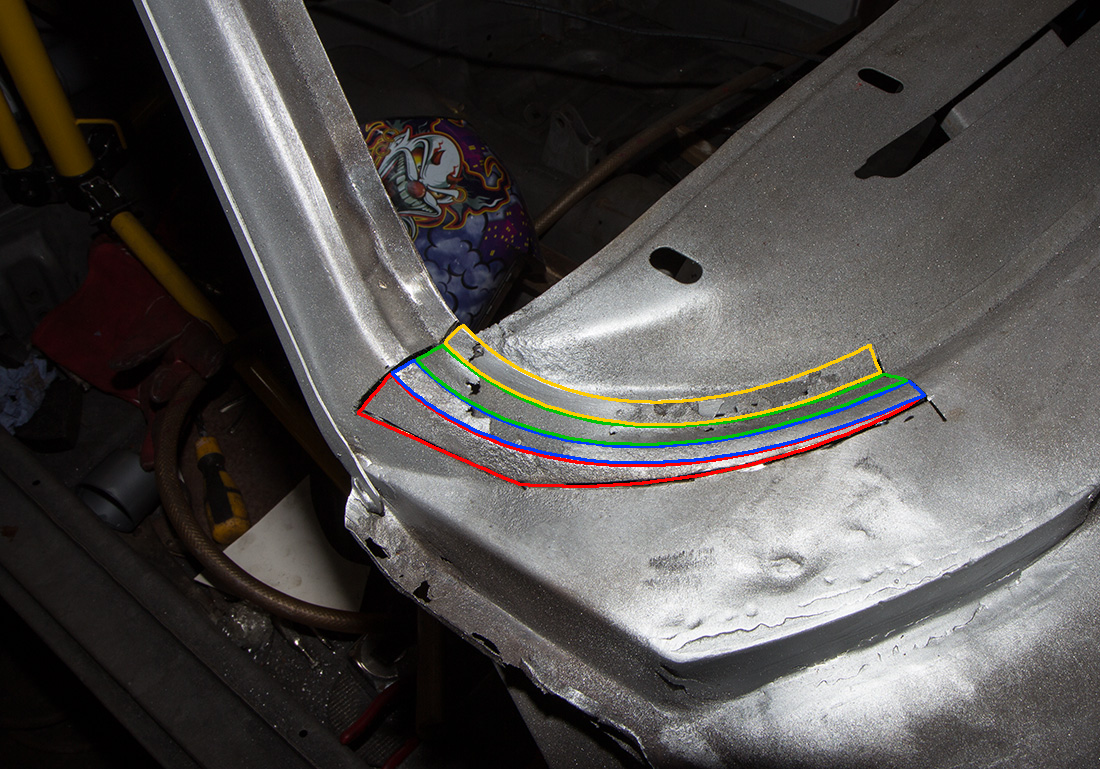
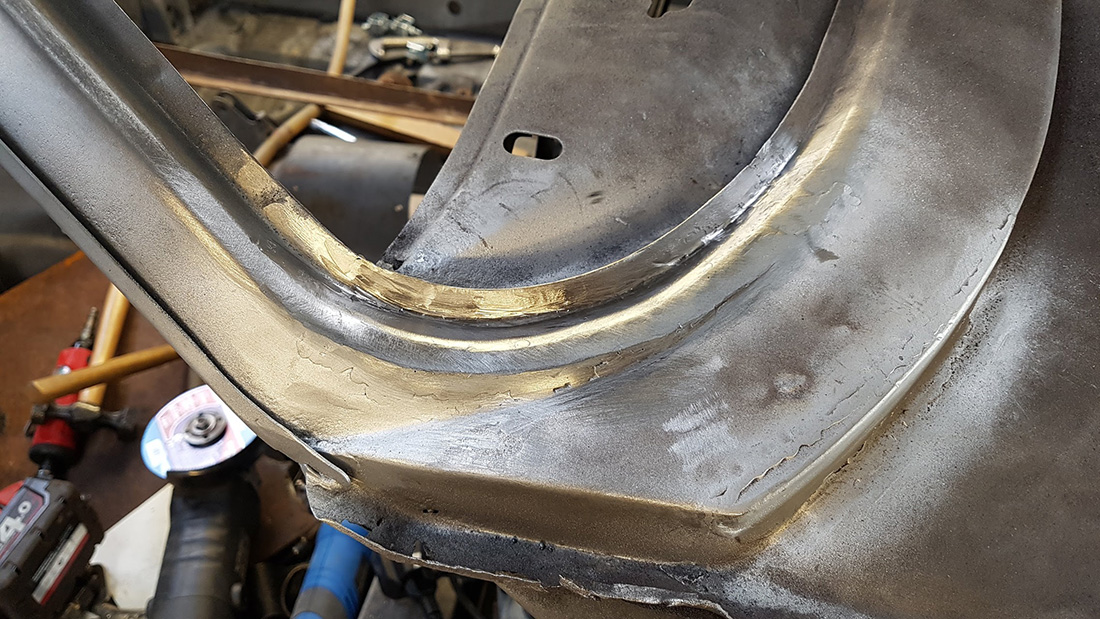
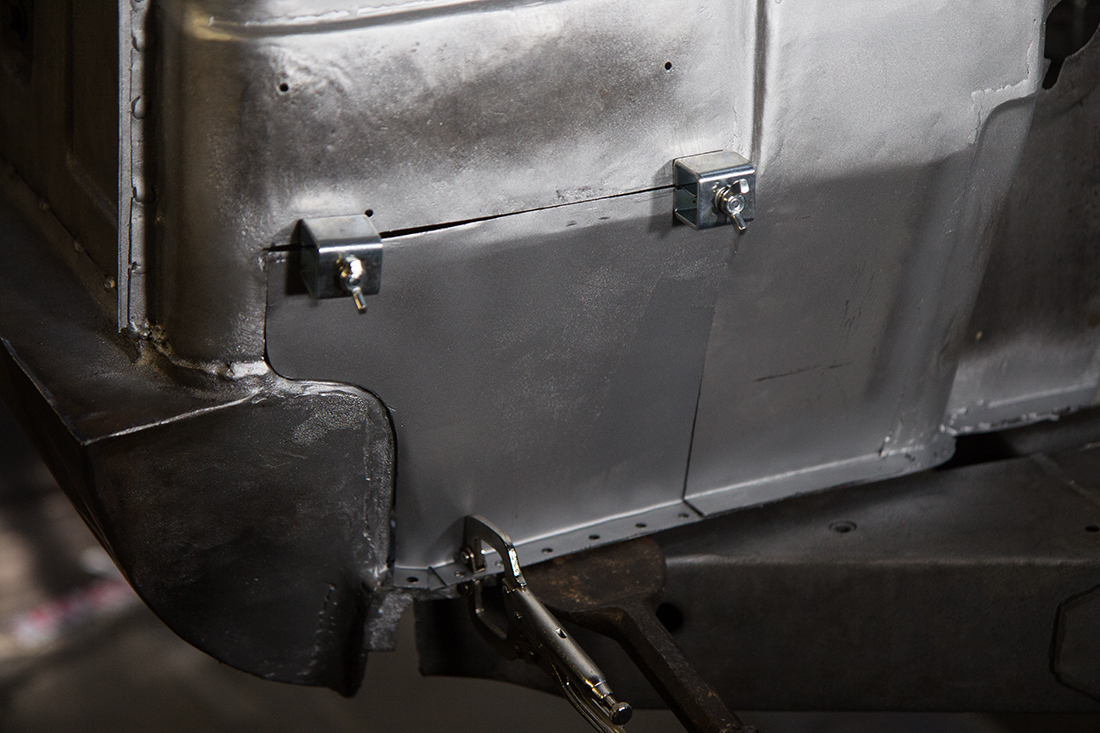
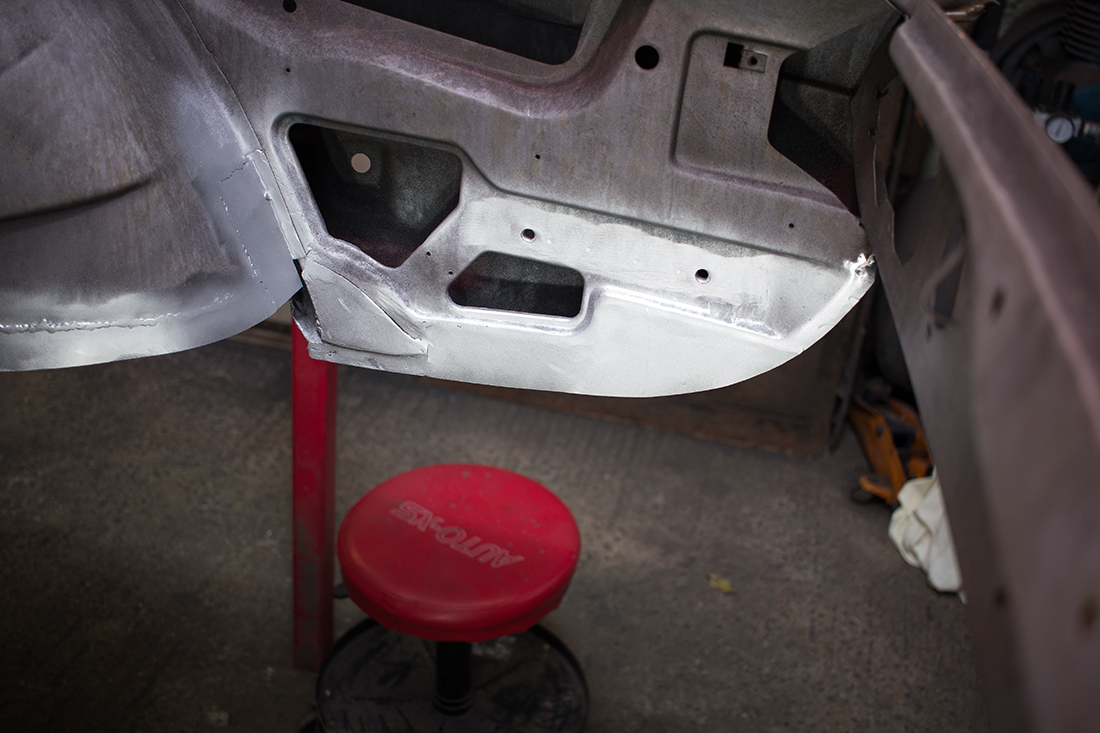
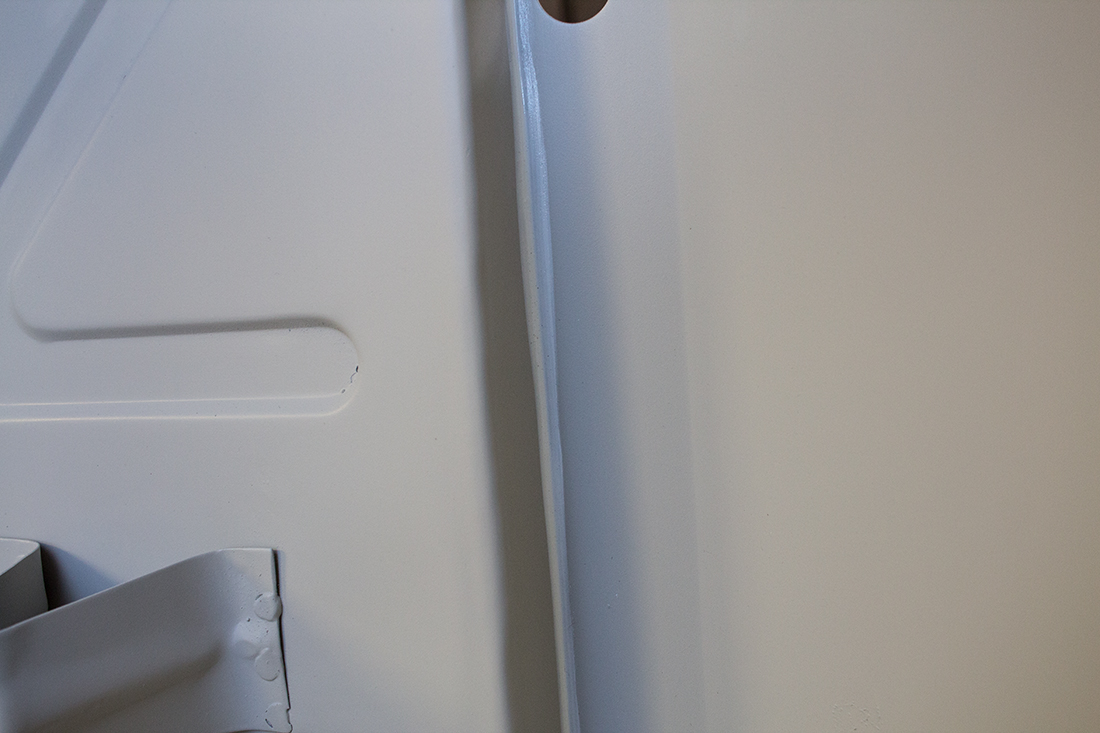
Outstanding ! I’m so pleased to find this site as I’m in the process of doing the r/h sill on my 1500 and seeing the front b/head corner as it should be, vs the rusted remains, helps greatly with the work. The photos are really good and makes the repair work easier. Do you have any showing close-up of the body support on the front corner ? Thanks-
Thanks, Peter. Is this the area you mean?
I’m a total novice, however bought a GT6 to restore with some serious bodywork required. Similar to how yours was I guess. Very very impressed with the work reflected in your blog.
Punting around coachwork /welders/ resto companies to get quotes has been frightening ie huge££££..! Much more than I originally envisaged, but then the amount of rot is more than I initially understood there to be..
I’m thinking the only way I can afford to complete the resto is do the body work myself, and just punt out the spraying.
How many hours do you believe you have spent on body work alone? I’m guessing you have significant welding experience?
Could a novice, with a bit of common sense (sort of) take this stuff on….
Cheers
Hi,
It’s difficult to estimate total time spent on the bodywork. Welding the body was in the region of 400 hours so I think all in, welding, prep and painting is probably at the 2000 hours mark.
I had no prior experience restoring cars and I knew how to weld but nothing on this scale. My welding has improved a vast amount as a result.
I would say go for it if you’re good at working methodically.