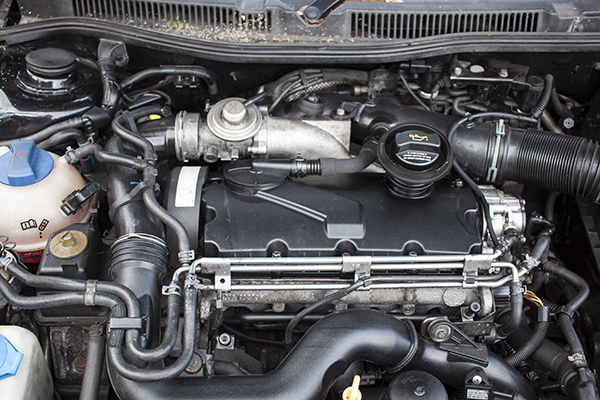
I bought a MK4 Golf TDI last year, the 150 BHP version. Everything looked good on paper and it test drove well. I know that they suffer with camshaft issues but this one had a new camshaft installed fairly recently with some work done to the injectors also. It had all the extras I wanted, climate control etc.
The camshaft does two jobs on the VW PD (Pumpe Düse) engine. It operates the valves. Secondly it operates a high pressure pump on each injector. They produce higher fuel pressure than the previous generation of diesel engines and that means better atomization of the fuel, more power and efficiency. Because of this there’s less room on the camshaft for each lobe. The lobes are quite narrow and are under a lot of stress so the engine needs regular oil changes with very specific oil. Everything you ever wanted to know about the PD engine can be found in this PDF!
Back in June the car broke down, very rough running and a lot of white smoke. The engine wouldn’t rev up properly and had little power. Fortunately we got a tow home but I had a lot of diagnosing to do.
I tried a few things to start with. I checked for continuity on the injector loom, that was fine. I also fitted a transparent fuel return line to see if any air was in it but that was okay. I inspected the camshaft and injectors, ran some diagnostics with the VCDS software and sought some help from the UK-MK4s.net forums. Eventually I came to the conclusion that it was the camshaft wear that was the root cause of the problem. The cam had developed flat spots on the injector lobes which was giving the injectors a rough time. Eventually the injector seals started to give up. Clearly some have got so bad that it’s now affecting the fuelling. I think in my case the seal closest to the cylinder must have gone and that cylinder is being over fuelled resulting in a lot of unburned fuel. The injectors are all fed from the same supply so I think if one injector seal has gone, potentially other injectors could be starved of fuel which could explain the slightly random symptoms I’ve been seeing.
The camshaft that was fitted previously must have been poor quality to develop flat spots as bad as this. That and the use of the wrong oil or not changed frequently enough. There’s also a lot of wear on the valve lobes. One of them to the extent where you can see metal fraying off the edge of the lobe!
So the plan is to change the camshaft, cam followers, injector seals, timing belt with tensioners and the water pump while I’m at it. The rockers, injectors and cam carriers are held in place with stretch bolts so new replacement bolts are necessary. The manual calls for several special VW tools but all you might need that may be slightly unusual is the timing belt lock kit (not entirely necessary but makes things a bit easier), a camshaft pulley puller (although this one is not actually the correct sort for this engine, more on that later) and a 12 point triple square bit set. You’ll also need a torque wrench that goes down to 8Nm for some of the smaller stretch bolts.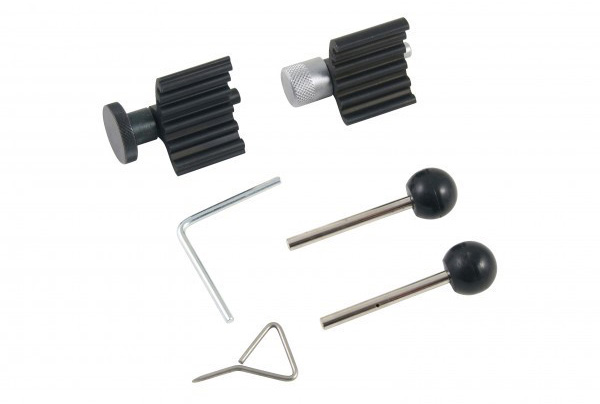

I’m using a Haynes manual for this mainly which seems to cover the subject quite well to be fair. Sometimes Haynes manuals just don’t go in to enough detail, something I’ve found with the Spitfire but for the purposes of this job it seems to be fine.
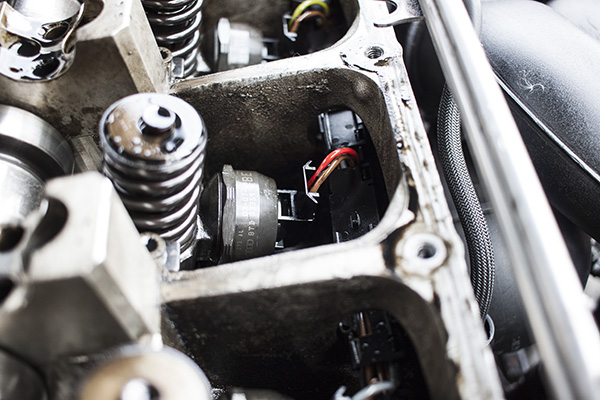
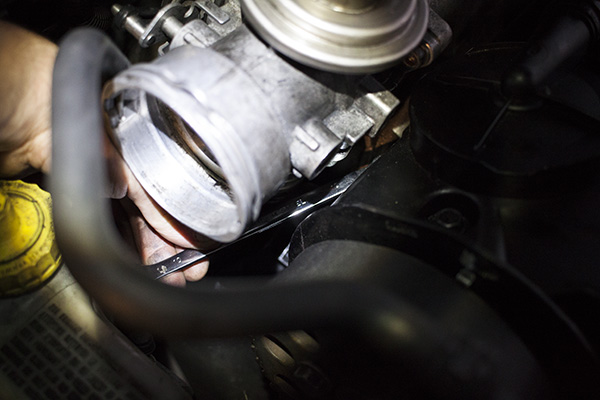
First step is to remove the plastic engine cover which just pulls off. Next is to remove the cam cover and the large rubber hose that feeds the inlet manifold from the intercooler (10mm bolts). You’ll find the bolt nearest to the EGR valve at the back is a bit tricky to get to so you can either take the EGR valve off or once the intake hose is off you can just about get to it with a 10mm ring spanner. I took the EGR valve off mine while I was trying to diagnose the issues. Just as well because the valve was actually stuck closed and it needed a good clean out.
You’ll need to remove the timing belt cover as well, there are just two spring clips that hold this in place. Once the cam cover is off the injector rockers need to come off. The rockers come off in pairs and are held in place with eight 12 point stretch bolts. Working on one pair at a time, I slowly loosened each bolt to remove the rockers nice and evenly.
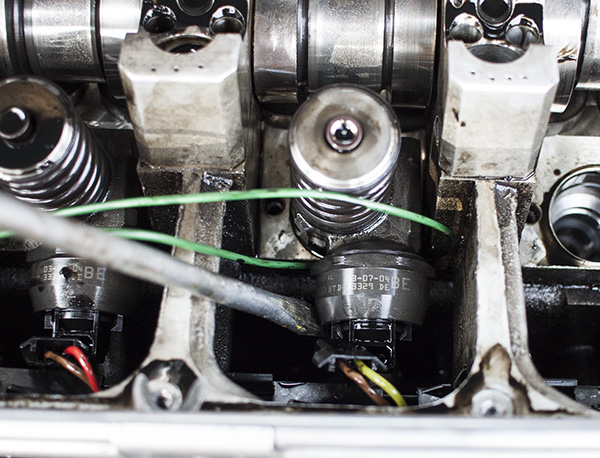
Once the rockers have been removed we can moved on to removing the injectors. Each one will need disconnecting from the injector loom to start with. This can be a bit tricky to get off but they just have a tab that you press in. Bit of a wiggle and they should pop out.
Each injector is held in place with a clamp and stretch bolt. Once the stretch bolt and clamp are removed, you can rotate the injector left to right a few times by levering it with a screwdriver. This should loosen the seal enough to pull it out. VW recommend the use of a slide hammer to remove the injectors but I found it fairly easy just by looping a piece of wire under the solenoid and wiggling them out with a screwdriver while pulling on the wire.
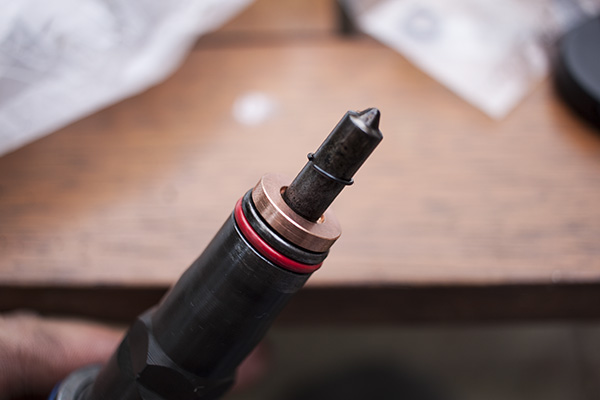
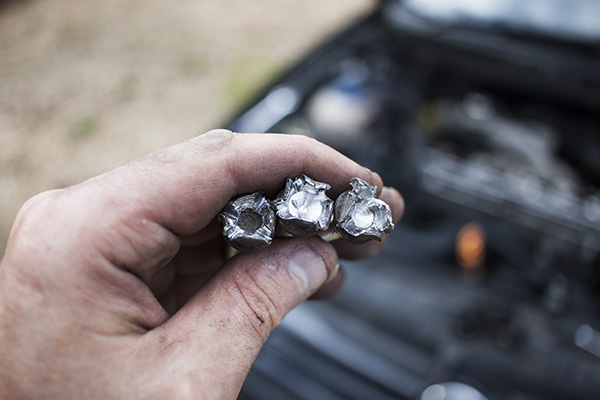
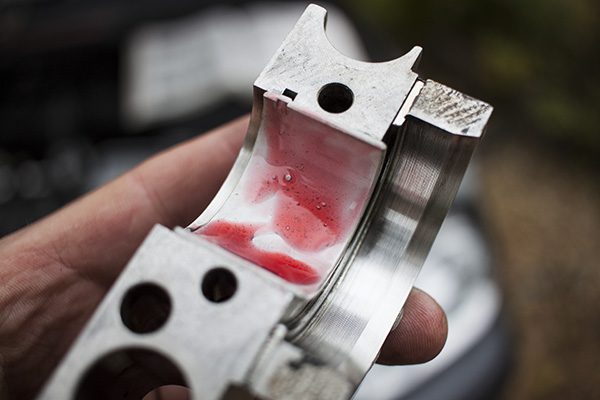
The seals on two of the injectors were in fairly good condition but the other two were knackered. You can see where the lowest seal has just perished. The top two seals seal off the area where the fuel return outlet is. Just beneath that, on the smaller diameter part, are tiny perforations where the fuel supply is drawn in to the injector. The issue here is that the lower seal has gone and excess fuel is getting in to those cylinders while at the same time potentially starving subsequent injectors of enough fuel. Although I’m not entirely sure about the starvation, that depends if the fuel pump can keep up.
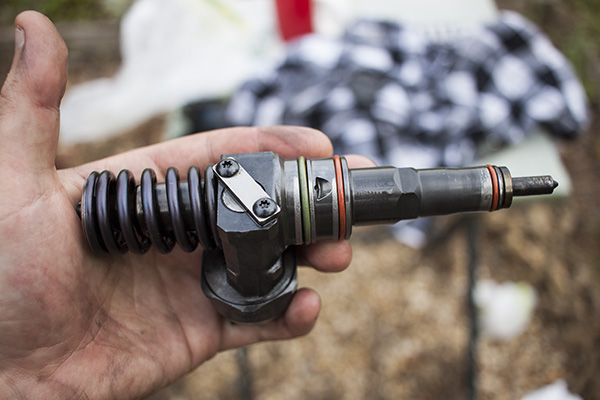
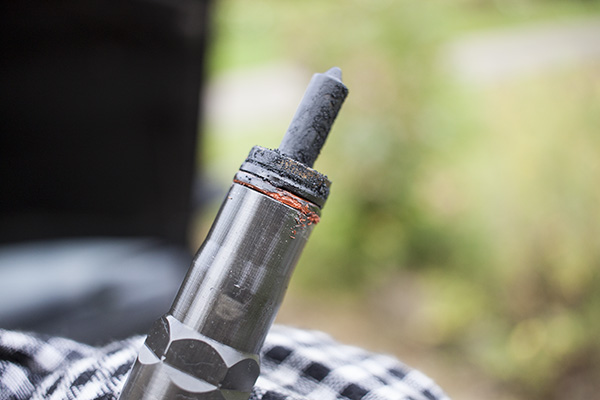
The brass part at the end is actually what seals the combustion chamber but in some cases that clearly wasn’t making a tight seal.
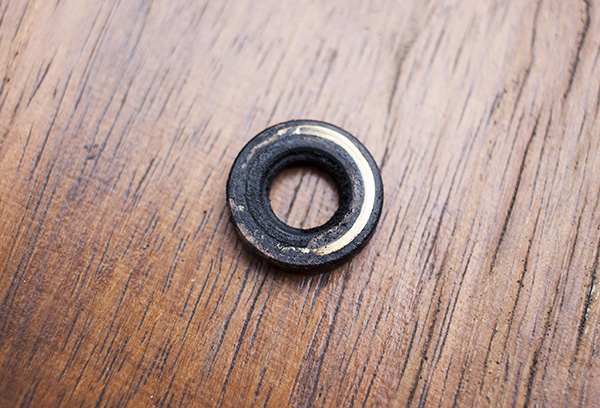
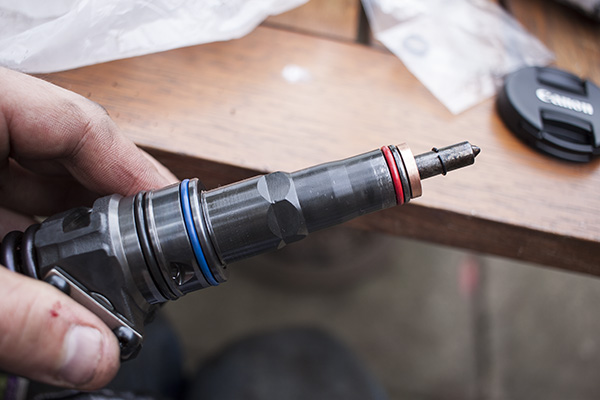
I cleaned the injectors up well and removed most of the carbon deposits from the end. You’re supposed to use a special tool to fit new seals here but from what I can gather that’s just to help you get them on without being twisted. This is easily done if you are careful, you don’t need the tool. Just look closely at each O ring after you have put it on and make sure the mold line is straight all the way round. The brass washer can be removed by gently putting it in the vice and twisting it off. The new ones should come with a tiny circlip to hold them in place. The small O ring obviously fits at the end, the slightly thinner of the two large O rings goes in the middle and the thicker one at the top (nearest to the spring).
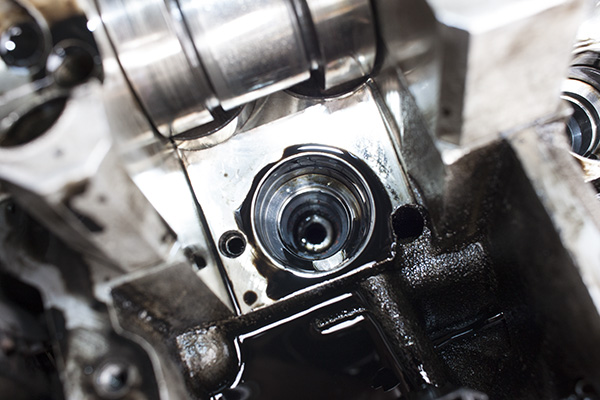
The holes that the injectors fit in to will need a thorough clean but with care because any slight damage in there could wreck the cylinder head. I used some kitchen roll and a small piece of tubing to try and clean the very bottom of the holes out, making sure that there wasn’t any debris left in there. Any small bits in there could prevent the O rings sealing properly. I stuffed kitchen roll in each hole until I was ready to fit that particular injector. If you look closely you can see bits of O ring stuck to the sides in this one, all that was cleaned out.
 I smeared some engine oil round the O rings before fitting the injectors which should just slide in to a point. Make sure they go in nice and square then apply some pressure and you should feel them kind of click in. Now they need aligning. The manual gives you a measurement from the right hand edge of the cylinder head so you can make sure each one is in square. I don’t think this is entirely necessary though as it’s just to make sure that the clamp is lined up correctly. If you have a pretty good idea of how they were before they came out, I think you can get away with squaring them up by eye. Once each injector is square the new bolt needs tightening to 12Nm plus 270°. Reconnect the injector loom and then it’s on to replacing the camshaft.
The auxiliary belt needs removing next which means the tensioner needs moving out the way. There’s a square bit of alloy sticking out from the top of the tensioner which is for a spanner to make it easier to move. Once it’s out the way you can either slide a drill bit through the hole in the side to lock it in place or just remove the belt and let it go back in to place.
The lower auxiliary belt pulley needs removing now. This means you’ll have to jack the offside front up and get it on an axle stand. Remove the front wheel. Behind the alloy intercooler pipe is the pulley. Usually this should have a plastic cover over the bolts to protect them from water and road grime. Someone had forgotten to put this back on my car so 3 of the 4 cap head bolts holding the pulley on had to be drilled out. I was running out of sharp drill bits and had to mess around with a chisel to get them out. Got there eventually.
You should be able to prize the pulley off one bit at a time. Once that’s done then it’s time to remove the lower belt cover (4 lower bolts, one higher up) and lock the crank at TDC. The Haynes manual states that you need to remove the inner wheel arch cover. You don’t need to do this but it was just as well on my car. A load of road grime had built up behind it over the years and I found some rust that needs treating.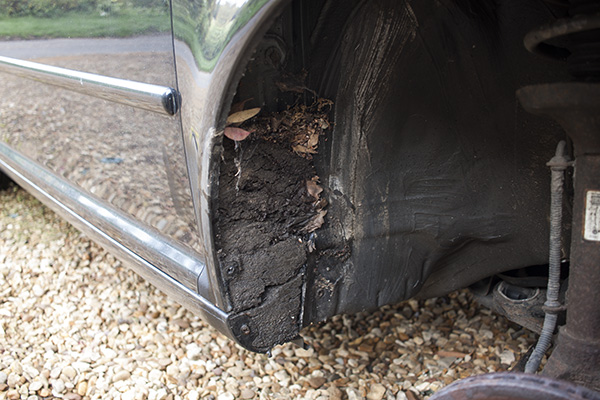
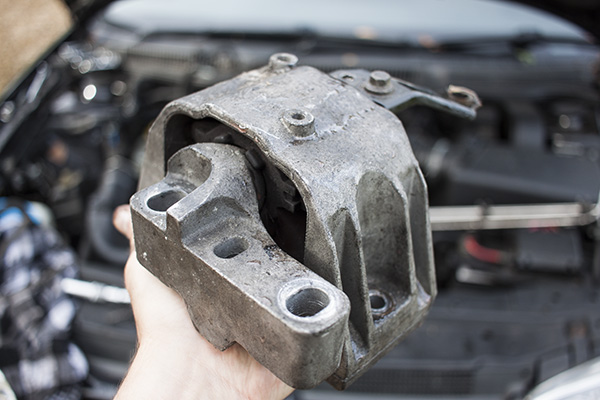
The engine needs supporting with a jack next as the engine mounting needs to come off to remove the timing belt. This was a pig of a job. I had to remove the auxiliary belt tensioner, expansion bottle and fuel filter to get to the engine mounting bolts. They were bloody tight as well which made it that bit harder. Got there in the end…
The engine mount bracket that is attached to the engine doesn’t seem to want to come out. The only way I could see of removing it would be to remove all the plastic belt cover. This makes getting the belt tensioner out a little tricky. I managed to get it out in the end and refit the new one by removing the stud. If you can get two nuts on the stud and remove it with the old pulley on I think that must be the easiest way of removing the pulley.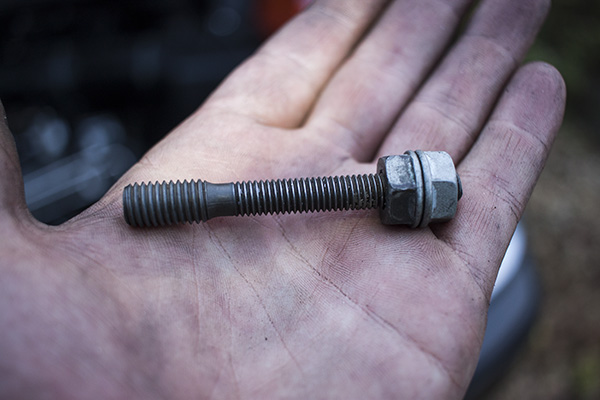
Once the tensioners are off you can change the water pump which has just 3 bolts. It came out with some wiggling. Clean the bore out and bolt the new one in with a new O ring.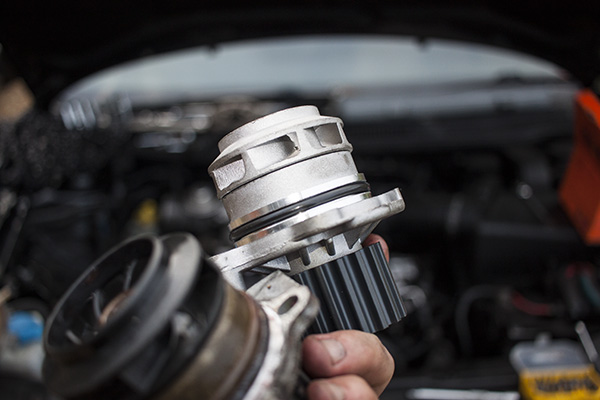
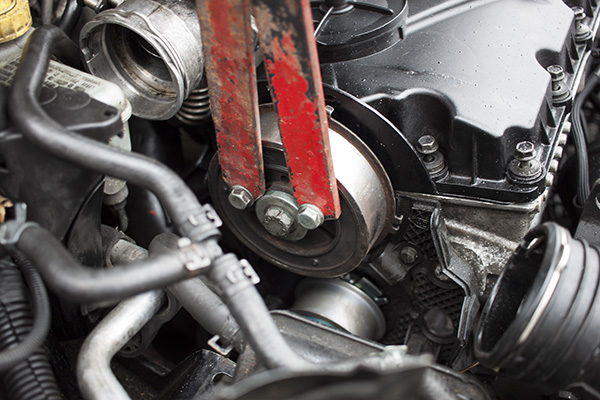
Now the camshaft pulley can be removed. First the 3 bolts can be removed and the toothed pulley can come off. The pulley underneath the outer toothed part is secured by a bolt in the centre. A very tight bolt! I made up a device to bolt on to the pulley to give me some leverage. Most people seem to have made something similar…

Once the bolt is off you can remove the pulley using a puller. As it happens the one mentioned above isn’t the right sort for this engine but it worked a treat anyway. I just removed the legs and bolted it straight on to the pulley. When the pulley has been removed the tandem pump needs removing. This must be removed so that the new camshaft is in the correct position when tightening the cam carriers down otherwise some of the valves may foul a piston. I suppose you could rotate the crank 90° so that all the pistons are half way down the cylinders but I’m still not sure how easy it would be to tighten the caps down evenly.
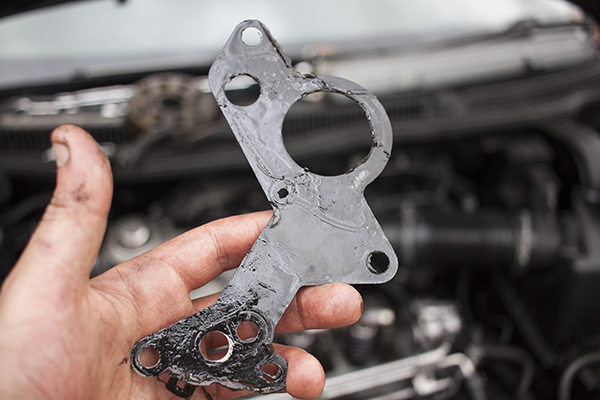
To remove the tandem pump, first unbolt the water pipe below it. Then you can remove 4 bolts to move the tandem pump out the way just enough so the part that engages with the cam is clear. Remove the metal gasket which will either need replacing or cleaning up and refitting with some instant gasket.
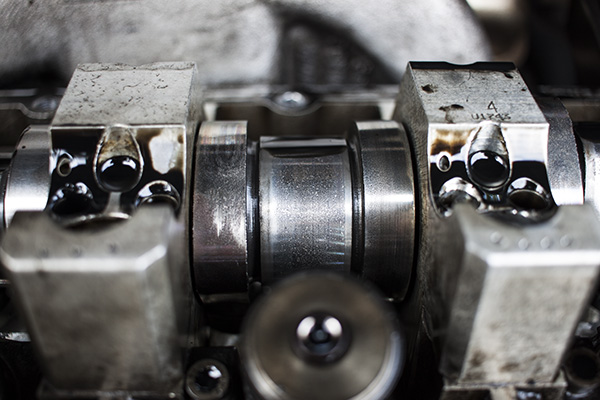
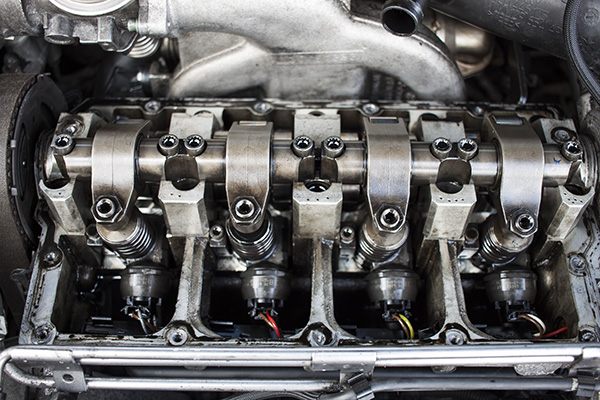
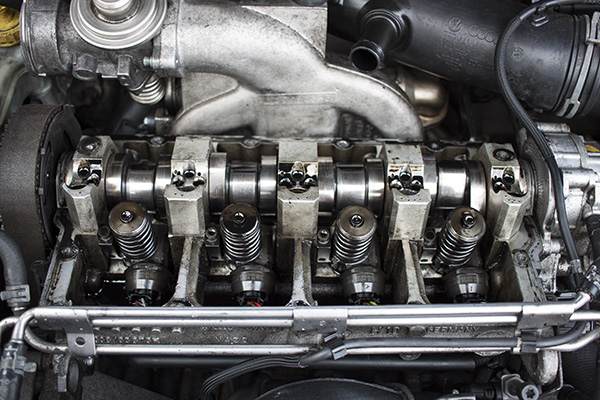
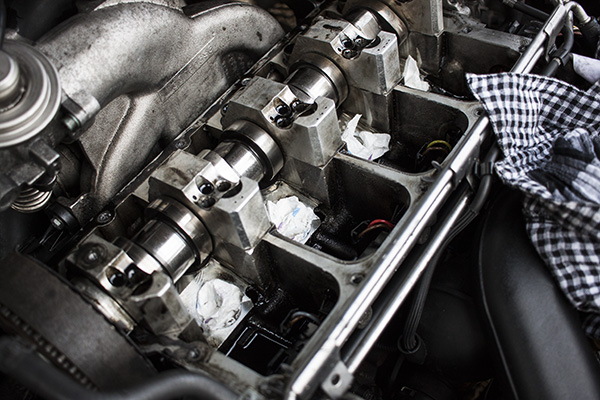
The camshaft carrier caps need marking so they can be put back in the same spot. The first one is closest to the timing belt, the fifth one is closest to the tandem pump. Removing and refitting needs to be in sequence also. First slacken off 1, 3 and 5 nice and evenly. Then 2 and 4 can be removed evenly also.
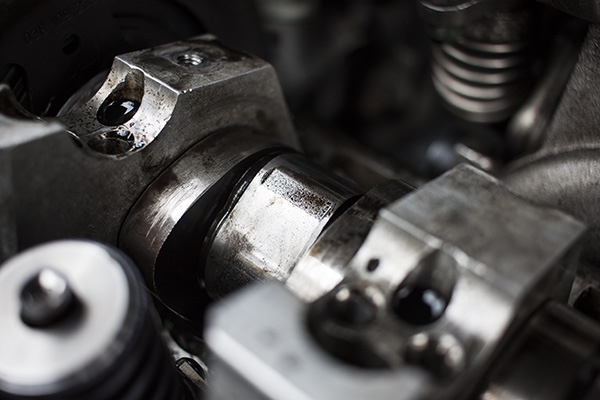
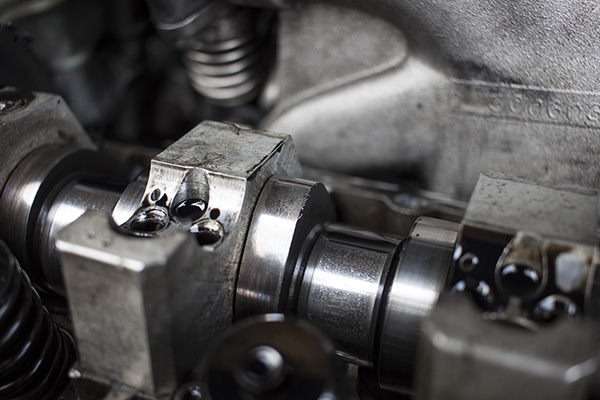
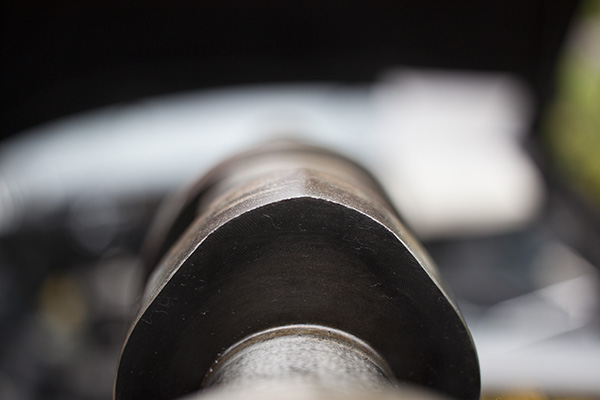
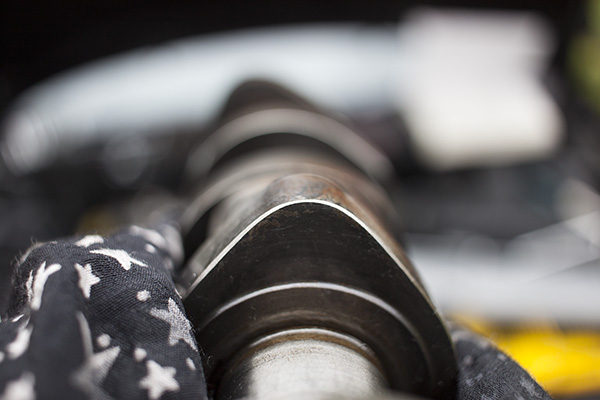
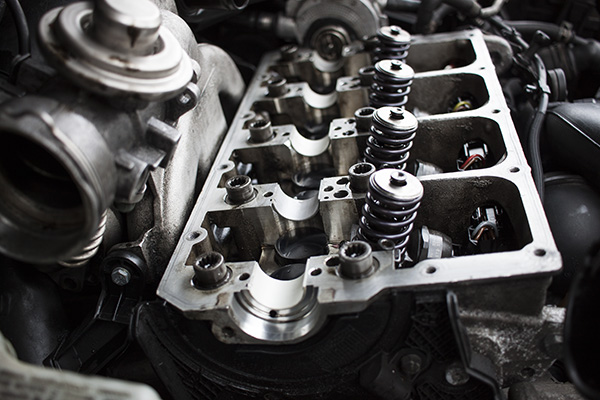
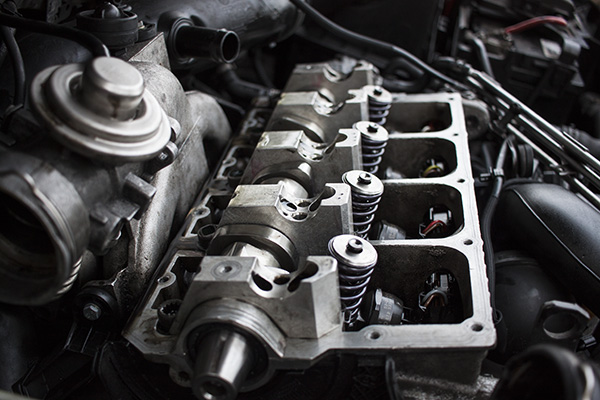
Now you can inspect the cam properly. Mine is definitely past it. You can see that some of the lobes are quite misshapen. There should also be an even chamfer all the way round the edge of the lobe. Some lobes were fine, others were not. I wouldn’t be surprised if I was losing some power here. The worn lobes can’t have been lifting the valves anywhere near as high as a normal one.
I cleaned up the cam carriers and fitted new bearing shells. I also fitted new cam followers. These are supposed to be submerged in oil for a while before you fit them but I found it easier to submerge them and pump the air out manually. The old ones weren’t too bad really. A bit of wear on the top but certainly not deformed or cracked which seems to happen to some PD engines. I did notice that these were the hardened black variety though.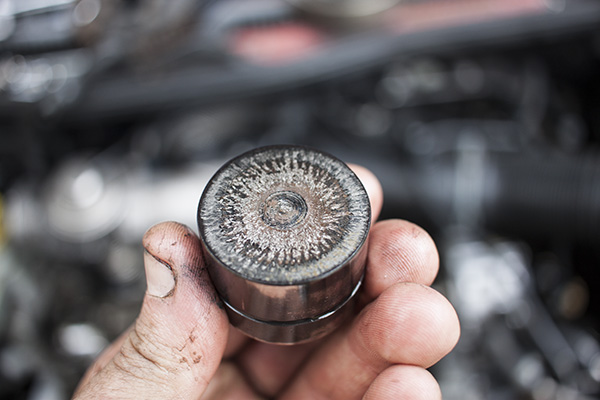
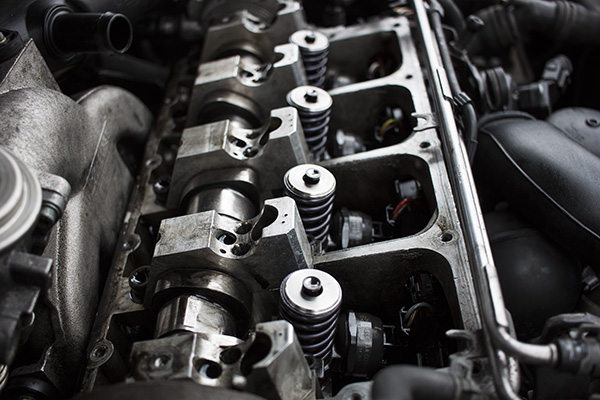
Here’s the new followers ready to go in and after they have been fitted along with new cam bearings.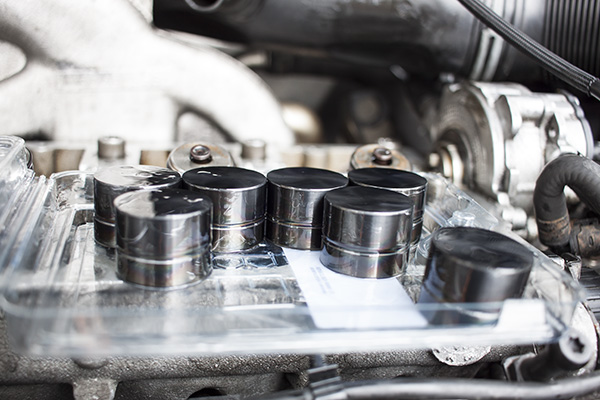
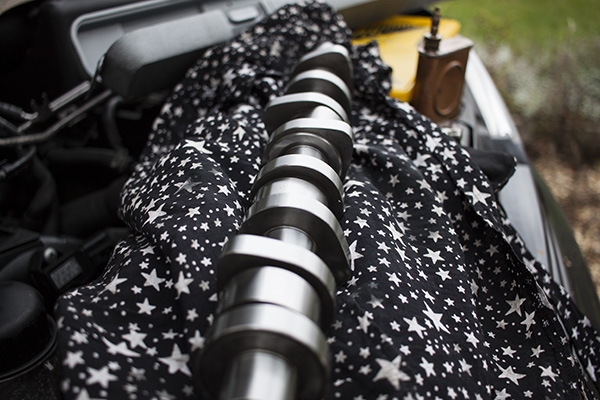
The camshaft kit I bought came with followers, camshaft, camshaft seal and shell bearings. The red stuff is the special cam lube they supply with the kit. You can see how different the lobes on the new camshaft are. Hopefully it should make a fair bit of difference to the way the car drives afterwards.
Once you have dropped the cam in fit bearing caps 2 and 4 with new bolts. Torque them down to 8Nm plus 90°. Then 1, 3 and 5 can be fitted with new bolts and torqued down evenly. The oil seal needs fitting before cap 1 is fitted too ideally.
Now the bearing caps are on the injector rockers can go back on. The rockers will need new bolts too. The torque setting for these is 20Nm plus 90°. The tandem pump and cam pulley can be refitted now. The main bolt in the centre of the pulley torque is 100Nm. I reused the gasket for the tandem pump and just smeared some instant gasket on both sides after cleaning the mating faces up. The coolant hose will need bolting back on below the tandem pump too. I smeared a bit of instant gasket on that too just to make sure.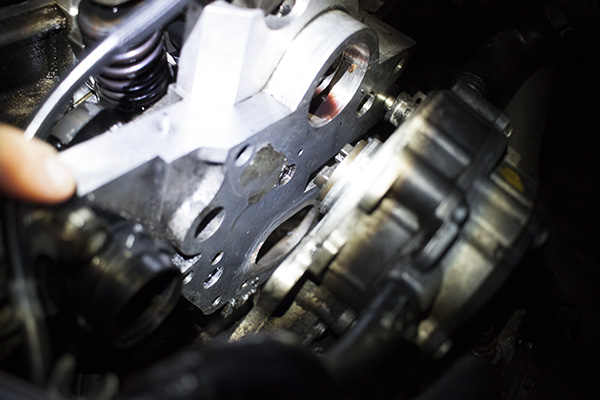
Now the injectors rockers need the clearance setting. First of all though the crank needs rotating 90° so that all the pistons are half way down the bores and none of the valves foul a piston. The clearance is set by finding the highest point of an injector lobe with a dial gauge. The adjustment screw can be screwed in until resistance is felt, then backed off by 180°. My gauge has the magnetic type base so I bolted my pulley holding tool on to the cylinder head for the gauge base to stick to.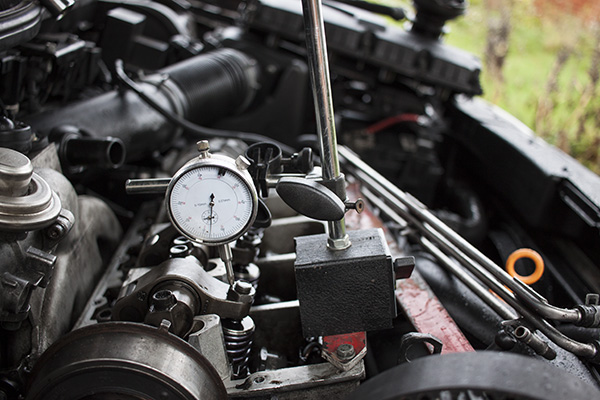
Once the clearances have been set (I went over mine twice just to make sure). The crank needs rotating back 90° and the lock tool fitting for TDC. The cam belt pulley wheel can be fitted now but don’t tighten the bolts just yet. Rotate the cam until you can fit the lock pin. Now the new timing belt can go on. This can be a bit of a pain to get round the engine mount. Once it’s in place, the tensioner can be adjusted. The kit I bought was a Gates kit and had pretty detailed instructions for fitting but all you need to do is rotate the tensioner with an allen key until the indicator is within the gap on the back plate. The nut in the centre needs tightening to 20Nm plus 45°.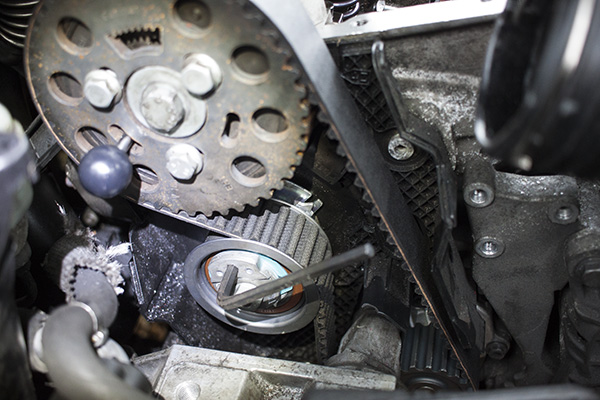
Now the locking tools can be removed. The 3 bolts for the timing belt pulley can be tightened to 25Nm. Using the crankshaft centre bolt, rotate the crankshaft two full turns and refit the locking tool. Check the camshaft and see if you can fit the locking pin here too. If you can’t (I couldn’t), loosen the timing belt pulley bolts and fit the locking pin. You might need to rotate the camshaft just a bit to get it in. Re-tighten the 3 pulley bolts and rotate the crank another two full turns. Hopefully you can fit both locking tools fairly easily now the belt has settled. This should also confirm that the crank and cam are correctly timed.
The lower and middle timing belt covers can go back on now after a clean up. There’s 5 bolts in total, two of which are shared between the two covers.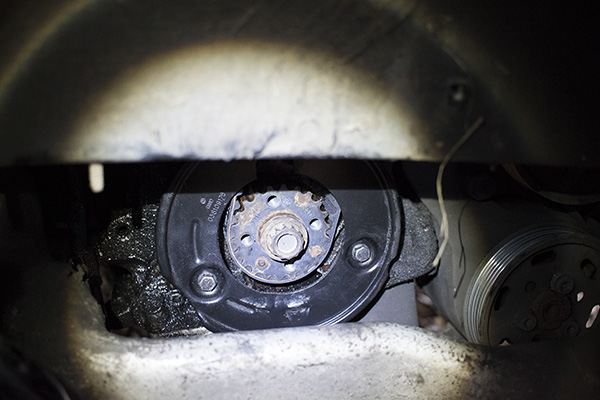
Now the auxiliary belt pulley can be refitted. It will only fit on one way as it doubles as a harmonic balancer. The bolts are tightened to 10Nm plus 90°. The plastic cover was missing on mine and I had to mess about drilling the bolts out. After the bolts were tight, I filled them with some instant gasket to stop water and muck getting in. I could easily have used silicone or something but instant gasket came to hand! Hopefully next time someone takes the pulley off they will just be able to pop the instant gasket out with a screwdriver and the bolts won’t be so hard to get out.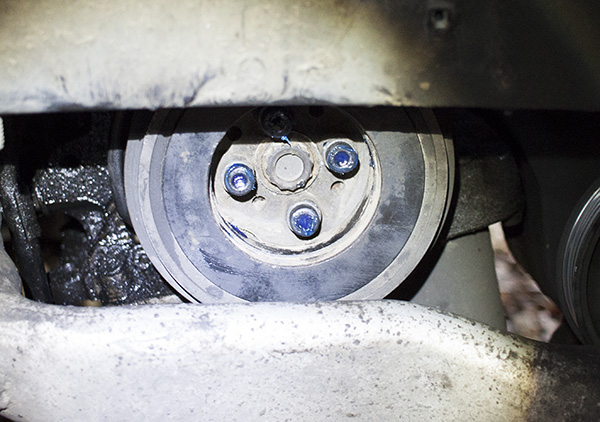
Now the auxiliary belt can be fitted. It should be fairly easy to see which way it goes on. Round the crank pulley, over the top of the alternator, round the back of the air con pump, round the bottom of the power steering pump. Hopefully that makes sense! The tensioner can be fitted now. It will be easier if the locking pin (or in my case, a drill bit) is in place. All you have to do once the bolts are tightened then is lever the pulley back a bit with a spanner and remove the pin.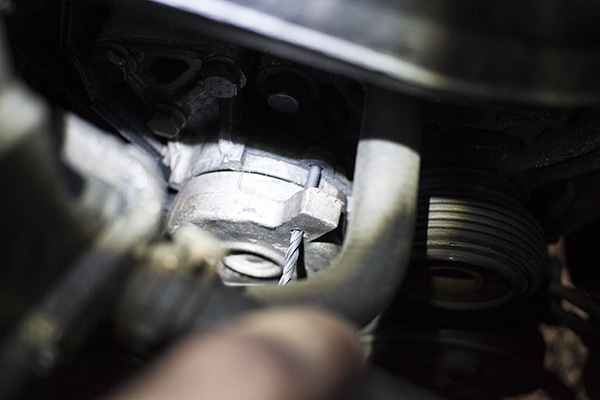
Next up is the cam cover. I put a bit of instant gasket around the curved parts at each end just to make sure it seals OK. All the bolts should be fairly accessible. There is a slightly tricky one near the EGR valve but you can just about get a ring spanner in there.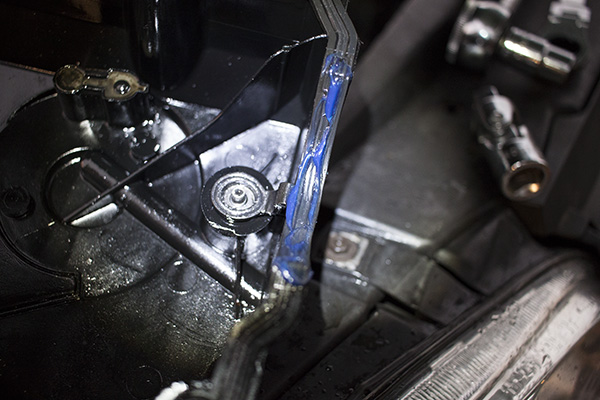
The engine mount can be bolted back on now which is considerably easier than removing it. Torque for the bolts—bracket to car body (wheel arch), 40Nm plus 90°. Mounting bracket to engine mounting bracket bolts, 100Nm and engine mounting bracket bolts to engine, 45Nm.
Only a few bits left to do now which include the remaining timing cover, air hoses and wheel arch cover. The fuel filter and lines need reconnecting. I also did an oil and filter change at this point. Not much point in doing all this work only to let crappy old oil circulate the engine. Time to turn it over.
Mine turned over several times for a fairly long time but nothing happend. I then realised that the fuel filter was empty. The tandem pump doesn’t seem to work if there is air in the line. Fortunately I had a small 12v pump. I was able to bypass the filter in the supply with the pump and turn the engine over with it running. This was enough to prime the tandem pump. You can get these small pumps from eBay for just a few quid.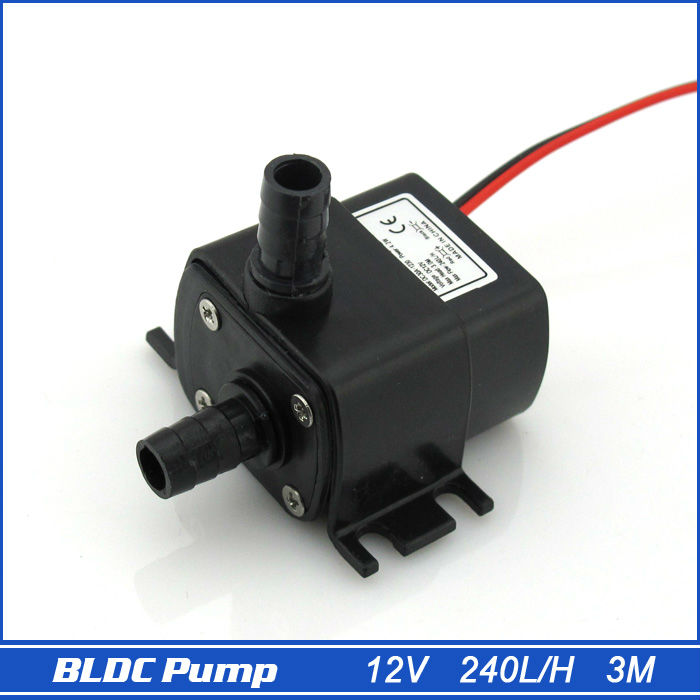
I reconnected the fuel filter and tried again, it fired up this time. I tried to rev it a bit but it died, not that surprising because the filter was probably still not quite full and needed time to purge all the air. A few more tries and it was running beautifully but with one exception…
It was STILL smoking heavily. I couldn’t have been more annoyed! It was thick white smoke, the same as I’d been seeing before. I got the car fully warmed up and took it for a run, it cleared up a bit and was now producing smoke but a lot less and more of a blue colour.
The next day I got the car fully warmed up again. I must have run it for an hour on the drive idling and the smoke was minimal. Another run up the road and it seems to have cleared. All I can think is that there was still quite a bit of excess fuel built up in the exhaust manifold and possibly in the turbo. See how it goes over the next few weeks but for now, it appears to be sorted.
All in all it took me about 3 weekends to finish the work. Mainly because of waiting for various parts to arrive in the post. If you definitely have everything you need though it shouldn’t be more than a weekend’s work. I have learned a lot during the process and I think I’d feel fairly confident doing it again but I hope that is never the case!
A summary of the parts I replaced:
- Camshaft
- Camshaft bearings
- Camshaft oil seal
- Cam followers/hydraulic tappets
- Injector seals
- Cam carrier stretch bolts
- Injector retaining stretch bolts
- Rocker stretch bolts
- Timing belt
- Timing belt tensioner
- Timing belt roller
- Water pump
Update:
I’ve done around 700 miles since the cam was changed. Everything seems to be fine. MPG has improved and the car definitely feels smoother and quieter which isn’t surprising. The only small issue is the engine isn’t 100% smooth at around 1100 RPM. Having connected VCDS (VAG-COM) to determine what the problem might be, I can see that the fuel compensation for smooth running (block 13) isn’t even across all injectors.
Having heard good things about it I bought some Liqui Moly Diesel Purge and ran the fuel feed and return pipes straight from a jar full until it was nearly gone. I ran the engine at various speeds and it took about 20 minutes to use it all but it didn’t make a scrap of difference. The values in block 13 are pretty much exactly the same as they were before I started. Just thought I’d share that in case anyone was thinking of buying some. I wouldn’t waste your money. At least not if you are expecting to see tangible evidence of it doing anything.
You can download a copy of the log file here – LOG-01-013-002-xxx (113277)
22 thoughts on “VW Golf TDI – PD Engine Issues”
Hi I have pretty much same as yourself. First start up on mine in morning no acceration. Replaced all seals also. One of my Injectors have normal bolt clamping down injector and rest ave stretch bolt, shouldnt think this should be my probably, also power bad,
What sort of condition is your cam in? As you can see, mine was very bad. I also ended up replacing the turbo on mine (another post will appear soon on that). My inlet manifold was very clogged up too. Got some more power back now after cleaning it out.
If you have a laptop and VCDS that would give you some clues as to whether the injectors are working OK.
Are you sure you set the lash on the injector at the highest point? Most articles I have read say to set at the lowest point, then bottom out the adjuster and then wind back 180 degrees?
Cheers
Thanks
Yes, what I mean by the highest point is the highest point of the camshaft lobe that’s operating the rocker for the injector. This is found by using the dial guage on the rocker. You then screw the adjuster in until it stops, at which point you know the injector is fully open. Then back it off 180 degrees so there isn’t any risk of damaging the injector while the engine is running and everything has expanded with heat.
Hi
so you dint replace the roller rockers even though they were runnimg on your chocolat camshaft.
Possibly a false economy?
Possibly, Roger. I did check the thoroughly at the time and decided not to replace them as they looked OK. Replacing them is another expense on an already expensive job. Fortunately both the cam and the rollers are fine as I made a point of checking them 10000 miles after this work was done when I did an oil service. Maybe I was lucky.
If I am just replacing the seals on my injectors… do I have to roll the crank back 90degs still or is that just if I am doing the camshaft at the same time. What would be the process of just replacing the seals of the injectors? Removal looks simple enough but I am just trying to work out the installation process.
You shouldn’t need to move the crank if you are just doing injector seals (assuming the timing belt hasn’t been moved etc.)
Thanks very much for your detailed post. I have a VW Transporter 2006 wth a 1.9 PD TDI AXB engine which has been giving me trouble lately, injectors and wiring loom. It was giving a misfire, which progressively got worse. Always smokey on start up if left for any period of time, say just overnight which would suggest injector seals leaking fuel into cylinder. I managed to figure out through other forums that it could have been caused by a loose connection on the loom as well. I have since bought a new loom (€100 from VW)! and got injectors out for testing and repairing (€500! :(), two were fine but two needed reconditioning, all 4 injectors got new seal kits. Now I’m wondering how the camshaft is.. as I’m a little reluctant to put the injectors back in if the camshaft is going to cause problems again! If the camshaft is worn does it throw up a fault code?
A worn camshaft won’t throw up an error code as there’s no direct way for the ECU to sense wear. It could manifest itself in other ways. Obviously in my case it accelerated injector seal failure. Do you still have exactly the same faults? I.e. smoke on start-up after standing? Does it clear up as it gets warm? Does the engine run roughly? If you had the valve cover off I would expect a worn cam would be fairly evident. One good way to check injector fuel supply and return is to install a transparent return fuel line to the fuel filter and watch for air bubbles.
no error code. when camshaft is worn you can se from 1000 rpm to 2000 loose power when is little worn and when is much worn you lose power up to 2700 rpm…. from my experience with a seat leon 1m arl 1.9 tdi pd 150 bhp.
Hi Joe, thanks for posting this up, looks like you did a meticulous job. My pd 150 golf suffered very tough running recently (virtually undrivable) and was attributed to a very worn cam at 157k miles. I wasn’t as adventurous and just had a garage replace this, followers etc and fit a new loom I’d already purchased. Just had it back, seems to be running ok but haven’t driven in anger. They said they’d performed run in procedures and driven the car for an hour or so but that I should go easy for a few miles. Did you change out the oil after a short period after installation or just revert back to the change intervals as normal? Did you also drive without hitting high revs/full boost for a time? Also what PD oil do you use?
Many thanks!
I did drive it fairly carefully for 500 miles or so to run everything in but stuck to normal oil change intervals. First change since the cam replacement was after 10,000. I use Comma PD Plus 5W40 in mine as it’s intentionally designed for PD engines. I’ve stuck to an oil and filter change at 10k religiously ever since.
-1.46 2.52 -0.45 -0.64 I think 1 and 2 too much, you need correct that do you know inside injectors have some plates under spring must be also changed. cant find video right now.
motor oil specs must be used the only recomm. numbers what manuals books example 507.504 etc. How healthy your car is, 8k-10k is fine. Even LL service.
https://youtu.be/dS-4C0qGOMc
https://youtu.be/ld9iywiuQMQ
https://youtu.be/3jlZBLrq9ag
https://youtu.be/CFIL9PjE6dk injector
the specified oil from vw pd motors is to have the 505.01.
505.01 is a additive to protect form worn pump injector and camshaft lobes. change oil at max 15,000 km or if not do that km max 1 year after must change the oil too if you din’tt haved run that 15.000 km.
https://www.upload.ee/image/8480253/Screenshot_227.png under spring, also injectors must be a measure from the cylinder head https://www.upload.ee/image/8480264/Screenshot_226.png
Good videos there. I didn’t know about the spring in the injector… Good to know. I knew the injectors should be measured from the cylinder head in order to make sure the clamp is aligned correctly but I didn’t have verniers long enough to do that. The car has done 20,000 miles since on Comma PD Plus without any issues though.
Here https://youtu.be/QZnM5LWp2l8
Hi! At first, thanks for your post! Things explained! Doing the same job with my b6 passat with bmp engine. I have a problems with injector seals as well. What do you think about injector seat reconditioning? I have changed injector seals a year ago and now i have the same problem with blown seals again. Want to add that wear in camshaft is caused by insufficient lubrication – good oil dont do the job enough. I had an option to participate in timken oil tests and results are not satisfying. Only thing that helps is oil additive. I tried myself a TSL additive and results now satisfy me. Old rough and damaged surfaces now are smooth as mirror. If interested google it up. Take care with oil pump and ballancing unit. These is a piece of hex rod that tends to break or wear. But, thumbs up! Like your job.
Hi. This is very detailed. I have changed injector on my 1.9 tdi. Put it back together and values are at 0. But i have cam cover leak by tandem pump. I didnt use any sealant at all. My old seal wasnt leaking but i thought while i was at it, could do with relplacing a seal, so i bought Elring seal with the bolts. Now its leaking.
Hello. Nice blog. I would like to ask something regarding the crank pulley. I believe I have the same/similar engine, as mine is the ARL engine 1.9 gti tdi pd type (golf mk4 2003). I want to replace the timing belt, however the crank pulley does not want to come out. I managed to remove the 4 M8 bolts, but the pulley fill really solid even after a few attempts of hammering and levering. As it seems to be so solid I wonder if the 20mm 12point bolt also needs to come out? If not what would be the best way to remove this crank pulley? Should I use a ribbed puller? I am without ideas, so I would really appreciate some help. Thanks in advance.
Sorry I can’t remember! I sold my Golf some time ago and I can’t remember anything about getting the pulley off really. You might have to use a puller on it. Sorry I can’t be of any more help.