It’s been a while since I posted anything but I’ve been working on the diff again recently. I ordered the carrier bearings and the two pinion bearings, small and large. All was well until I realised that one of the pinion bearings was the wrong size. It’s part number is M88040, I needed M88048. They also share the part number M88010 which I later realised is in reference to the cup and is the same one used for several different inner taper roller bearings. So that held me up yesterday but I did manage to get on with some of it.
A week or so ago I finished the centre of the diff which means getting zero backlash between the sun and planet gears. Only one size thrust washer seems to be available for the planet gears but the TRs use the same dimensions so I found some on revingtontr.com. They don’t have the oval shape hole in the middle (which I believe is supposed to help with lubrication) but I’m told this can lead to the hole getting elongated and the washer dropping out! The original washers behind the sun wheels were made from fibre and I couldn’t quite get everything to fit so I got a sheet of phosphor bronze (PB102) 0.7mm thick and cut some new washers to fit. I also replaced the little cross shaft for the planet gears as the old one was pretty worn. You can see that the new one has two cut outs where the gears fit which should help with lubrication.


Yesterday I fit the inner half of the carrier bearings, I just hammered these on using the inner race of one of the old bearings and a piece of flat steel. I also refit the crown wheel (bolts require 46lb/ft torque) and checked for runout. The runout tolerance is 0.08mm and I saw just over that so I measured it on the face of the crown wheel teeth and it wasn’t so bad. The way to resolve that is to replace the diff carrier which aren’t available new anymore so it’s not worth the hassle, it’s close enough.


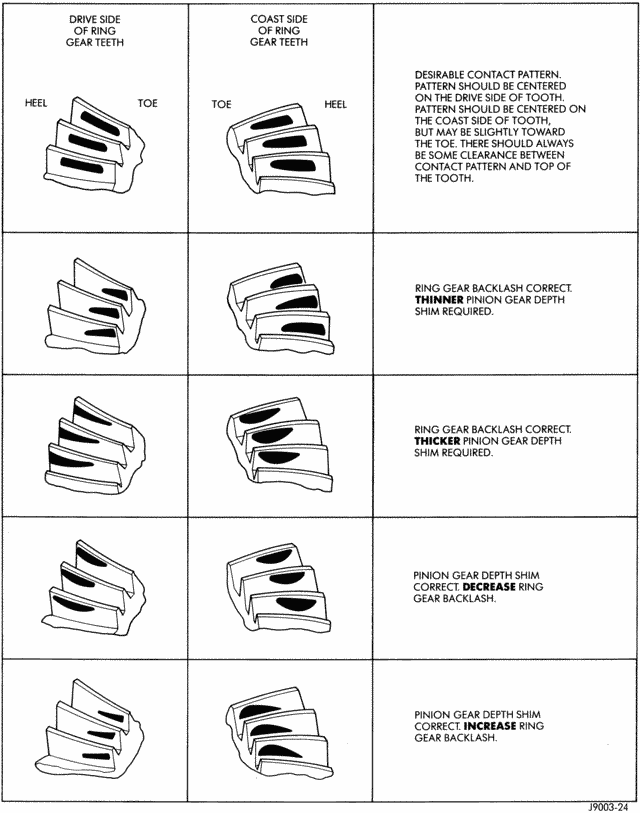
Next steps are to fit the pinion (with the correct bearings!) and torque that up. The preload on the pinion needs a torque measurement so I’ll make use of the Park Tool TW1 for that. Then I’ll need to paint the crown wheel and do a contact pattern check which will tell me if I have the pinion set at the correct depth and the diff carrier (hence the crown wheel) set in the correct lateral position. 
Getting the correct contact pattern, pinion preload and pinion to crown wheel backlash is tricky. Once the preload is set using shim washers, it’s just a case of getting them in the correct order to get the right contact pattern. I had to use a couple of crush washers before I had everything correctly set up because almost everything needs assembling in order to do the check properly but I got there in the end. I used bright yellow acrylic paint for the contact pattern check which is much easier to see than engineer’s blue.
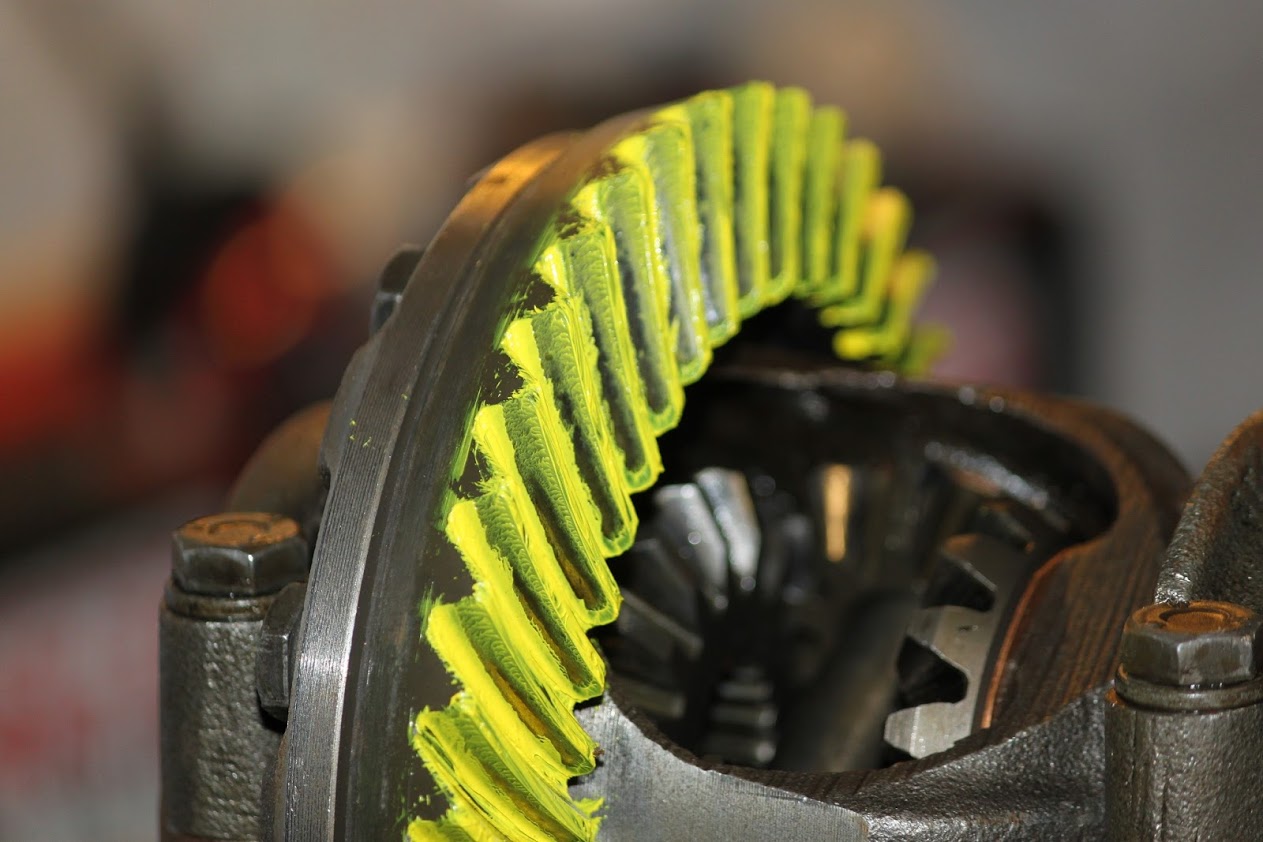
A search for “contact pattern check” should yield a table for reference…
I won’t know if my rebuild of the diff was successful until the car is on the road but I’m glad I learned about it and did it myself.