I was given a piece of ash which originated as part of a bar in a pub and decided to make a coffee table….
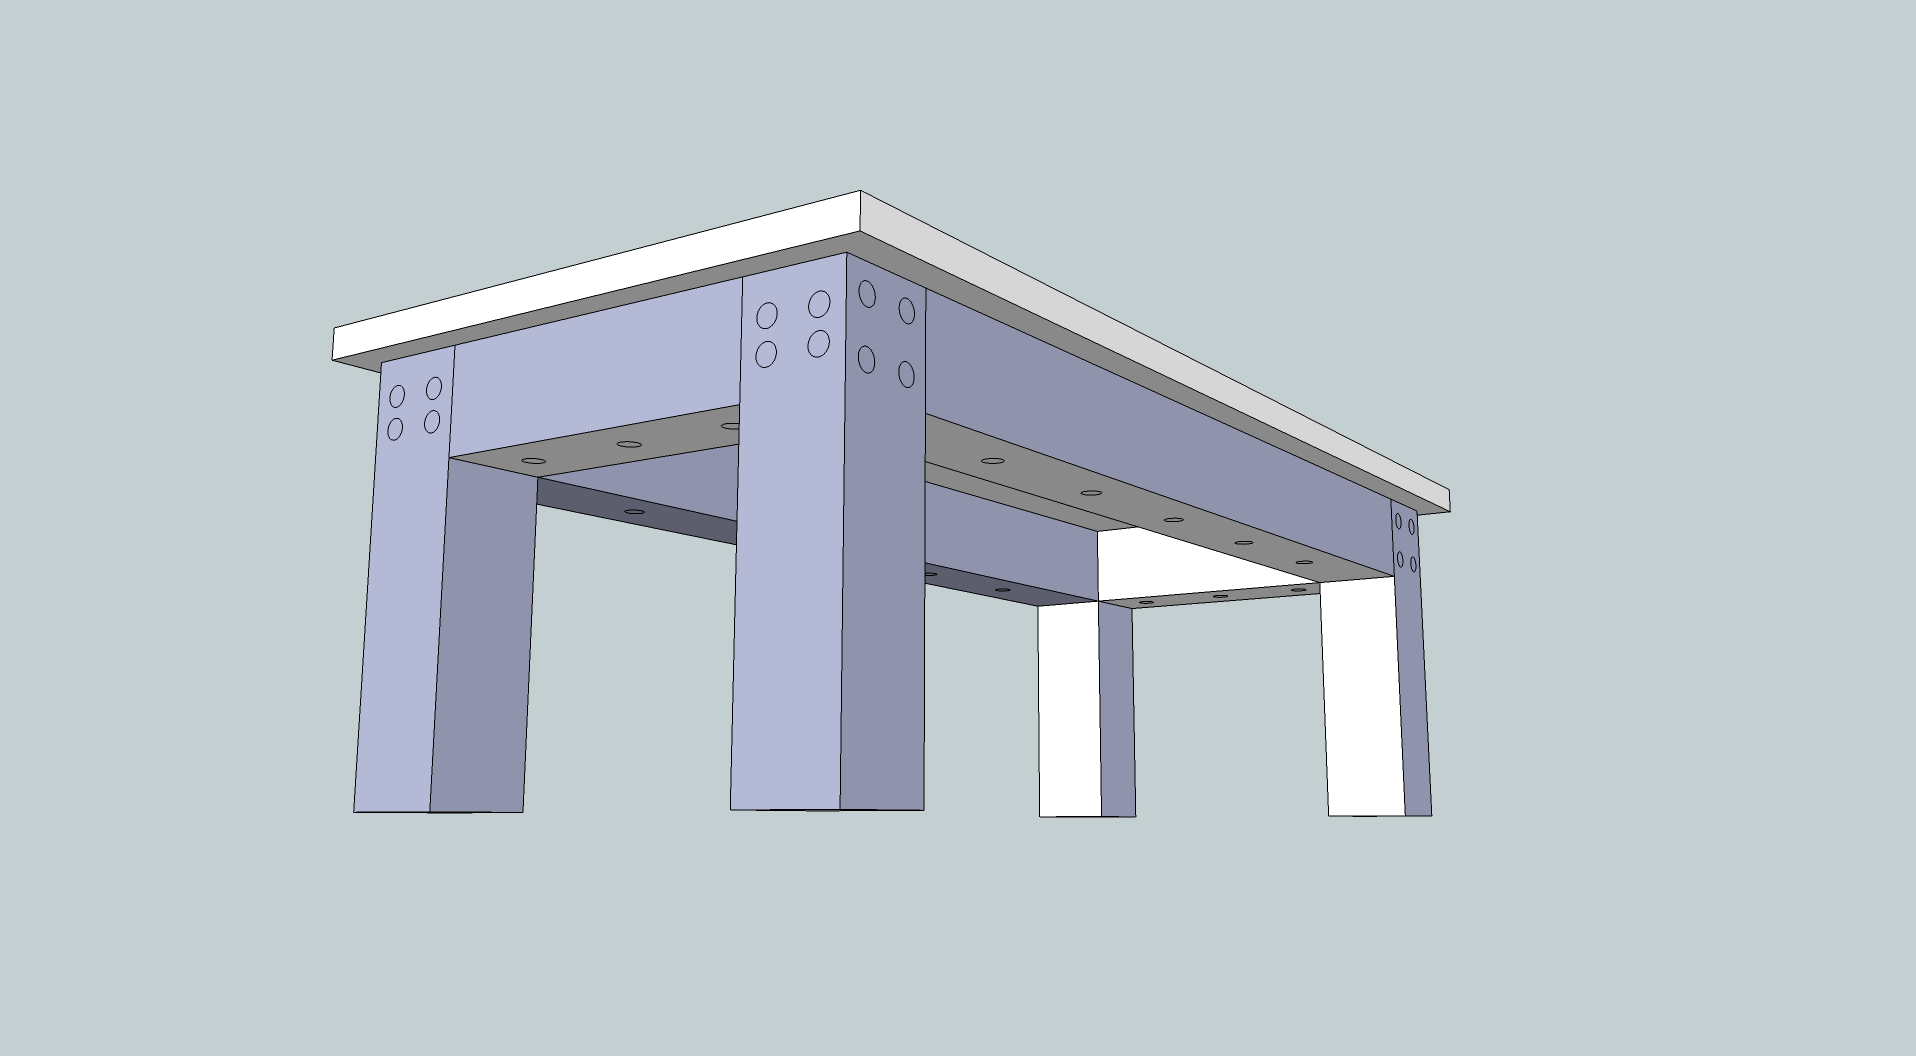
So here’s what the plan looks like. The top was pretty much ready to use. My girlfriend’s office used to be a pub and was recently converted so the carpenter cut the top for us which is what started off the idea. It’s had a router run round the edge to give it a nice bevel too. Before I decided what wood to use for the rest I left it in the shed for some time with a large lump of limestone on it because it had bowed.
I decided to use oak in the end and ordered a couple of 100mm x 100mm x 2400mm beams. The final plan was to screw it together and glue it, counter sinking the screws by about an inch and filling the holes with 20mm dowel – no screws visible. After working out the measurements and forming a plan, I started to sand the beams. They started to come up really nicely – took some time though to sand them down past the original sawing marks. That’s where a random orbit sander and 60 grit discs did most of the work.
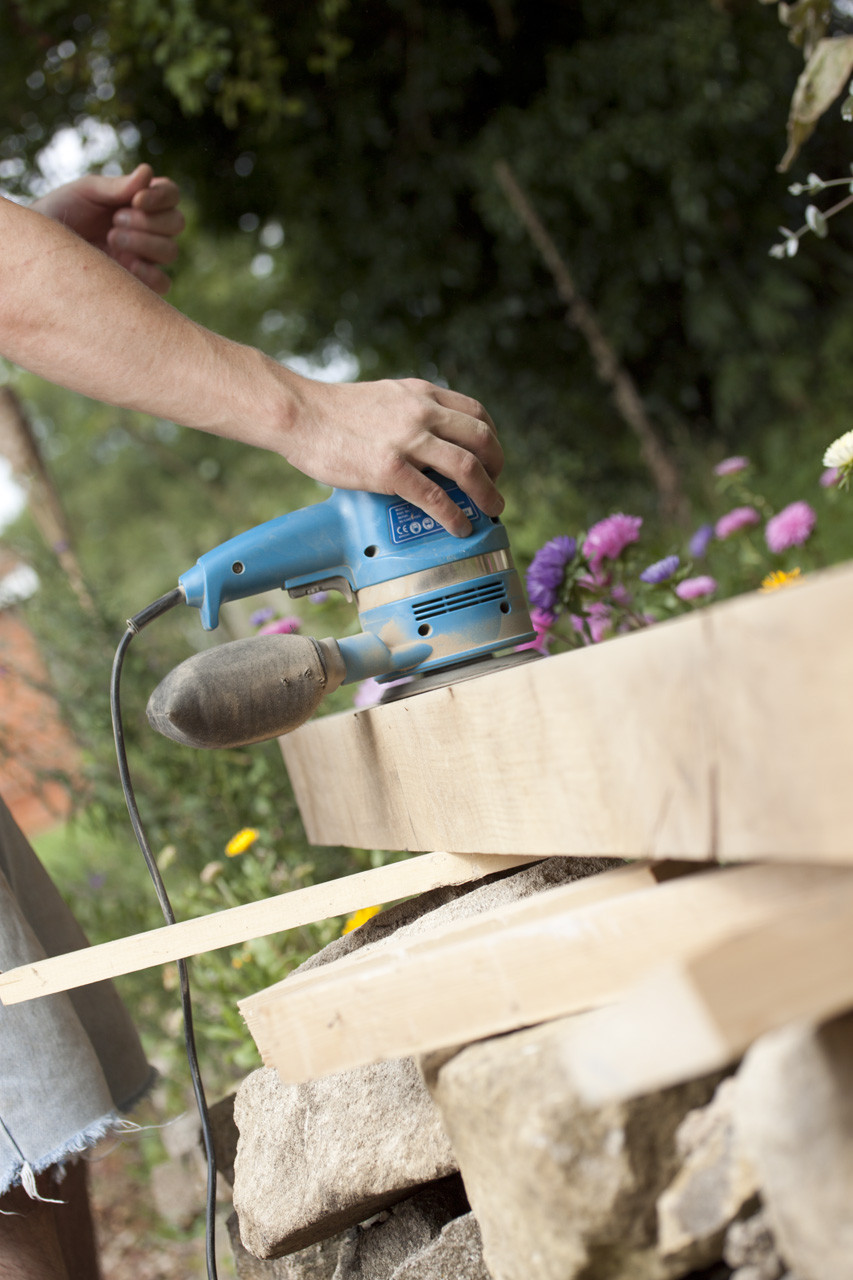
The oak is good solid wood and the grain is really nice. Seeing how good the wood looked at this stage really made me want to make a good job of this – could be a very long lasting coffee table if it’s done right.
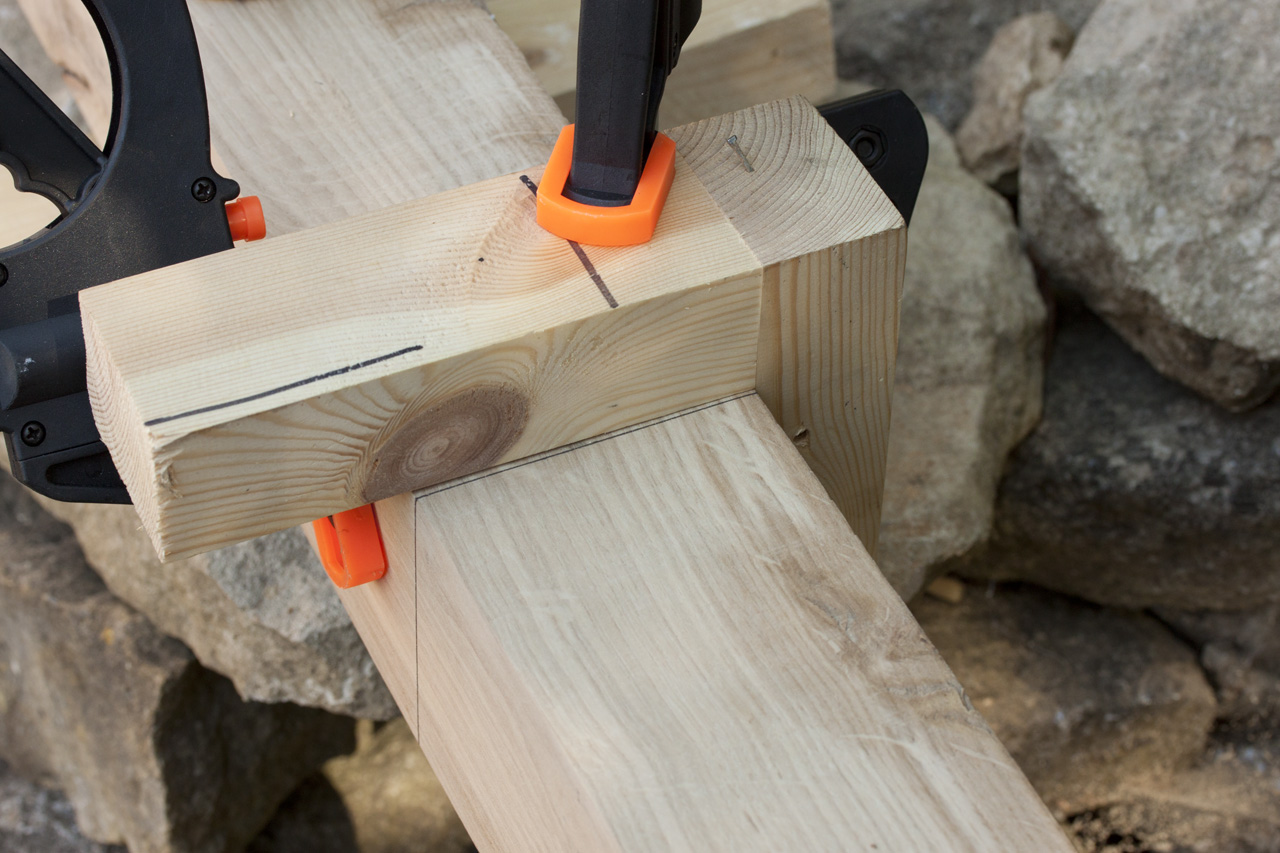
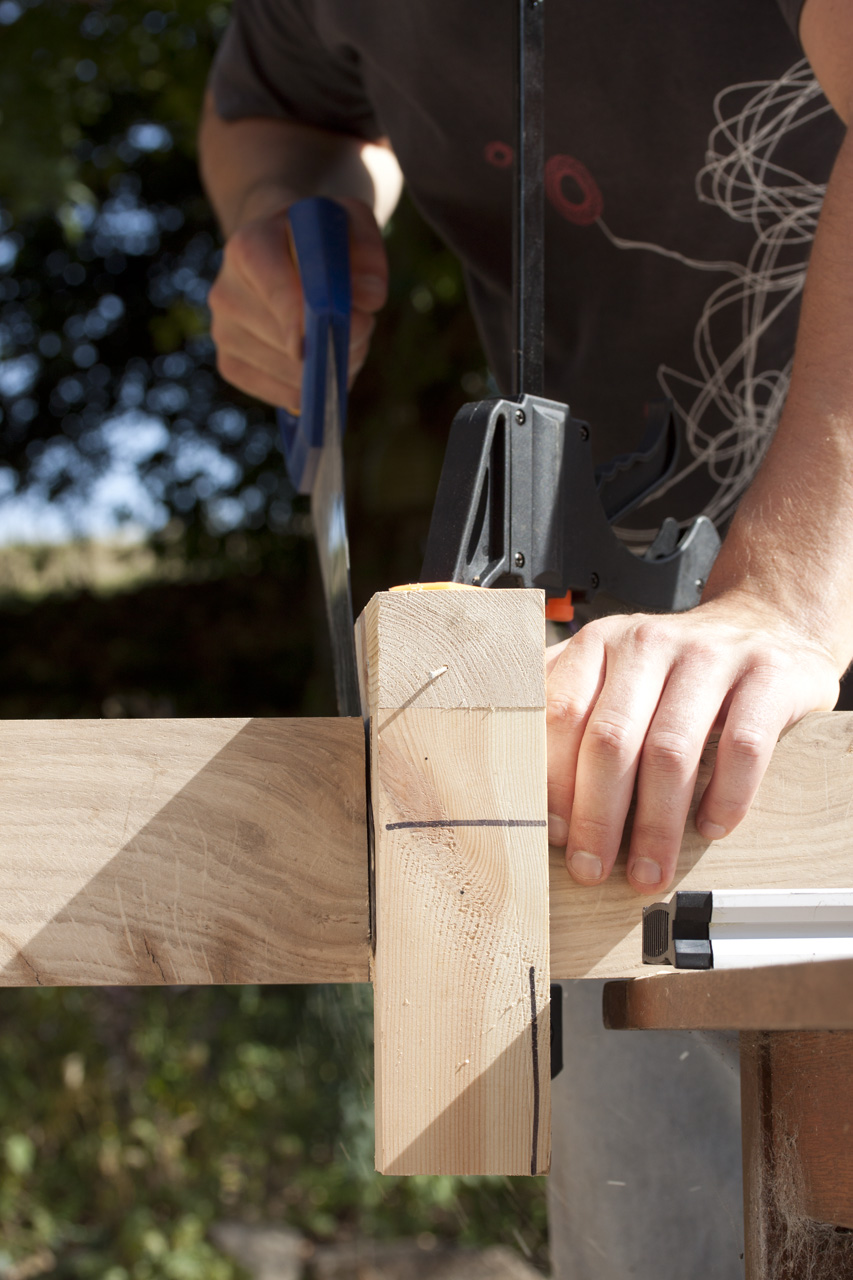
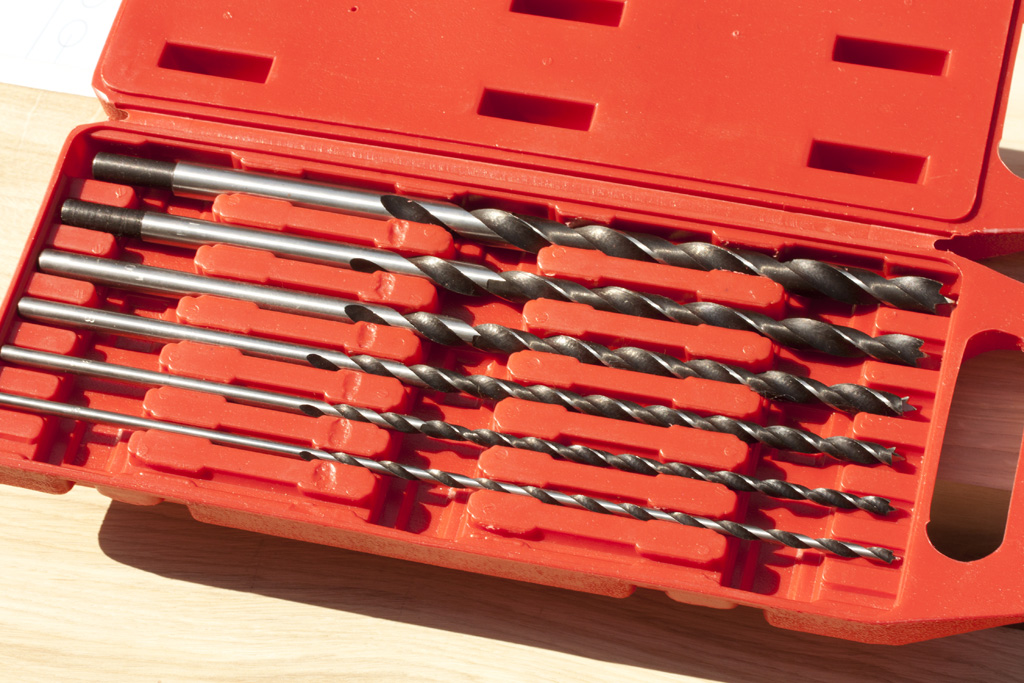
The first problem I came across after sanding the first beam was cutting it straight. I’d bought a few things to get this project going – a new set of drill / screw driver bits, new cordless drill driver, clamps etc. If I’d had the money I would have bought a power miter saw too which would have made making straight cuts really simple. The only thing I had is a hand saw and very little experience of cutting things straight! In the end I used two pieces of wood screwed together at a 90° angle, clamped along the line where I needed to cut to guide the saw blade. The ends weren’t straight but the weren’t far off either – I’m not bothered about it being too perfect, as long as it’s solid.
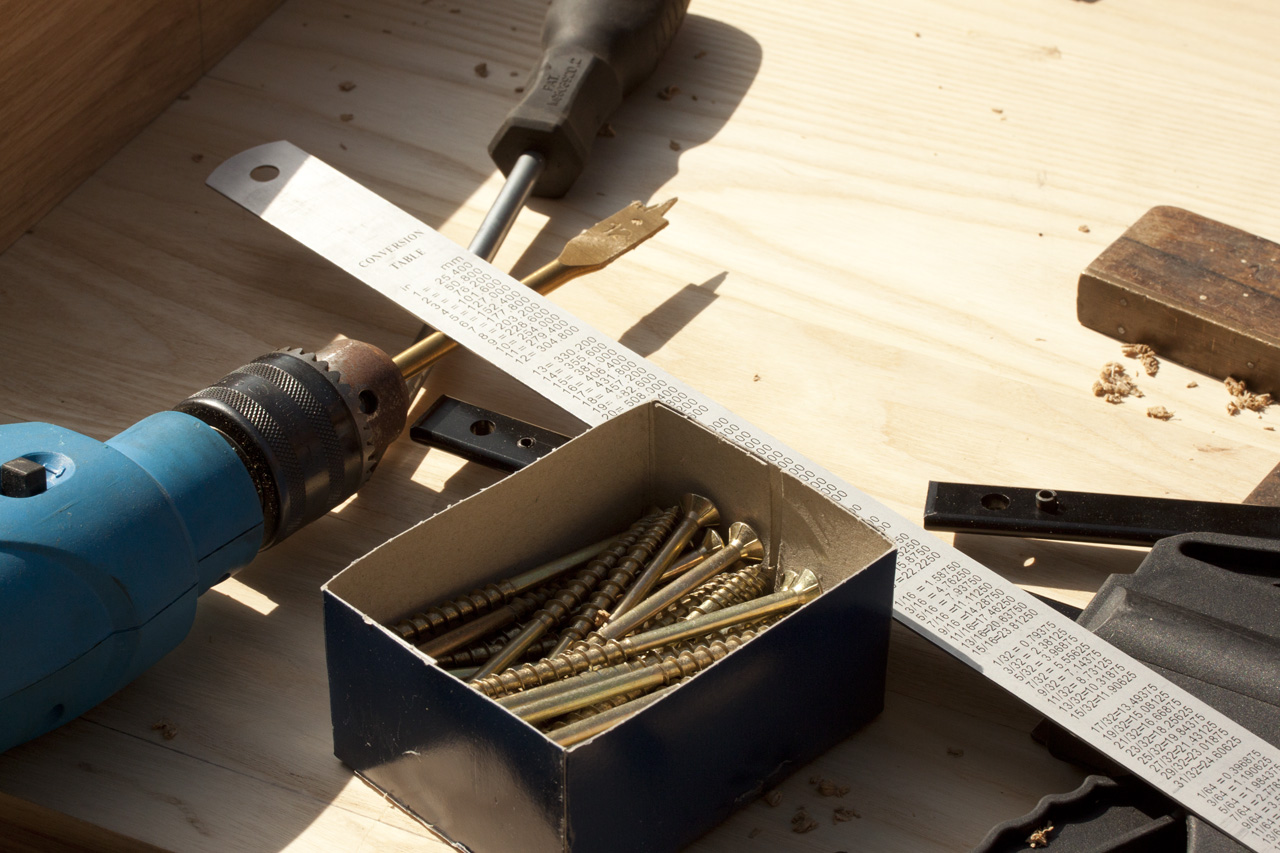
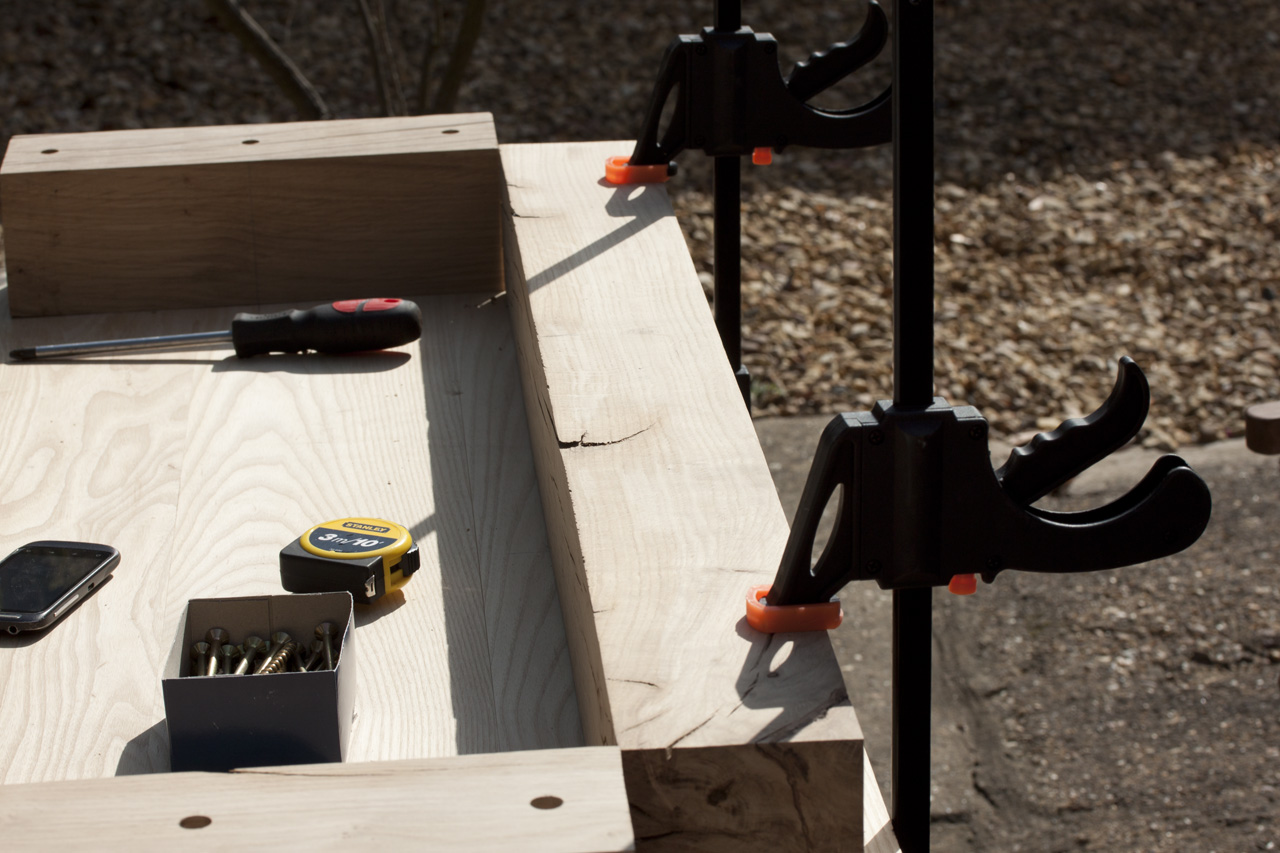
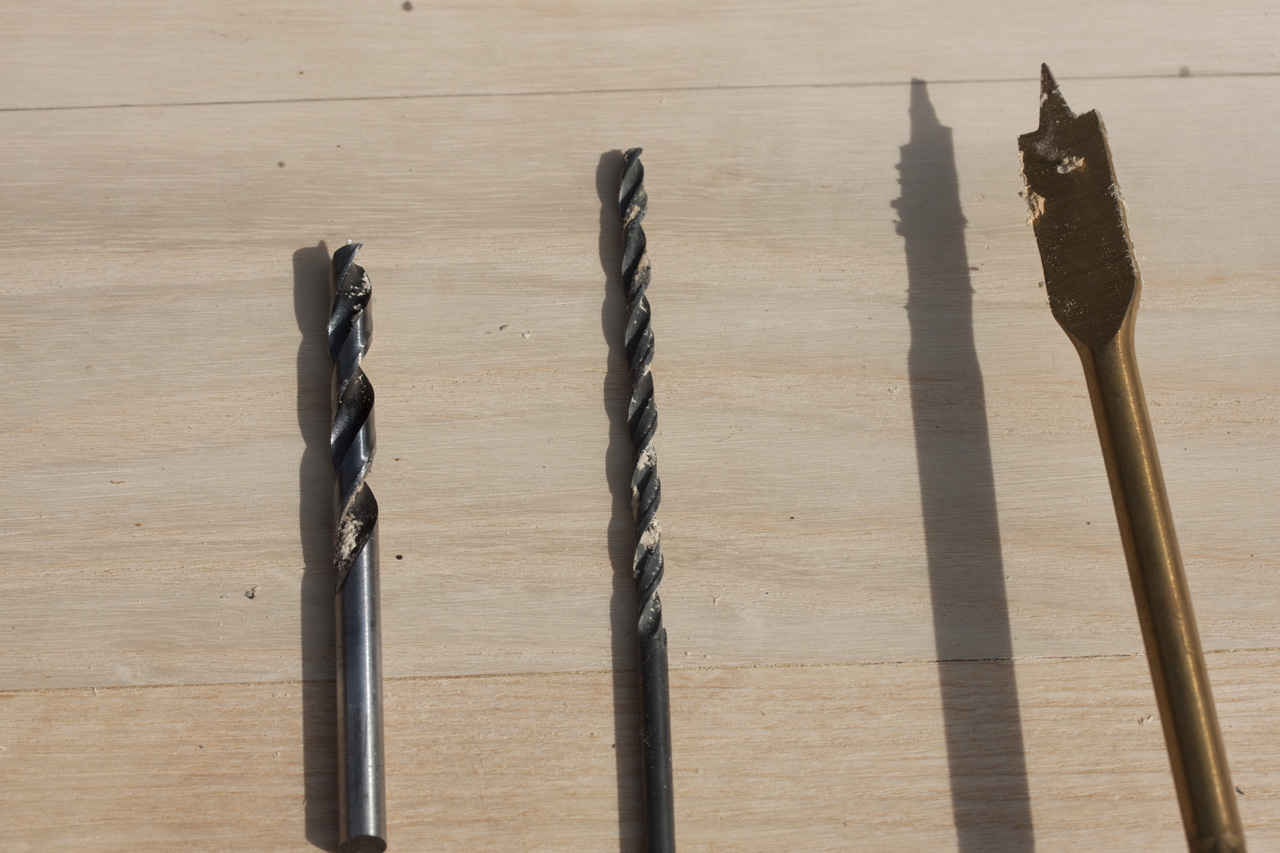
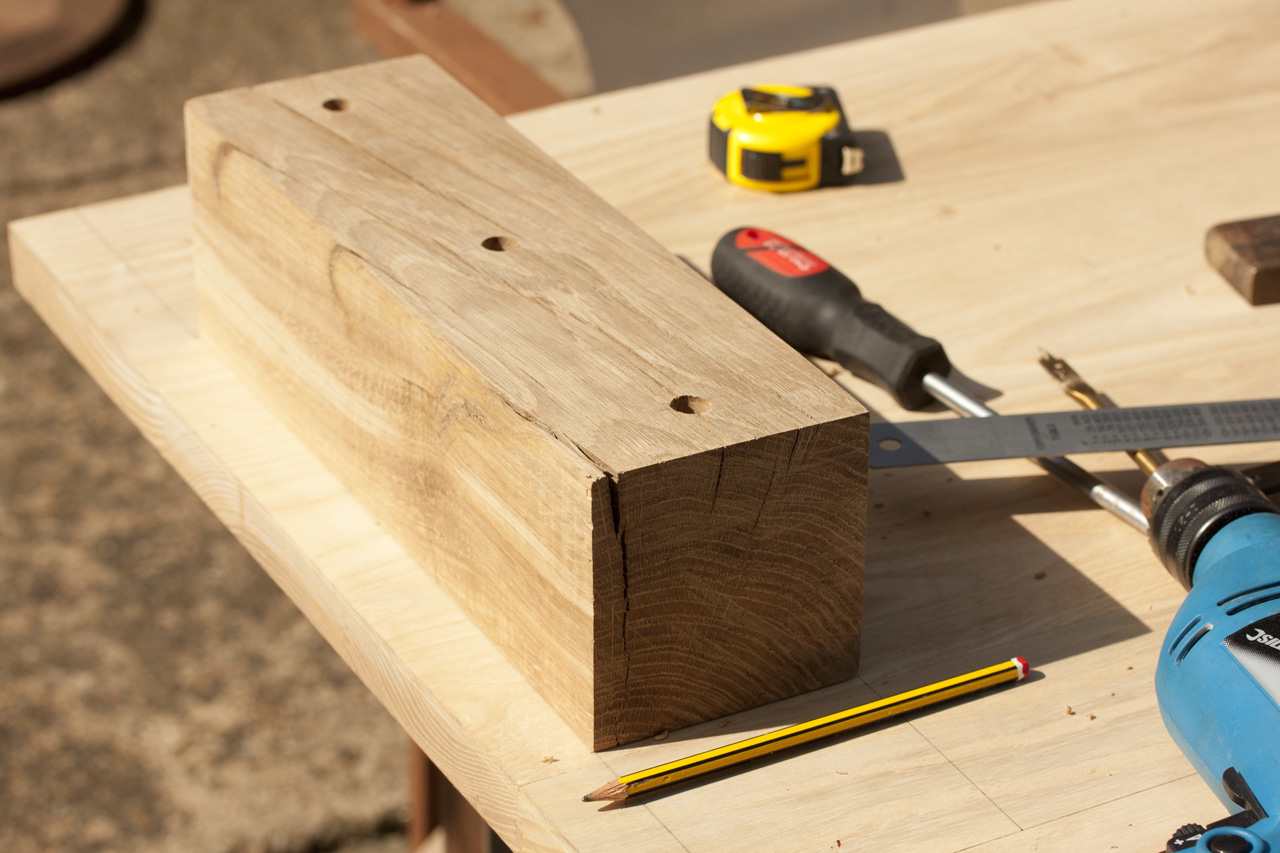
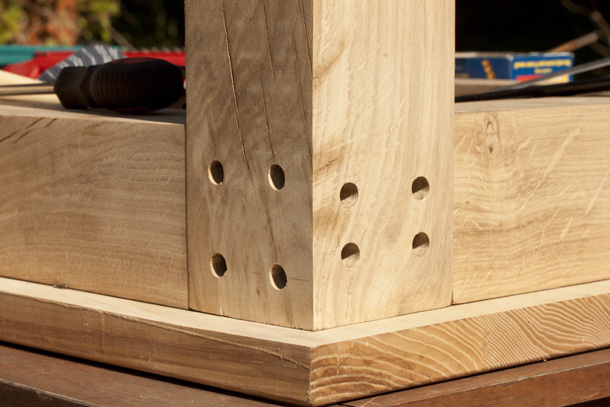
Once I’d decided how I was going to cut them straight (ish!) I started measuring up for pilot holes. The screws I got for this are 6 x 100mm and are designed to prevent splitting. The last thing I wanted was to split any of it. I also had a bit for the pilot holes 4 x 120mm, long enough to go through an entire beam and in to the ash table top. Problem with this was that the oak is really dense, neither of my drills could cope with drilling through the tough oak very well. I knew I was going to counter sink the screws so I drilled about an inch in to the beam with the 20mm spade bit, leaving less material for the 4mm pilot hole bit to get through. So far so good. Now came the problem of driving the fairly big, 6mm, screws in. The cordless wasn’t up to the task. I had to re-think at this point and come up with a way. The answer was to follow the pilot hole through with a 5mm bit from both sides, this made driving the screw in much easier and I actually ended up putting them in by hand.
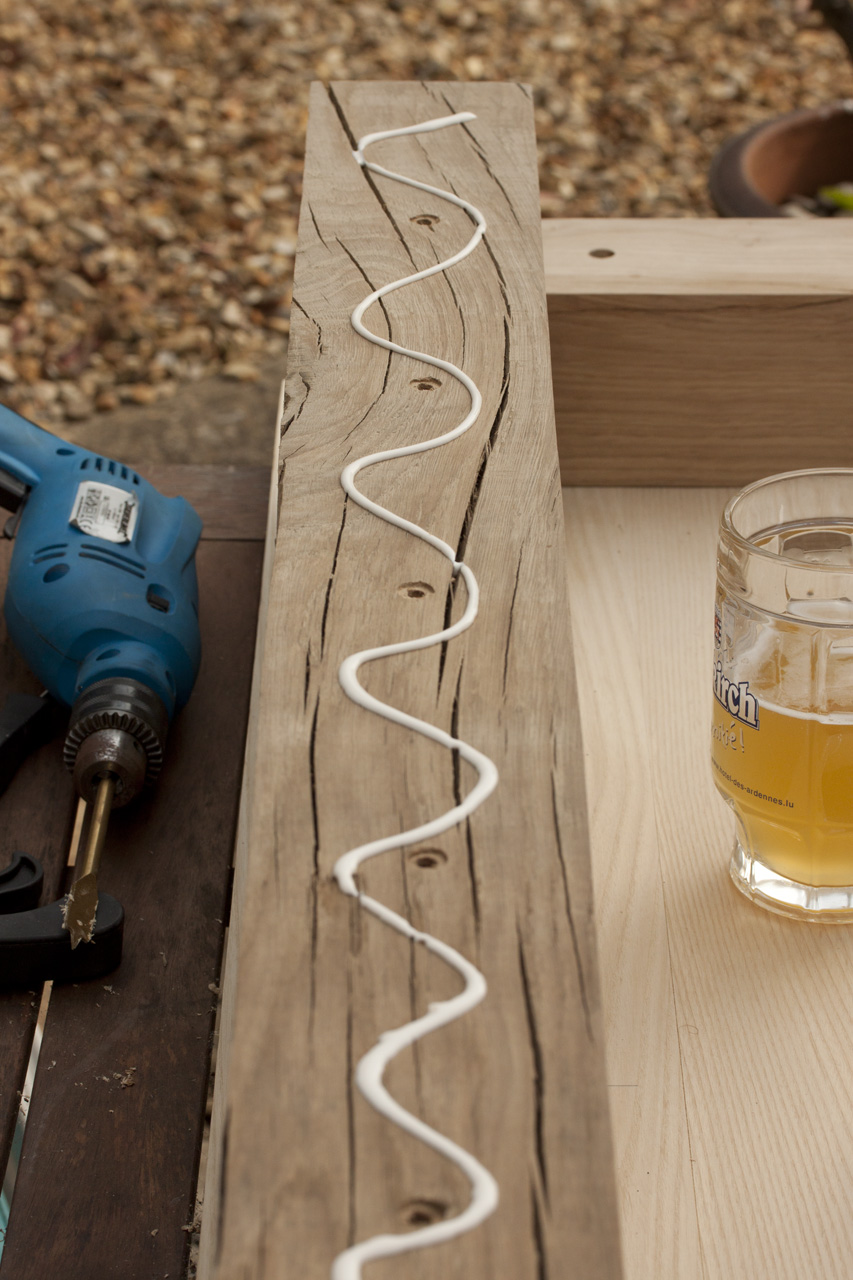
I felt that relying on screws alone wasn’t going to be enough so I got some “Gorilla Glue” which claims to be extremely strong. At this stage I’d already lost my rag once and was in need of something to help keep me calm and focused. Hoegaarden was the answer. A nice large bottle straight from the fridge…

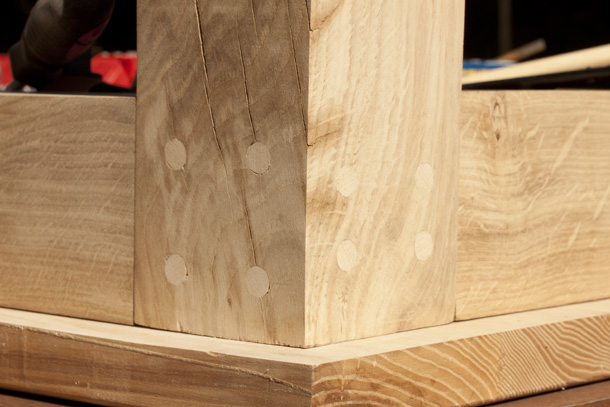
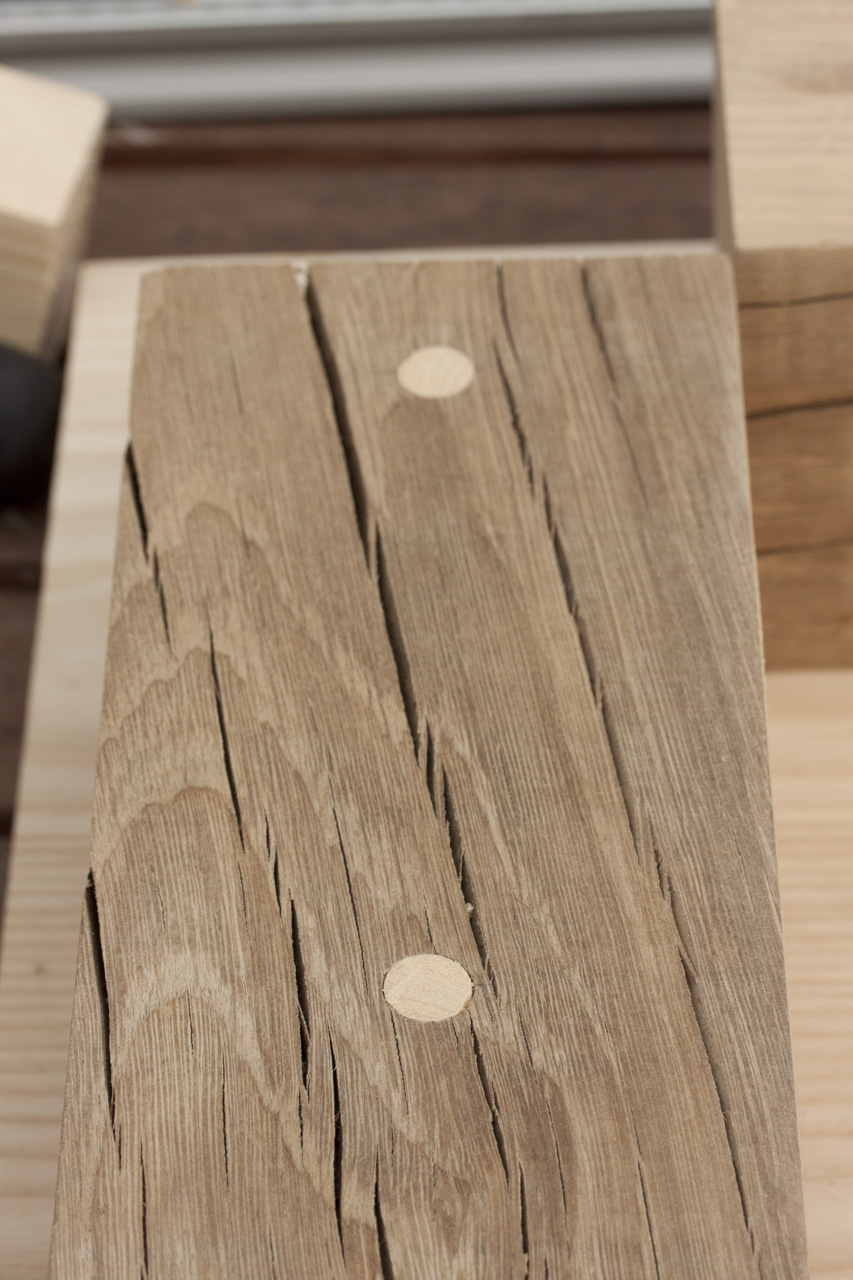
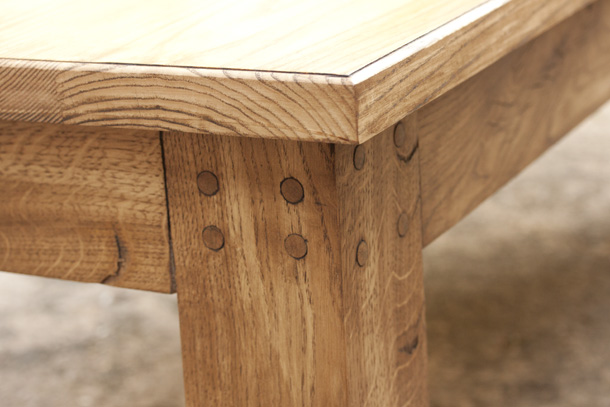
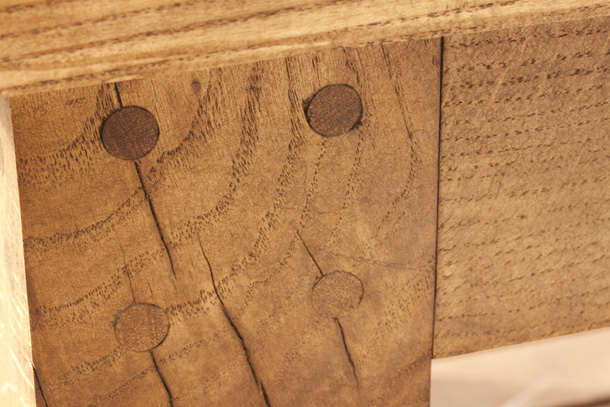
I glued all the parts I’d done so far to the table top, all that was left was to cut the legs and screw / glue those on too. I’d bought myself a set of long auger bits to do the pilot holes for the legs the following weekend. I used the 20mm spade bit on the underside to make sure no material would get in the way and stop both pieces being flush when I put the screws in. After screwing and gluing the parts together, I cut some short dowels and plugged the screw holes – sanded these down to make them level – an idea I’d got from building the bottle drying rack. As all the wood is bare and it’s made from two different types of wood I used some wax stain to protect it and make the shade a lot darker.
Close to the end now and this is what I have so far. I’m pretty pleased and it’s rock solid – 48 screws have gone in to it along with the glue. I don’t think it’ll fall apart in a hurry. It weighs a ton – nearly 5 metres of oak have gone in to making it.
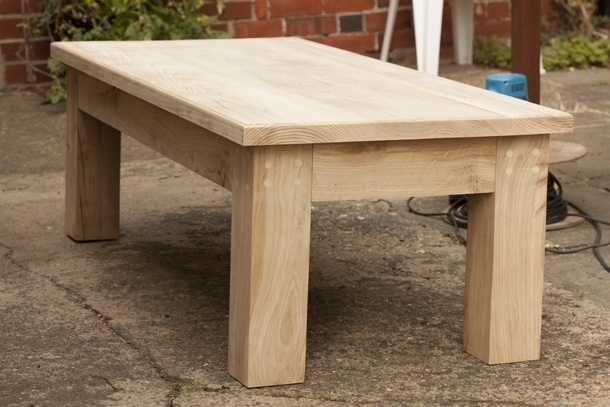
After all the measuring / cutting / drilling I wasn’t really in the right frame of mind to start waxing it but I remembered some advice from Mr Miyagi and started applying Briwax in “Tudor Oak”. I was pretty impressed with the results. I applied it with really fine steel wool, fairly thick coat – then used a rag to take the majority of the wet wax off and a final cloth to buff it up. I think it took me about 8 hours to make. Given that I’ve never made a coffee table I’m quite pleased. The final result…
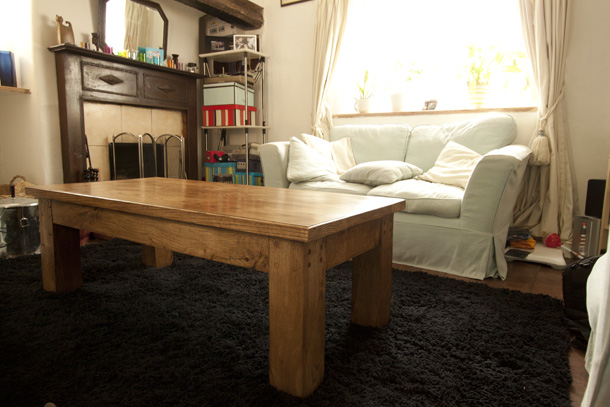
At last, I can put my feet up!