The clutch went a couple of weeks ago on the Spitfire 1500 so I have replaced that and the slave cylinder. I’m not a mechanic by any stretch of imagination but here’s how I did it….
First thing I had to do was get the front of the car up on axle stands. This is so you can get access to the bottom of the engine. The front of the engine is supported by rubber mounts. The rear of the engine is supported by the gearbox which is bolted to the chassis towards the middle of the car. I used a block of wood with a jack to take the weight of the engine.
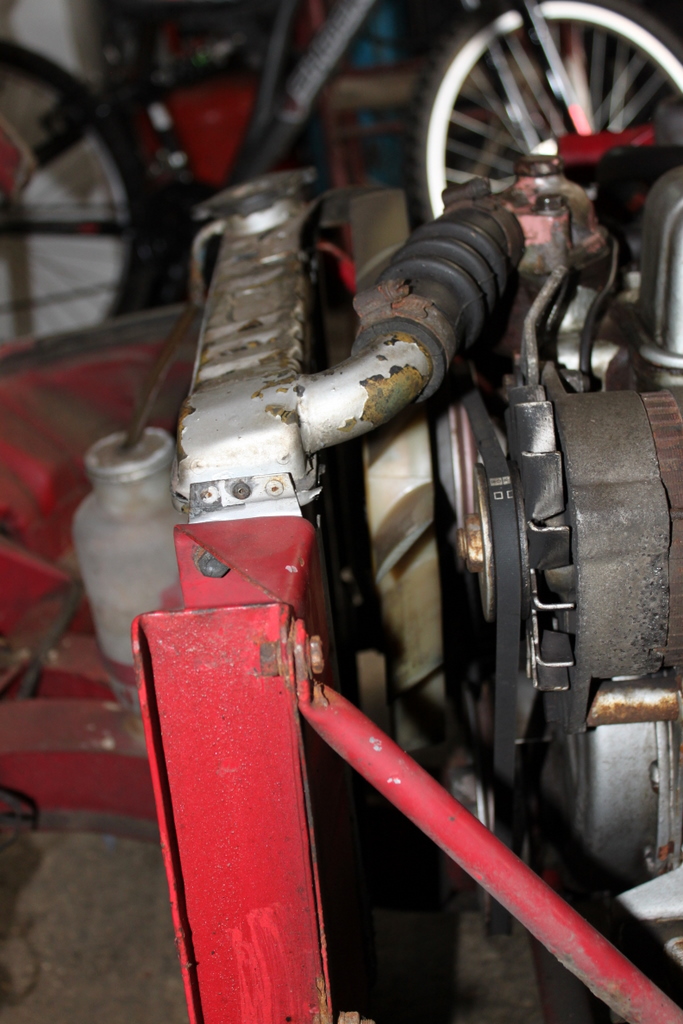
The radiator needs unbolting next. As you raise the rear of the engine to enable the gearbox to be removed the cooling fan can foul the radiator and damage it. I removed the bolts from both sides at the top of the bracket where the struts meet it. There are also two bolts under the radiator which should let the whole thing, including the bracket, move. Just to be on the safe side, I also put a bit of cardboard between the cooling fan and the radiator. Loosen the exhaust at the down pipe also.
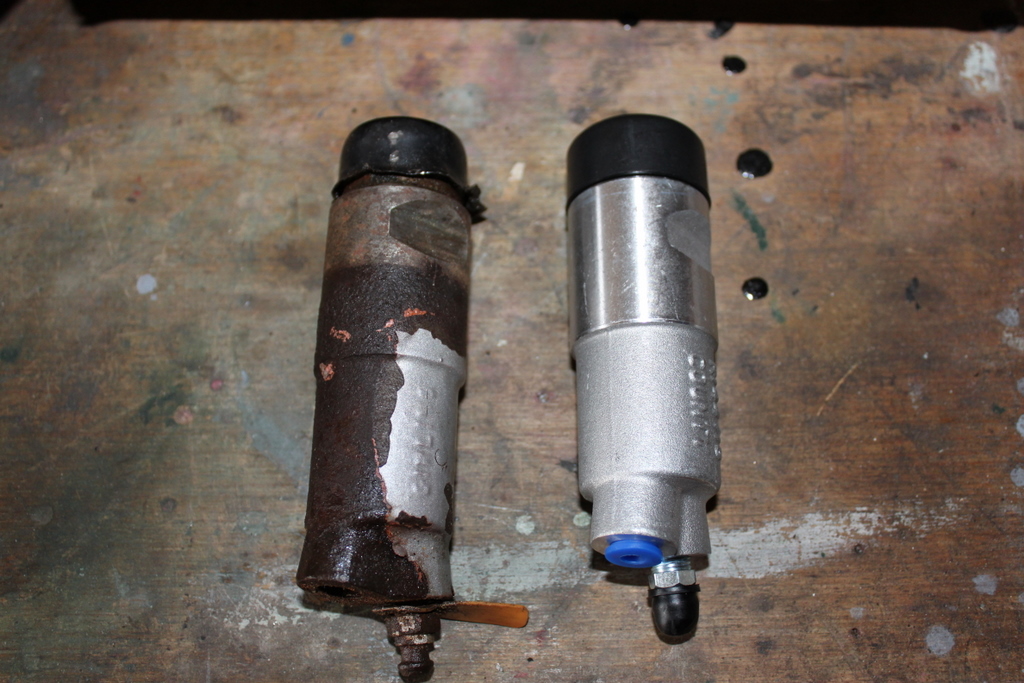
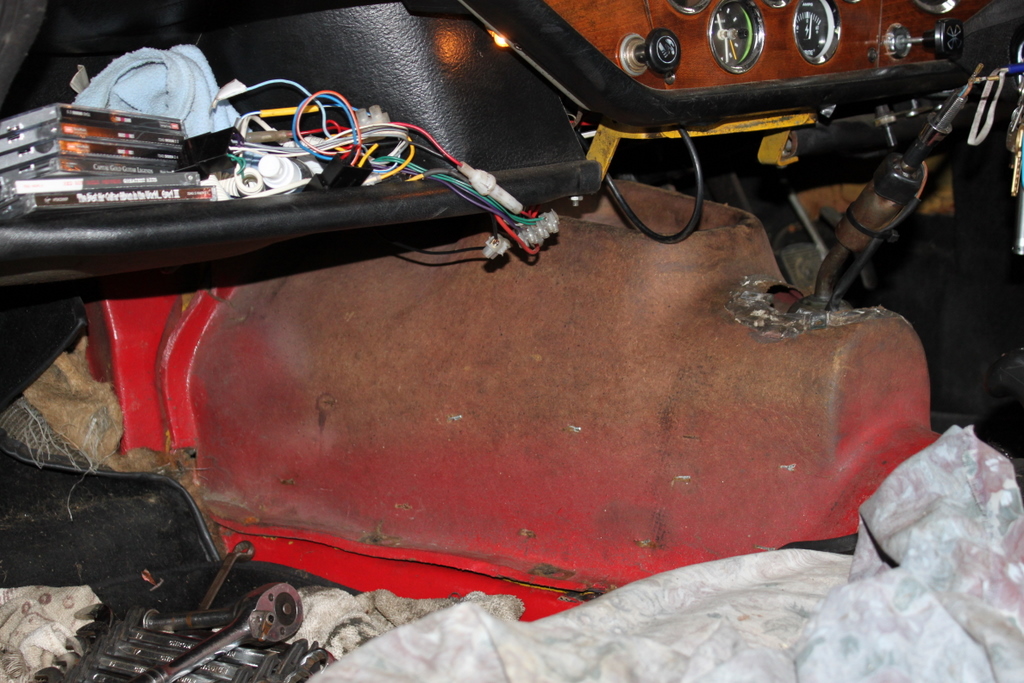
The trim inside the car needs removing now. I had to take the stereo out, the center console, both the knee pads either side of the prop shaft tunnel and the padded prop shaft tunnel cover. The gear knob needs removing. Mine has overdrive so I popped the cover and switch off, used a spanner to loosen the nut on the underside of the gear knob that is threaded on to the stick. Undo the threaded ring inside the knob and it should come off. The carpet needs taking off next. This should expose the fibreglass gearbox cover now. Remove all the bolts and clips round the sides, unscrew the plate that goes round the bottom of the gearstick and pull the cover off. Disconnect the overdrive switch, overdrive solenoid and reverse light switch. In this case I’m replacing the slave cylinder too. I reckon the one on mine was probably the original. Its made from steel and was pretty rusted and scored inside. The new replacement is made from machined alloy and is a much better part. The original one lasted over 30 years though so it didn’t do bad!
The old and new slave cylinders…
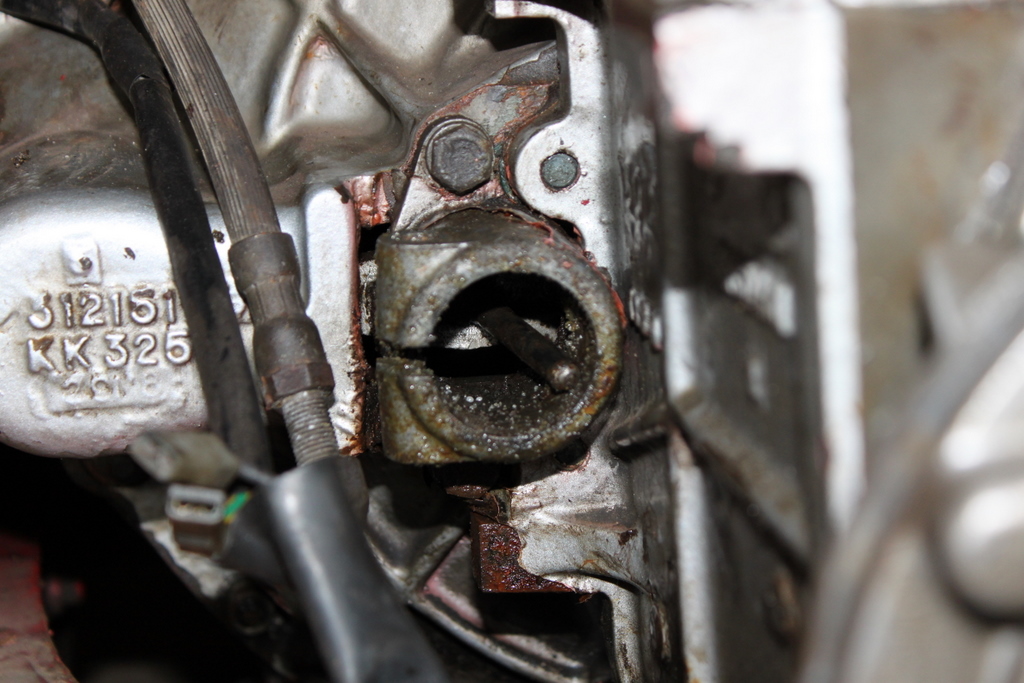
Once you’ve removed the cylinder and gear stick (keep and eye out for the pin that holds the gear stick in – take it out before you take the gearbox out!) you should have something that looks like this.
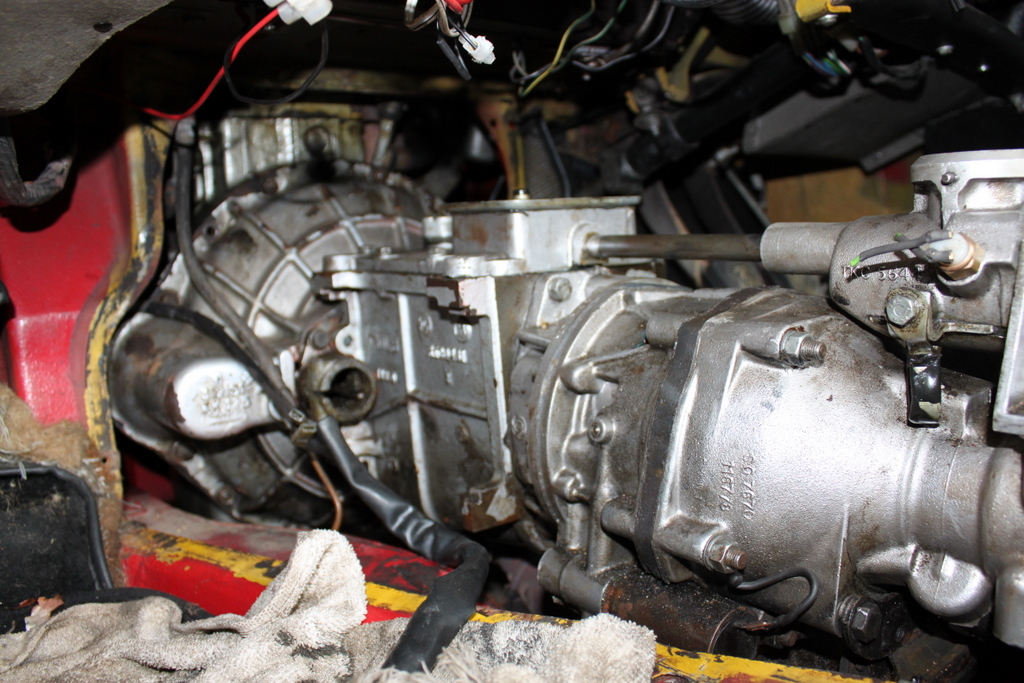
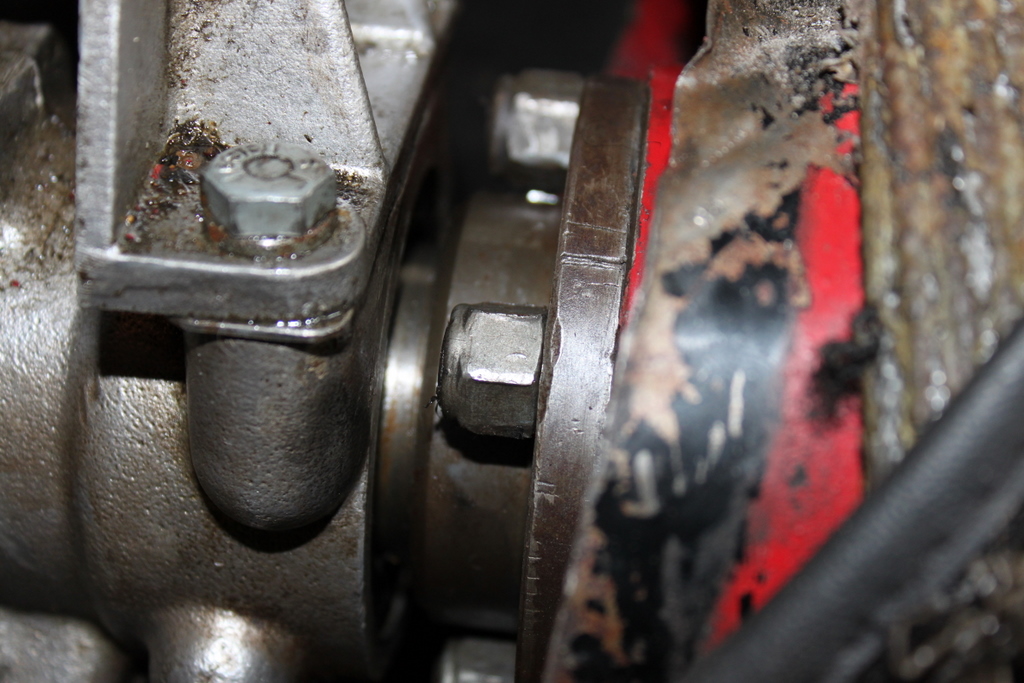
Next I had to remove the bolts that hold the engine and gearbox together. Some of them are shown at the top here…
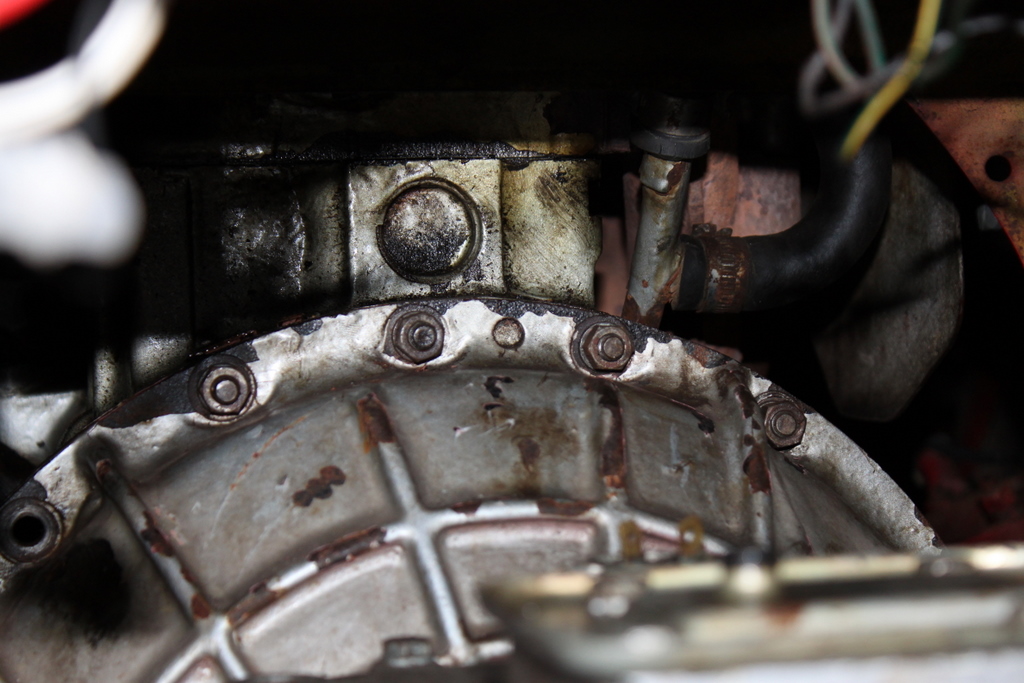
Once all these have been removed its time to unbolt the prop shaft. There are 4 bolts that need taking off, this should let the prop shaft drop down and rest on the exhaust for the time being.
The bolt heads are under the prop shaft tunnel which you can see on the right (pretty mangled on my car, I’ve had the gearbox out a few times now but it can be bent back easily enough). You need to unbolt the gearbox from the chassis as well. There are two bolts, you can see one of them in the bottom right of this photo.
Now I jacked the engine up which lifts the gearbox clear of the prop shaft tunnel. With some help hauling the gearbox out I put some extra weight on the front end of the car because I found that the car was being lifted by the jack and not actually moving the engine up far enough for the gearbox to clear the prop shaft tunnel.
Now comes the hard bit! Most of the gearbox casing and bell housing are made from cast iron on this car which means the damn thing weighs a ton! The only way I could get the gearbox out passed the dashboard is to pull the gearbox towards the back of the car, tilt it up so the input shaft is facing down and wrestle it out over the passenger seat. When it’s finally out after all the blood, sweat and tears it looks like this!!…
.JPG)
The clutch fluid had leaked inside the bell housing so a I gave it a good clean up. I made sure the gearbox was level and checked the oil level by filling until oil starts to come out of the plug that was removed on the side. Now the gearbox is off I need to remove the old clutch and release bearing. The clutch is held on by the pressure plate. 6 allen bolts hold this on. Remove these and take the pressure plate off, you might need something to prize it off a bit. Some of the release levers on mine had got so worn down they had broken off! The friction plate springs were in pretty bad shape too so a new clutch was probably past due.
.JPG)
.JPG)
After those are removed I fitted the new friction plate and pressure plate with the help of the alignment tool that I bought (just a plastic one for a few quid). You can see the alignment tool in the center here. You can also see the short rods that the friction plate cover lines up on. I had to tap it on gently with a mallet. Put the allen bolts in and tighten up. Remove the alignment tool.
.JPG)
While the gearbox was out I replaced the clutch release bearing. The release arm is held in by a pin that goes through the bell housing. Remove the split pin and tap the pivot pin out gently with a drift of some sort. Watch out for a spacer that is fitted also. The arm should then come out. Once you have the arm out you need to tap two really small roll pins out to remove the bearing carrier – use a cut nail or something similar. I put the old bearing in the vice and found a socket that fit inside the bearing against the lip of the bearing carrier. Tap the carrier out and refit the new bearing by gently squeezing it on in the vice – don’t use a hammer, it’ll damage the bearing. Refit the carrier in to the release arm and refit the release arm to the bell housing.
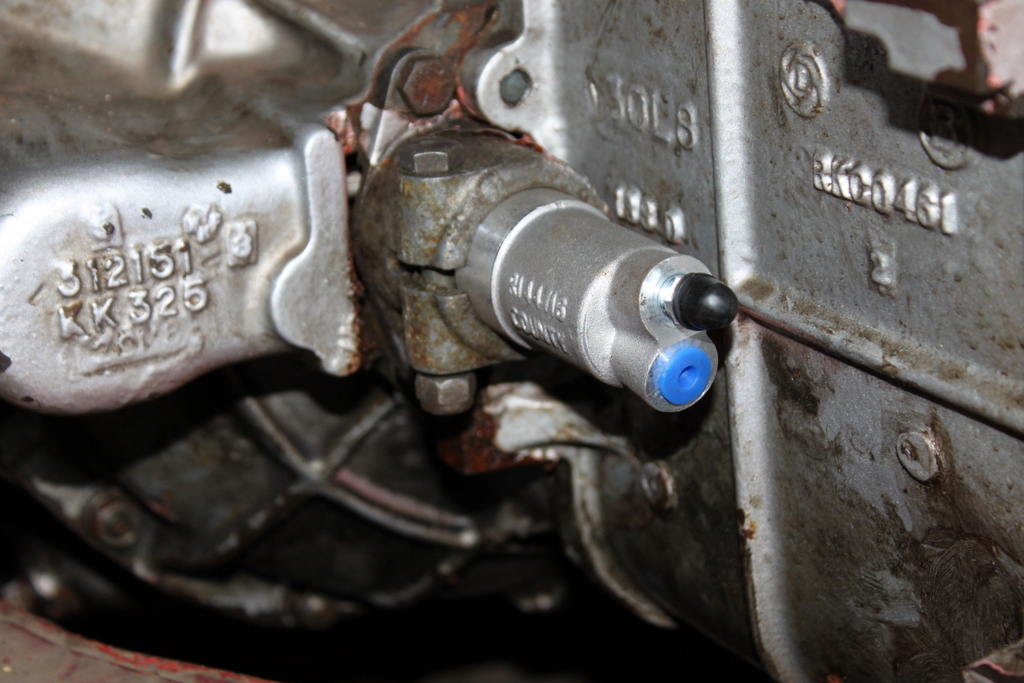
You can now put the gearbox back in which is another struggle but you will eventually get there. I had to stand on the front to get the engine to lift high enough on the jack so the gearbox lines up and slides on. You can then bolt the bell housing on, lower the engine / gearbox to line up with the mounting bracket and prop shaft. Then bolt the prop shaft and mounting bracket back on. Now comes the slave cylinder replacement. I found that taking the slave cylinder bracket off the bell housing is a bit easier. This way you can locate the push rod in to the slave cylinder without too much hassle. It’s not easy trying to line the push rod up with the bracket still on like in the photo below.
Make sure you mount the slave cylinder with the bleed screw at the top so the air can escape when you bleed it.
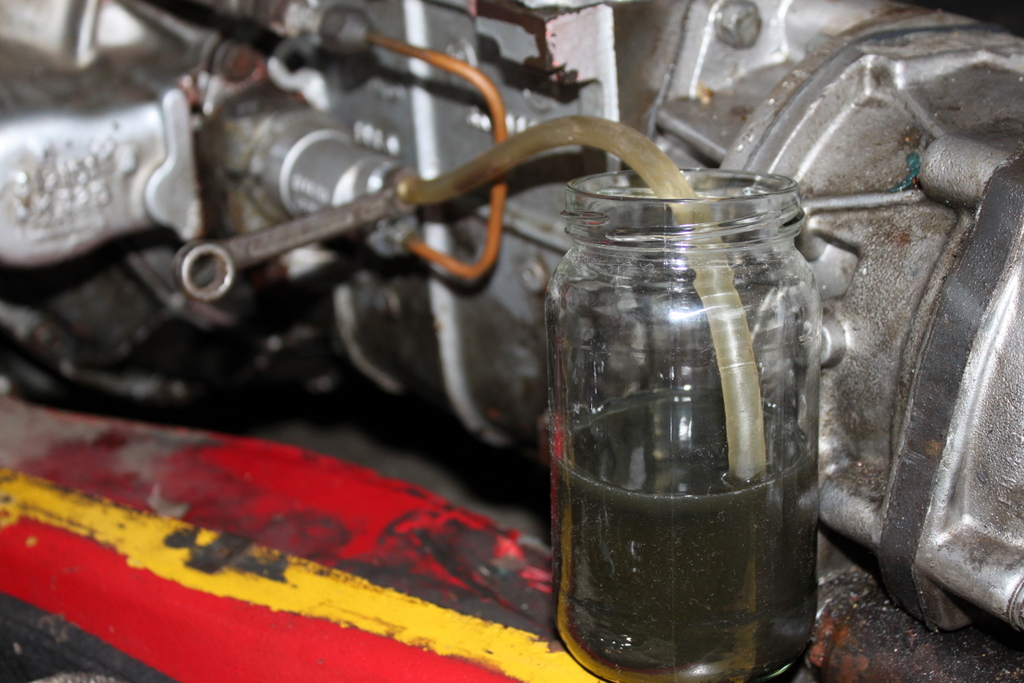
I connected the hydraulic pipe and setup a jar with a tube from the bleed screw going in to it along with a ring spanner to operate the bleed screw. While keeping the master cylinder reservoir topped up I kept pumping the clutch until all the old clutch fluid out. You can see the state of it in the photo below – not good! Keep going until you see clean fluid with no air coming out and tighten the bleed screw. As long as the end of the tube is submerged in the old fluid you should avoid air getting back in to the system.
Once that is done you’re about good to go! Refit the cabling for the overdrive switch, solenoid and reverse light switch. Refit the gear stick. Remove the jack from under the engine and the card that was used between the cooling fan and radiator. Bolt the radiator and exhaust down pipe back up. Lower the car and give it a test before putting all the trim back in! You’ll notice what a difference all the sound deadening and trim has! If everything feels in order refit all the trim. Here’s the first bit – fitting the gearbox cover, in my case it’s the original fibreglass one and is looking pretty worn out now. That’ll want replacing at some point, the joys of owning a classic!
Fit the carpet, center console, knee pads and prop shaft tunnel cover. It’s taken a few hours in total and I would recommend replacing a clutch without a hangover! All this has some reward – the clutch feels nice and crisp now. The crap Thor impressions can stop!!!!…
.JPG)
Next major thing for my car is a replacement gearbox. I’ve rebuilt this one a few times but still have no joy on 2nd gear and guess what – they don’t seem to make 2nd gear anymore! Watch this space 😉
3 thoughts on “Spitfire 1500 Clutch Replacement”
This is my second visit to your site and just wanted to thanks for taking the time to share your experiences. Just bought my son a 1976 1500 Spit for his 21st and he’s rebuilding while he’s in lockdown. TY
Fraser & JAmes
Thanks, Fraser. Excellent birthday present! That’s the same age I was when I got mine. I hope he has as many years of fun with it as I have (16 years and counting!).
I just hope that most of this also applies to a herald 1961, if it does you have given me a fantastic start help.